JMT 2019 Day 2: My Hiking Superpower

September 5, 2019
Upper Lyell Base Camp to Thousand Island Lake (8.6 mi)

IMG_4381

There is a break in the clouds and warm sunshine to bask in when I reach the outlet of Thousand Island Lake around 3 pm. I filter some water and and relax on the lake shore contemplating whether to camp here or continue on. I have been leapfrogging with Larry and Ellen all day, and they have been trying to convince me to hike a bit further than planned and camp at Garnet Lake instead of Thousand Island Lake, which Larry pish-poshed as “Thousand Camper Lake.” It is still early, but storm clouds have been threatening since I crested Donohue Pass at 9:25 am.

IMG_4369

View from Donohue Pass

It hadn’t rained yet despite the ominous dark clouds and I had bragged to Larry and Ellen over lunch about my ability to make it not rain on backpacking trips. Larry exclaims, “You’re not supposed to talk about such things!” Ellen pipes up that she never filters or treats her water and she has never gotten giardia. Larry is aghast that we would so nonchalantly curse ourselves.

IMG_4375

Heading toward the dark, volcanic Ritter Range

When I finally decide I will stop hiking for the day and camp at Thousand Island Lake after all, the clouds close in and the temperature drops. I put my fleece back on.

Larry is not wrong, Thousand Island Lake is a super popular place to camp. The nice sandy campsites Jackie and I occupied two years earlier are already taken, and I walk further around the lake away from the other people and pick an exposed, rocky spot for the view as a light rain begins to fall. I retreat into my tent planning to nap, and of course the sun comes out and turns my tent into a sauna. Banner Peak is shrouded in a cloud, but as the clouds blow across the lake towards me, the sun appears to burn them off. Make up your mind, clouds! I just want to nap! Then, it suddenly starts to rain in large droplets that pummel the ground with such intensity that they spray sand all over everything. It rains so hard that water bounces under the vestibule of my tent and I have to stuff my sleeping bag back into my drybag/packliner to keep it from getting wet. Rain is followed by a bit of hail.

It cools down and I am lying comfortably in my tent when there is a commotion outside as what sounds like a group of 10 weekend backpackers from the city contemplate setting up camp right behind me. There is not enough room for all of their tents, thankfully, and they move on. And so, it turns out to be a good decision to camp at Thousand Island Lake instead of hiking through intense downpour and hail to Garnet Lake.

IMG_4383

Cons of Camping at Thousand Island Lake:
This is the hardest place on the JMT to find a good place to poop. There probably are a thousand campers at Thousand Island Lake every summer. It’s part of a beautiful backpacking loop from the Mammoth Lakes area. Behind every tree on the slope north of the lake near the campsites is some sign that a cathole has recently been dug. Or worse. Thousand Island Lake seems to be a place where a lot of beginner backpackers camp and I saw travesties like a bunch of rock piled on top of naked poop and toilet paper. Thousand Island Lake really needs a toilet because it is so popular. Some Silicon Valley tech billionaire should endow a pit toilet, like the public restroom in Bryant Park in NYC. (Bay Area friends, write your friends.)

Pros of Camping at Thousand Island Lake:
The view. Memorialized and made famous by Ansel Adams. You can only to fully enjoy the view and its infinite changes at sunset and sunrise if you camp here.

IMG_4388

6:32 AM

IMG_4391

6:37 AM


Video: How to JMT | How to Pack a Backpack

As COVID-19 skill building, I made a YouTube video! In the first of a series of videos I imagined while hiking the JMT, I present “How to JMT: Pack a Backpack”:

Future topics may include how to:

  • dig a cathole
  • prevent blisters
  • use your pack to level an uneven sleeping spot

You can read more about the gear I used on the JMT and my gear philosophy (totally not fussed) at this previous blog post.


JMT 2019 T minus 1: Lone Pine to Tuolumne Meadows

September 3, 2019

IMG_4322

I catch the 6:15 am ESTA bus from the Lone Pine MacDonald’s, which is full of backpackers repacking their packs at 6 am. I have left my car in the overflow parking of the Historic Dow Motel, which provides long-term parking to its guests. (Another place you can park while you hike for a small fee is the Museum of Western Film History.) I chat with my seatmate who has just completed the entire JMT in ten 25-30 mile days, waking up every morning at 4:30am. He says it was a sufferfest and he wishes he had gone slower so he could remember more parts of it. Most of the other folks on the bus have just finished the JMT or other hikes in the Sierra and are heading north to Reno to fly out to wherever they are from, including England and Australia. I am dropped off with one other hiker at Tioga Gas Mart at the turn off for Tioga Pass to catch the YARTS bus into Yosemite. (This is not an official ESTA stop on their website but when you make a phone reservation — which is advisable because the bus I was on was full — and tell them you are transferring to YARTS, ESTA will stop at the YARTS stop.) I feel nostalgic as I walk into the gas mart to use the restrooms. Last time I was here, I was miserable at the prospect of not being able to finish the trail.

The YARTS bus drops me off at Tuolumne Meadows just after 10 am. The Tuolumne Meadows store and campground feel like familiar ground. I go and stake out a campsite in the backpacker campground, setting up my tent and stashing my food in a bear box. Pack lightened, I hike over to the wilderness center to pick up my permit.

img_4324

They give you a wag bag for Mt. Whitney when you pick up your JMT permit. I dutifully carried it to Red’s Meadow and dropped it in the hiker box with all the others. Then I picked one up from the hiker buckets at Mt. Williamson Motel in Independence. Should have just left the first one at Tuolumne Meadows.

I make a loop around Tuolumne Meadows, covering the two miles we skipped last time to hitchhike to the post office before it closed. I visit Parsons Lodge and listen in on some ranger talks, learning about habitat restoration in the delicate alpine meadows and the importance of not going off trail. I take a taste of Soda Springs and walk towards Lembert Dome. An ominous cloud builds up over the mountains to the south, and I abort the idea of climbing Lembert Dome to go hide in my tent.

IMG_4335

Yay! Back on the trail!

img_4340

Lembert Dome

It thunders and hails but doesn’t rain much. When I set up my tent in the morning, mine is one of two or three tents set up in the backpackers’ campground. When I emerge in the afternoon, it is full, with excited hikers happily welcoming late comers to share campsites. In the evening, folks stroll around the backpackers’ campground, beer in hand, in a home and garden tour of the most popular backpacking tents on the market. A young European couple is in some kind of cuben fiber (oh, I’m sorry, DCF) spaceship that we all ooh and aw over.

There is a campfire talk in the evening about glaciers and the Q&A inevitably turns political. It’s a pleasant surprise and comforting that the NPS is still allowed to talk about climate change as a fact, though of course the ranger is mostly preaching to the choir. It ends with a super awkward rap with a refrain that she makes us sing along: “ice, ice, baby…. melting.”

*** ***

Looking back at my journal to write these posts, I noted between the entries for September 2 and September 3 simply:

Sunrise 6:23 AM
Sunset 7:16 PM

This was from the weather app on my phone so I would have an an idea of how long I had each day to hike. I knew I would lose cell reception after Lee Vining. Cell reception on the JMT is very limited. Tuolumne Meadows has Verizon, but at the time I was on an AT&T based carrier. When I left for the trail, friends said things like “Looking forward to reading your blog posts from the trail!” and I didn’t have the heart to tell them I wouldn’t actually be able to blog from the trail. I will randomly find great reception at a campsite near Trinity Lakes and post a couple photos to Instagram, and when I get to VVR, I will walk out onto the dam to text my emergency contact that I am on schedule. There is cell reception at the top of Kearsarge Pass which I will use to call and leave a message with Mt. Williamson Motel that I am on my way and that I want to take a zero and stay an additional night. That’s it. I didn’t carry any kind of satellite emergency communication device, but I met a lot of people who did. If I saw someone with a Garmin InReach hanging from their backpack shoulder strap, I would sometimes ask if they had the weather forecast. Not being connected is one of the best things about backpacking and going deep into the wilderness. I suspect it’s why I’m only able journal consistently out there.

Glacier National Park

June 27-30, 2019

When my mom was my age, she and my dad sold our house, packed up everything we owned and drove across the country from Georgia to California with two young kids in the car (me 8, my brother 2) so that my dad could start a company in Taiwan. That is way more hard core than me quitting the legal profession at 35 to pursue outdoor adventures. I have no responsibilities. I can hardly imagine. Compared to my mom, I feel like I have not gotten very far in life at 37.

And my parents could not have foreseen that that trip would have germinated my romantic notions of The West and eventually lead me to live this definitely not achievement-oriented / make-your-Asian-parents-proud vagabond life

This was what I thought about during my drive from Big Sky to Cut Bank Campground Thursday evening after work for the beginning of my solo adventure in Glacier National Park. The skies north of Butte and Helena were immense and the clouds enormous. During my six hours drive to Cut Bank, I drove through two storms. The sky would darken as if it were dusk, and then I would emerge into day again. And then it would become night. And then I was driving with headlights and wipers and sunglasses on as the setting sun emerged again below the storm clouds at 9pm.

IMG-3020

Cut Bank, a quiet and secluded area of the park, when I arrived at dusk

It’s not an adventure if eveything goes as planned. I had planned to camp for two nights at Many Glacier, but I got greedy and I am in the backcountry permit office in Many Glacier discussing backpacking options with the ranger when Many Glacier Campground fills up in the morning. So, I grab the last backcountry camping permit for Gunsight Lake for the following night, drive to Rising Sun Campground to stake out a spot for that night and then drive back to Many Glacier for a day hike.

I can’t decide whether to hike to Grinnell Glacier viewpoint or Iceberg Lake and let the parking situation dictate my decision. I get the last parking spot in front of Iceberg-Ptarmigan Trailhead, so Iceberg Lake it is! (“Ptarmigan” always makes me think of Chicken, Alaska which supposedly got its name because its early residents didn’t know how to spell “Ptarmigan.”) The trail to Iceberg Lake is perched on one side of a u-shaped glacial valley with beautiful views almost immediately of sharp fin-like glacially carved peaks. The trail was lined with Indian paintbrush and fluffy white bear grass flowers. I stop with all the other tourists to observe a mama bear and her cub playing a safe distance up a small drainage above the trail. I really enjoyed the vibrant turquoise green and brick red of the mudstone on the trail where there was water running over it. 

I stop for a snack break and water above Ptarmigan Falls, which is very much like Vernal Falls at the beginning of the JMT, but there doesn’t seem to be a good place to take a photo of the falls without falling. The second half of the trail to Iceberg Lake recalls The Great Valley from the Land Before Time, much like Yosemite Valley from Half Dome or all of Zion NP. Iceberg Lake is the tarn under the cirque at the end of the valley that forms part of the Continental Divide. The lake is beautiful when you first see it, but as I approached the shore in search of a good lunch spot, there were kids throwing rocks in the lake, rowdy folks shrieking from each other’s polar plunges and unsteady tourists trying to walk out onto the “glaciers” in the lake. A regular circus. High above the commotion, a herd of sheep impressively traversed the cirque to get to little patches of green grass, so I stayed and watched a while. 

IMG-3061.JPG

Iceberg Lake

It was still early so on the way back to the trailhead, I decided to take the side trail to Ptarmigan Lake. Not a few minutes from where Ptarmigan Trail forks off, I found half a dead baby sheep on the trail, followed by some bear scat a bit further on. Unlike the trail to Iceberg Lake with its expansive views, this trail was in heavily shaded woods. I started “Hey Bear!”-ing and soon ran into two girls who told me they turned around because they were spooked. I kept going anyway, because, whatever, I’m a card carrying Montanan now and can’t be scared of no bears. 

I cross paths with an older couple coming back from Ptarmigan Lake who inform me that I’ll have it all to myself, there is no one on the trail behind them. This is excellent news in light of all the bear signs, but once they are out of earshot, I say out loud to myself, “I guess I can pee wherever I want!” Iceberg Lake trail had the problem of being too exposed and well-trafficked and there had been a line at the pit toilet. 

Following a moderate climb, the views opened up on Ptarmigan Pass. This cirque, at the end of another glacial valley that forms a Y with the one ending at Iceberg Lake, is much less dramatic and photogenic than the one at Iceberg Lake, but I can see the faint line of the trail that switchbacks up to Ptarmigan Tunnel, which is really cool. Why is there a tunnel? Why doesn’t the trail just lead over a normal pass? How did they build the tunnel? What is on the other side? Piques the imagination. It made me think of the “Tower of Babylon” short story by Ted Chiang. Ptarmigan Pass does not open until mid-July.

IMG-3080

Ptarmigan Pass in the distance

I aspired to get up early for my overnight backpacking trip, but only managed to wake up at 8am. By the time I get onto Gunsight Pass Trail (part of the CDT), it is almost 11. The trail dips off Going to the Sun Road into the lush, heavily vegetated valley floor. The trail is narrow and lined with bear grass in full bloom. When I stop for water where the trail first meets the river flowing over rocks in swirly waterfalls, a deer appears and doesn’t seem bothered by my presence. I stop for lunch where the trail follows a meandering stream at the bottom of the valley, and a moose is also lunch-ing nearby in the marsh on aquatic plants. 

IMG-3125.JPG

Bear grass lined trail to Gunsight Lake

I arrive at Gunsight Lake campsite around 2pm and while it looks idyllic, I seem to collect a cloud of mosquitos as I hang my food and pick a campsite. I have a headnet, but the mosquitos attack my hands as I stake out my tent. So I keep moving and after I set up my tent I head off to try to hike to Gunsight Pass and see what’s on the other side. 

The trail climbs up over Gunsight Lake on switchbacks with great views of the splindly waterfalls on the opposite side of the valley that cascade into the lake. I climb over and around a small snowfield, then the trail cuts into the rock walls of the steep mountain side. I am thwarted from making it over the pass by a snowfield about half a mile from the pass. It’s not too wide, but would be a long drop down into Gunsight Lake. With no means of self-arrest, I decide not to risk it. I attempt to climb around the snowfield off trail, but get scared, especially after thinking about how I have to downclimb anything I climb up, turn around and head back to camp. 

IMG-3175.JPG

Gunsight Lake and Gunsight Pass Trail

After getting around the small snowfield I climbed over before, I see a hoary mountain goat maybe 100 feet ahead of me on the trail. It starts walking toward me so I pull out my phone and start taking photos. It starts getting really close, so I turn my phone to video and back up against the wall. I don’t want to be butted off the trail! The goat seems to check me out, probably asking for food, and determining I’m not going to feed it and am not a threat, kindly climbs up off the trail and lets me pass. I was very jealous of the ease in its climbing ability. If I was a goat, I would have made it to Gunsight Pass!

IMG-3153.JPG

Live to hike another day or YOLO?

My final day in Glacier was a straightforward hike out the way I came, a drive across the Sun road, with no stops because there was no parking anywhere, ending up at Polebridge Mercantile, where I bought and ate three pastries and hung out until they opened up the showers at 4pm. 

IMG-3203

Glacier NP definitely reminded me of Alaska, even down to Polebridge Merchantile. 

Backpacking in Denali

My summer season job with MICA Guides wrapped up September 10 which gave me just enough time to do an overnight backpacking trip in Denali National Park before the park service stopped running their buses on September 13.  My plan was to rent a car from Anchorage, drive up to Denali on September 11, pick up a permit and camp at Riley Creek Campground near the park entrance. Then I would take a Camper Bus into the park on September 12, camp out in the backcountry, and hike out and catch a bus back to the park entrance on September 13… the last day buses were running, so no being over ambitious and missing the bus!

A few unique things about backpacking in Denali National Park:

  • Private vehicles can only drive the first 15 miles of the 92 mile long Denali Park Road, the only road in the park.
  • Park busses only run from late-May to early-September. (Basically, when snow is not expected.)
  • Backcountry permits are only issued in person at the Visitors Center from 8 AM the day before the start of your trip, so you can’t really make a detailed hiking plan before you get there and you will want to get to the park as early as possible the day before your trip to maximize your permit choices.
  • There are no established trails, your permit is for a Unit or Units that you have a certain amount of time to move through. Based on the quick search I did, there isn’t much information about suggested backpacking routes in Denali NP on the Internet besides climbing Mt. Eielson. But I think that’s the way it’s supposed to be — a true wilderness experience!
  • From the whiteboard behind the permit desk at the Visitors Center, it looked like for some Units the maximum number of people who can camp per night is 4 people, so don’t plan to backpack in a large group.  
  • No trails means assuming you will be hiking at a speed of no more than 1 mile an hour. You don’t know what the vegetation will be like, if the drainages will be swampy, what stream crossings will look like, if a scree slope will be traversable.

In summary, it’s an intimidating mix of needing to plan in advance and then not being able to really plan much in advance. Luckily, I had learned quite a bit about hiking in Alaska — following moose trails, alder bashing, finding campsites, bear awareness — over the course of the summer and felt like I was prepared with realistic expectations. Here’s a good read if you are looking for more information about backpacking in Denali.

The drive to Denali National Park

It had started to get cold and rainy in at the end of August, such that I had started to long for being indoors and having insulation (I lived in a tent all summer), but from Labor Day weekend Alaska was enjoying an Indian summer which brought us back to the warm sunny weather of early July and camping was once again quite pleasant. Parks Highway offered impressive views of Denali (The Mountain) on my drive up from Anchorage, but I didn’t stop to take any photos because I was trying to get to the park in time to pick up a permit. (The Internet said that permit pick up was until 3:30 pm, luckily for me the desk was actually open until 5 pm.) The scale of the scenery on Parks Highway was much bigger than Glenn Highway where I’d spent the summer. The mountains were striped rust red tundra and spruce green with the gold of aspen and alder lower down, their black rocky peaks dramatic against a bright blue sky. It was a bit confusing when I got to Denali National Park. I got a camper bus ticket at the Wilderness Access Center, then had to go to the Visitor’s Center to get my backcountry permit and then Riley Creek Mercantile to get a walk-in tent site. I was glad I had a rental car to run all these administrative errands; I had considered taking the train.

Picking up my permit

The process of getting a backcountry permit worked like this. There is a whiteboard listing Unit availability above the permit desk. You get a form to fill out from the permit desk and the ranger sends you to flip through binders that describe the different Units. I had done a bit of poking around on the park website Unit map so I had a few Units written down as candidates for an easy overnight backpack. Unit 12 Sunrise and Sunset Glaciers on my list was available, so I snapped the last spot up. Of course, after hiking on a glacier almost every day for 3 and a half months, the thing I wanted to do most in Alaska was see more glaciers! Then I watched the required leave-no-trace, stream crossing, bear awareness videos, purchased a USGS quad map of my Unit to study and borrowed a bear canister.

Backpacking in Denali

The next morning at about 7 am, I got on the earliest camper bus for the 4 hour ride to Eielson Visitor Center to begin my hike. We saw a couple of moose and a mama bear and two cubs from the bus. The bus driver would stop to allow everyone to capture the wildlife with their gigantic telephoto lenses. It was cloudy, overcast and windy. When I arrived at Eielson Visitor Center, Denali was hidden behind a shroud of clouds and I nixed the possibility of climbing Mt. Eielson as it was covered with a dusting of snow at the top.

Eielson weather forecast.JPG

Perfect conditions for hiking!

I hiked down to the end of the developed trail from the Eielson Visitor Center, and gingerly picked a crossing across Gorge Creek. First real stream crossing ever completed, my feet were soaked but my merino wool socks squished out quickly and stayed warm. I walked along the gravel bar of Thoroughfare River as recommended by the ranger who issued my permit, but got bored and decided to punch up into some tundra to see what I could see. After a short bash through some small trees and wading through shin deep shrubbery, I started to recognize the plant life I wanted to walk on. The red stuff, mostly blueberries, was short, firm and easy to walk on, so I let the vegetation direct my path. Greener vegetation indicated drainages and I learned to follow the moose paths across those parts to avoid ending up in boggy marsh.

Tarn

Beautiful tarn

I didn’t have much of a plan except to camp in the valley along Sunrise Creek, since that was the closest area I was allowed to camp. The problem with Unit 12 is that most of it is visible from the Denali Park Road and you have to camp out of sight of the road. That also makes it a not so wilderness-y experience, but easy access to the road and Eielson Visitor Center made it a fool-proof, if a bit boring choice, for my solo end-of-season backpack.

I came to a small creek before Sunrise Creek where I found I had to backtrack and lose some elevation. Being stubborn I tried to climb higher across a scree slope but I kept falling so I ended up scree skiing down into the gorge and rock hopping across to Sunrise Creek.

Then I tried to walk as far as I could up Sunrise Creek. I was hiking up the north bank when the gravel bar virtually disappeared. Making the silly decision to avoid getting my feet wet, I was attempting to boulder across a short section of the gorge wall when a cinder block sized rock I was hanging on to detached from the wall and fell into my lap. I was lucky to only suffer a bruised thigh. So after a cold crossing, I gave up on following the river and climbed up on the south bank of Sunrise Creek.

It was only 4:30 PM, but suddenly, I was completely exhausted. I had only hiked about 6 miles but I think the fatigue from an entire summer of physical work and little time off caught up with me. My plan to hike up to the bottom of Sunrise Glacier was abandoned for the more urgent need to find a place to lie down. I set up my little tent on the bench below Bald Peak, and sheltered from the katabatic winds, took a nap for 1.5 hours. Somewhat recovered, I made dinner of Idahoan mashed potatoes and a foil packet of lemon pepper tuna and lay back down again reading Into the Wild (Chris McCandless’ ill-fated Alaska adventure having happened not far away) in my tent until the valley came ablaze at sunset around 8:20 PM. I was a less exciting expedition than I had hoped, but I guess the luxury of solo hiking is having the freedom to do things like pull in early to take a nap.

campsite

My campsite view of Sunrise Glacier

In the morning, I left my tent up to dry and set off to climb the saddle under Bald Peak and up a little knoll in front of it. The cloud cover from yesterday burned off over the course of the morning, revealing dramatic white peaks framing Sunset Glacier. As I got to the precipice, the peak of Denali poked up over the ridge behind Mt. Eielson. A pleasant surprise! I’d been hopeful but not at all certain I’d get a Denali view from there.

Sunset Glacier.JPG

Sunset Glacier

Me and Denali

Obligatory Denali selfie

I descended back to my camp, packed up and had an easy walk down the bench and back down to the gravel bar. I planned to simply follow the gravel bar along Thoroughfare River back to Eielson Visitor Center, but the stream crossings got intimidating and I ended up tussock hopping around a tarn and retracing part of my route across the blueberry fields from the previous day. There were still a lot of blueberries good to eat, but thankfully I didn’t see any bears! I arrived back at Eielson Visitor Center by 2:30 PM and first things first, took off my wet boots and socks and put on my Crocs. Yay, camp shoes! I put my name on the bus list and watched a video about climbing Denali before getting put on a bus for the 4 hour ride back to the park entrance.

Bald Mountain.JPG

Thoroughfare River

Denali

Denali with lenticular cloud

Post-hike

It was late evening by the time I got back to my car and I was feeling strangely not stoked about more camping and hiking adventures. I think I was realizing my body just wanted to recover from the summer. I sat in the parking lot feeling a bit defeated and found an AirBnb in Palmer and booked it for the next night. Too tired to make any other plans, I camped at Riley Creek Campground again. I had slept like a log on the tundra, but seemed to have trouble getting comfortable that night. When I got up in the morning to use the bathroom, I noticed that the tenugui I had hung on the corner of the picnic table at my campsite had frozen into a stiff origami shape. The plastic collapsible water bottle I had left on the picnic table was crunchy with ice crystallized across the inside. Ah, that’s why I had trouble sleeping. It was too cold to wait for hot water to boil and percolate my own coffee, so I quickly packed up my things and went to Morino Grill next to the Visitors Center to restore the feeling to my fingers with a cup of corporate-y Starbucks latte. My backpacking night had actually been very comfortable, and it had definitely not been close to freezing cold, even though it was at higher elevation. I had been super lucky with the timing of my trip! As my fingers regained feeling, I felt pretty good about my decision to spend my last two nights in Alaska indoors.

Epilogue: My AirBnb host turned out to be a super cool fiber and ceramics artist, I had the most comfortable stay, and the house was walking distance from two craft beer breweries (Arkose and Bleeding Heart)!


Not a Gnarly Adventure Story

I recently went to a Boldly Went outdoor adventure storytelling event in Portland. Since then, I’ve been thinking whether I have any exciting stories about my outdoor adventures to share in that type of format. The problem is I don’t have any stories with much “gnar factor.” I’m not very sendy. I like to be prepared. I do a lot of research. I’m conservative in my decision making, because either I’m the least experienced or I am alone.

It was only about a year and a half ago that I went on my first backpacking trip, but as I live this life of being an itinerant-worker-outdoor-adventurer, I think that I may already be forgetting how hard and scary things I now think are easy once were. And maybe I am less excited to report back to you about my trips because they just seem ordinary now. So before I forget, here are some things I used to be super intimidated by. Funny (and sad) to think that these sorts of things kept me from enjoying the wilderness earlier in my life.

1. Peeing and pooping in the woods

It turns out that, as long as there are not a lot of other people around (e.g. not trails in day hiking distance from Tokyo), peeing and pooping in the woods is very pleasant. It’s cleaner than most public restrooms, and the view is going to beat your bathroom at home. When I am hiking and need to pee, what I usually say to my hiking buddies to indicate I am stopping and wandering off trail a bit is “I’m going to find somewhere scenic to pee” and it’s true! Further resources and funny stories here.

alpine charmin

The best backcountry toilet paper I have had the pleasure to experience. I think it’s a lichen? I just call it “alpine Charmin”.

2. Finding a campsite in the backcountry

Before you actually do it, you read about it and have no idea what other people are talking about. You should camp on durable surfaces; you should camp on established camp sites; you shouldn’t camp on the top of a ridge (too windy); you shouldn’t camp at the bottom of a valley (cold air sinks); and on and on. In the end, campsites are like any other kind of real estate, each one has it’s pros and cons and it comes down to personal preference. Maybe you are willing to take a more exposed campsite for the great view; or maybe you have to pick a less flat spot that is more sheltered from the wind. After a while, you start getting an idea of what looks like a good campsite to you. It’s like learning to find street parking in a new city (which is actually much harder).

3. Hitchhiking

Sounds scary. But in my experience, if you are hitching near a place that is popular with hikers, and look like a hiker, it’s totally not a big deal and doesn’t feel sketchy at all. Most often, the people who pick you up are hikers or otherwise adventurers themselves. Keep good hitchhiking karma by picking up hitchhikers yourself.

hitching

Me hitching off the JMT

4. Not showering every day

When I was in law school, I remember telling my friend Erica I could never go camping because I have to wash my hair everyday. I’ve found that if physical activity is stimulating enough and I’m tired enough at night, going to sleep dirty and itchy scalp becomes a non-issue. It helps to adventure in cool places where you won’t sweat too much. If I do get sweaty it helps to jump into a cool lake or towel off with a bandanna. My hair does still start bothering me after 3-4 days so I like to bring a wooden comb on multi-day trips to help me manage the grossness. Ostensibly it helps distribute hair oils, but it’s really just a way to scratch my scalp that feels good.

laundry

I still prefer to be clean if possible!

See, if I can become outdoorsy, you can too!

Hiking the Hakuba Range (白馬連峰)

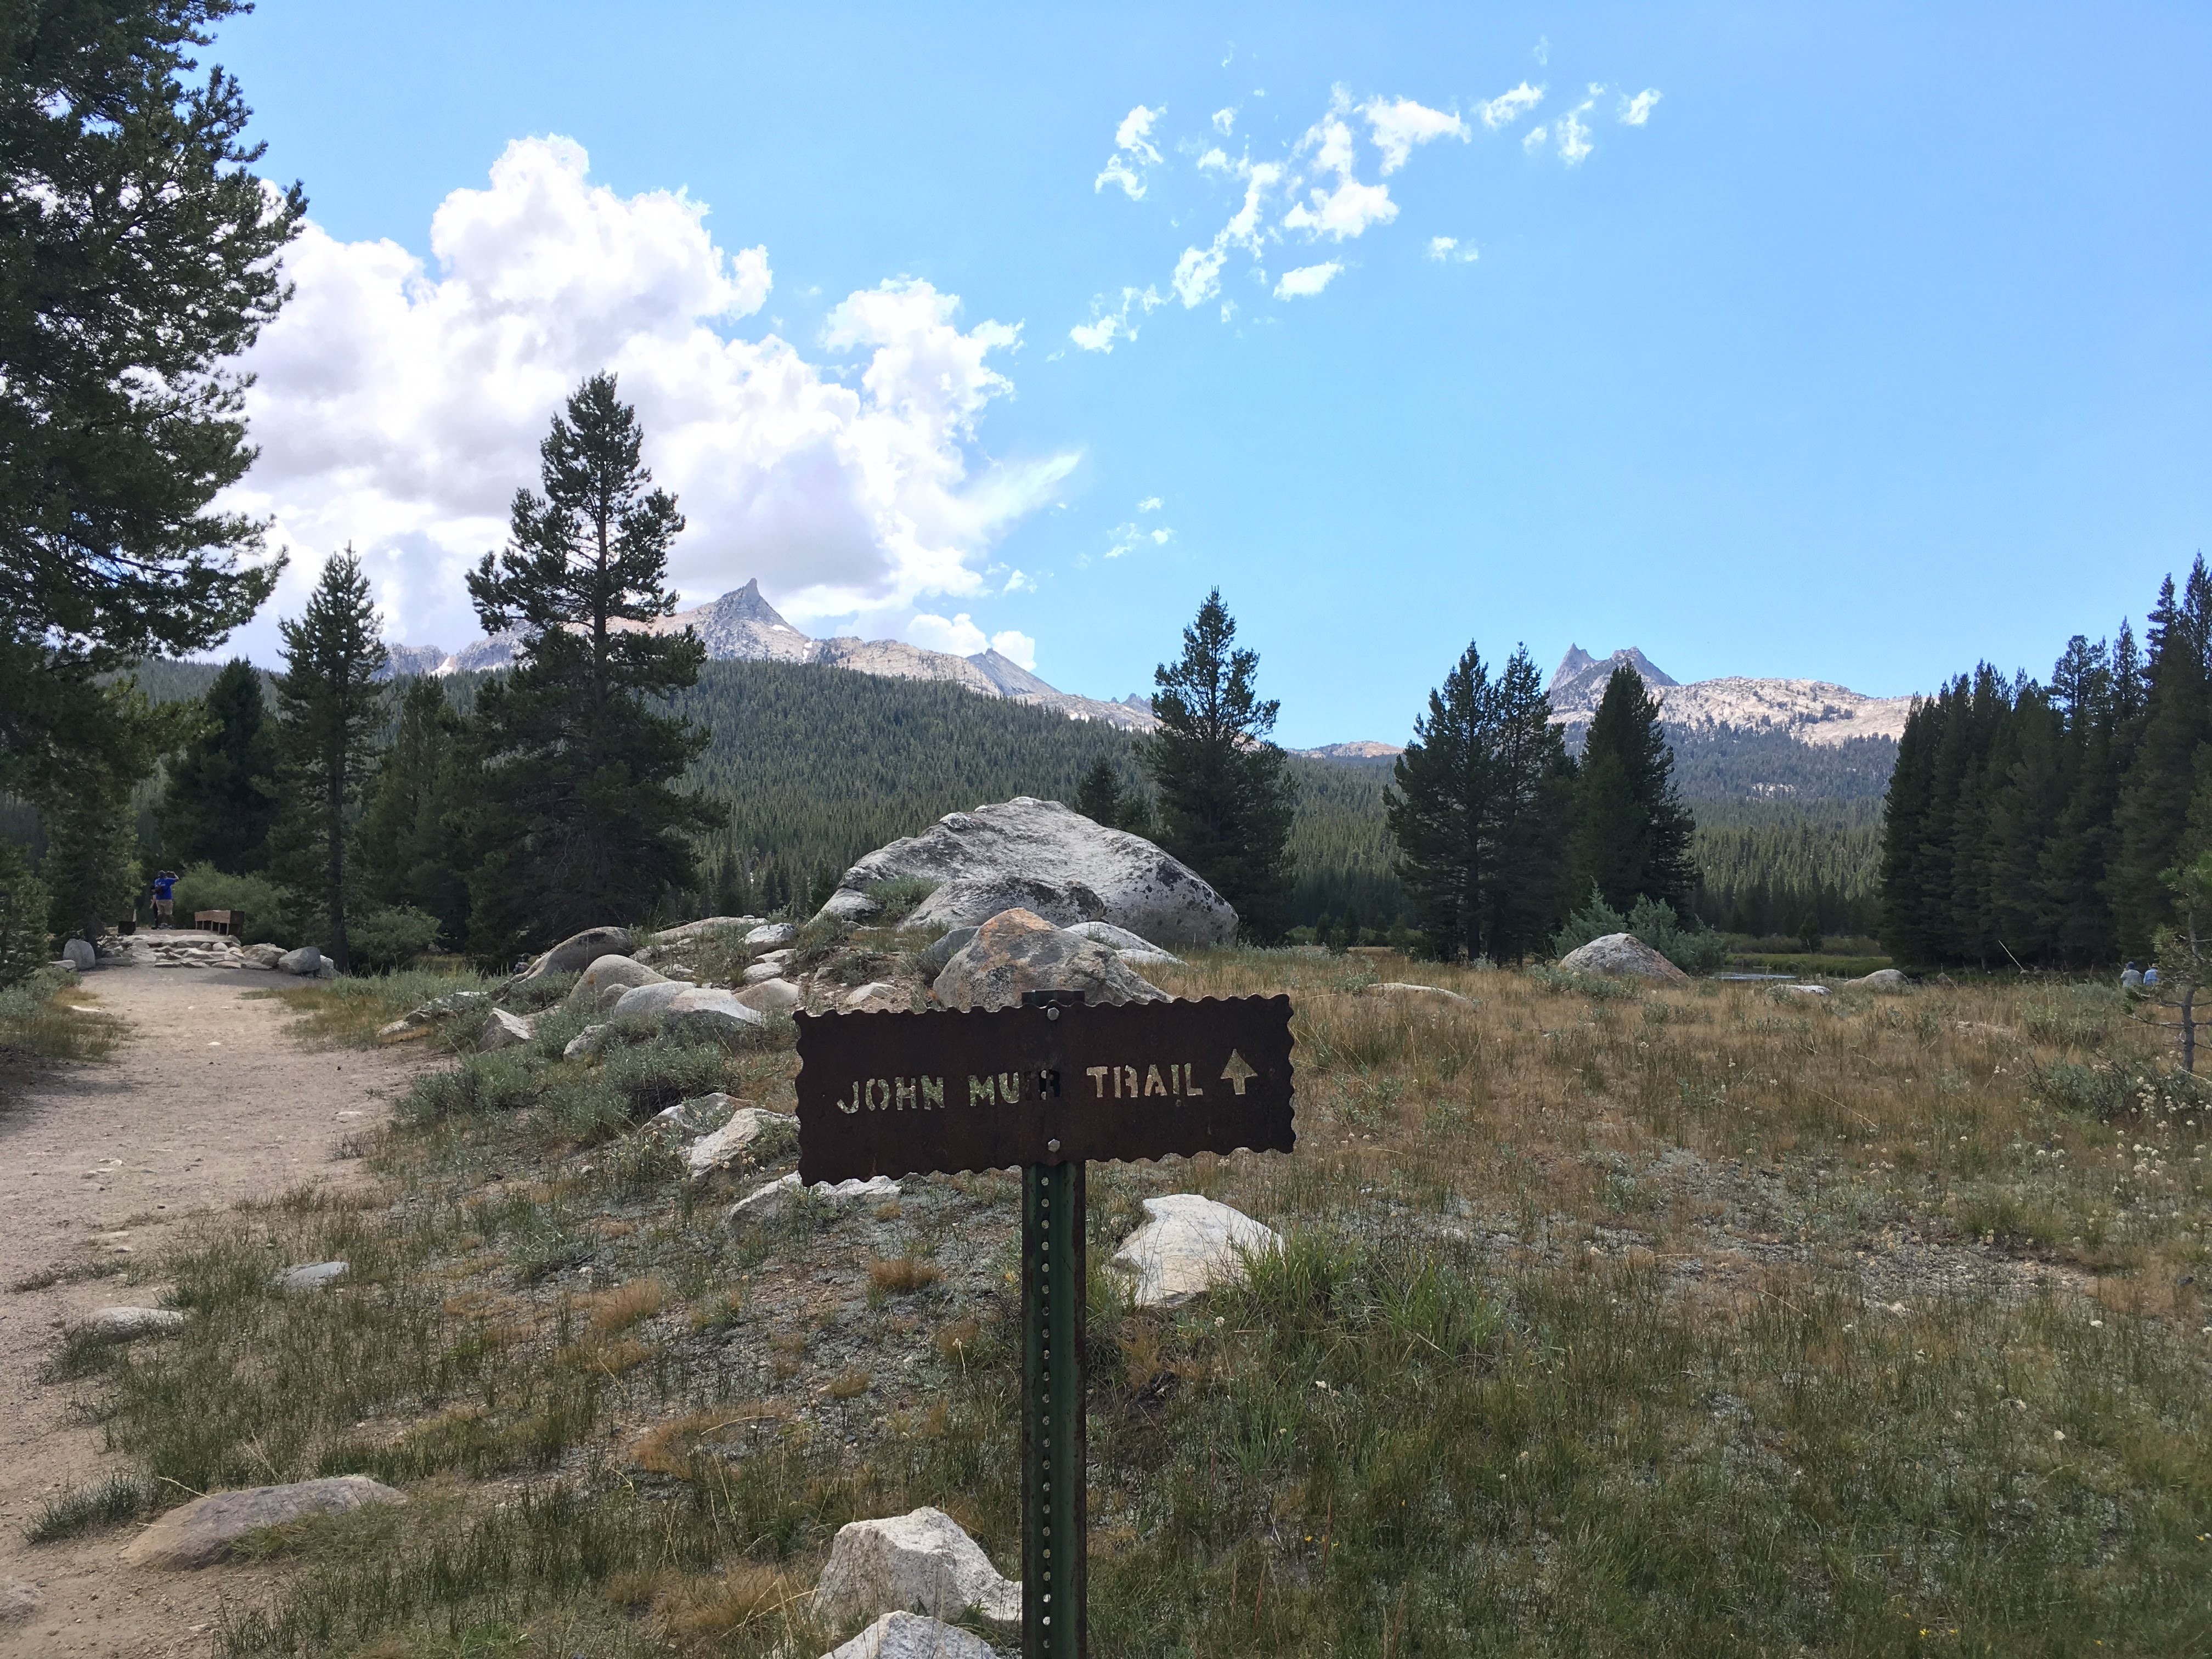
At the end of August, looking to escape the Tokyo summer heat, I took a highway bus from Shinjuku to Hakuba, the famous ski town in Nagano, for a three-day solo hike in the Hakuba Range.

Hakuba hike map

My 3-day hiking route and planned alternate course, in case of adverse weather.

Day 1: Wednesday, August 30

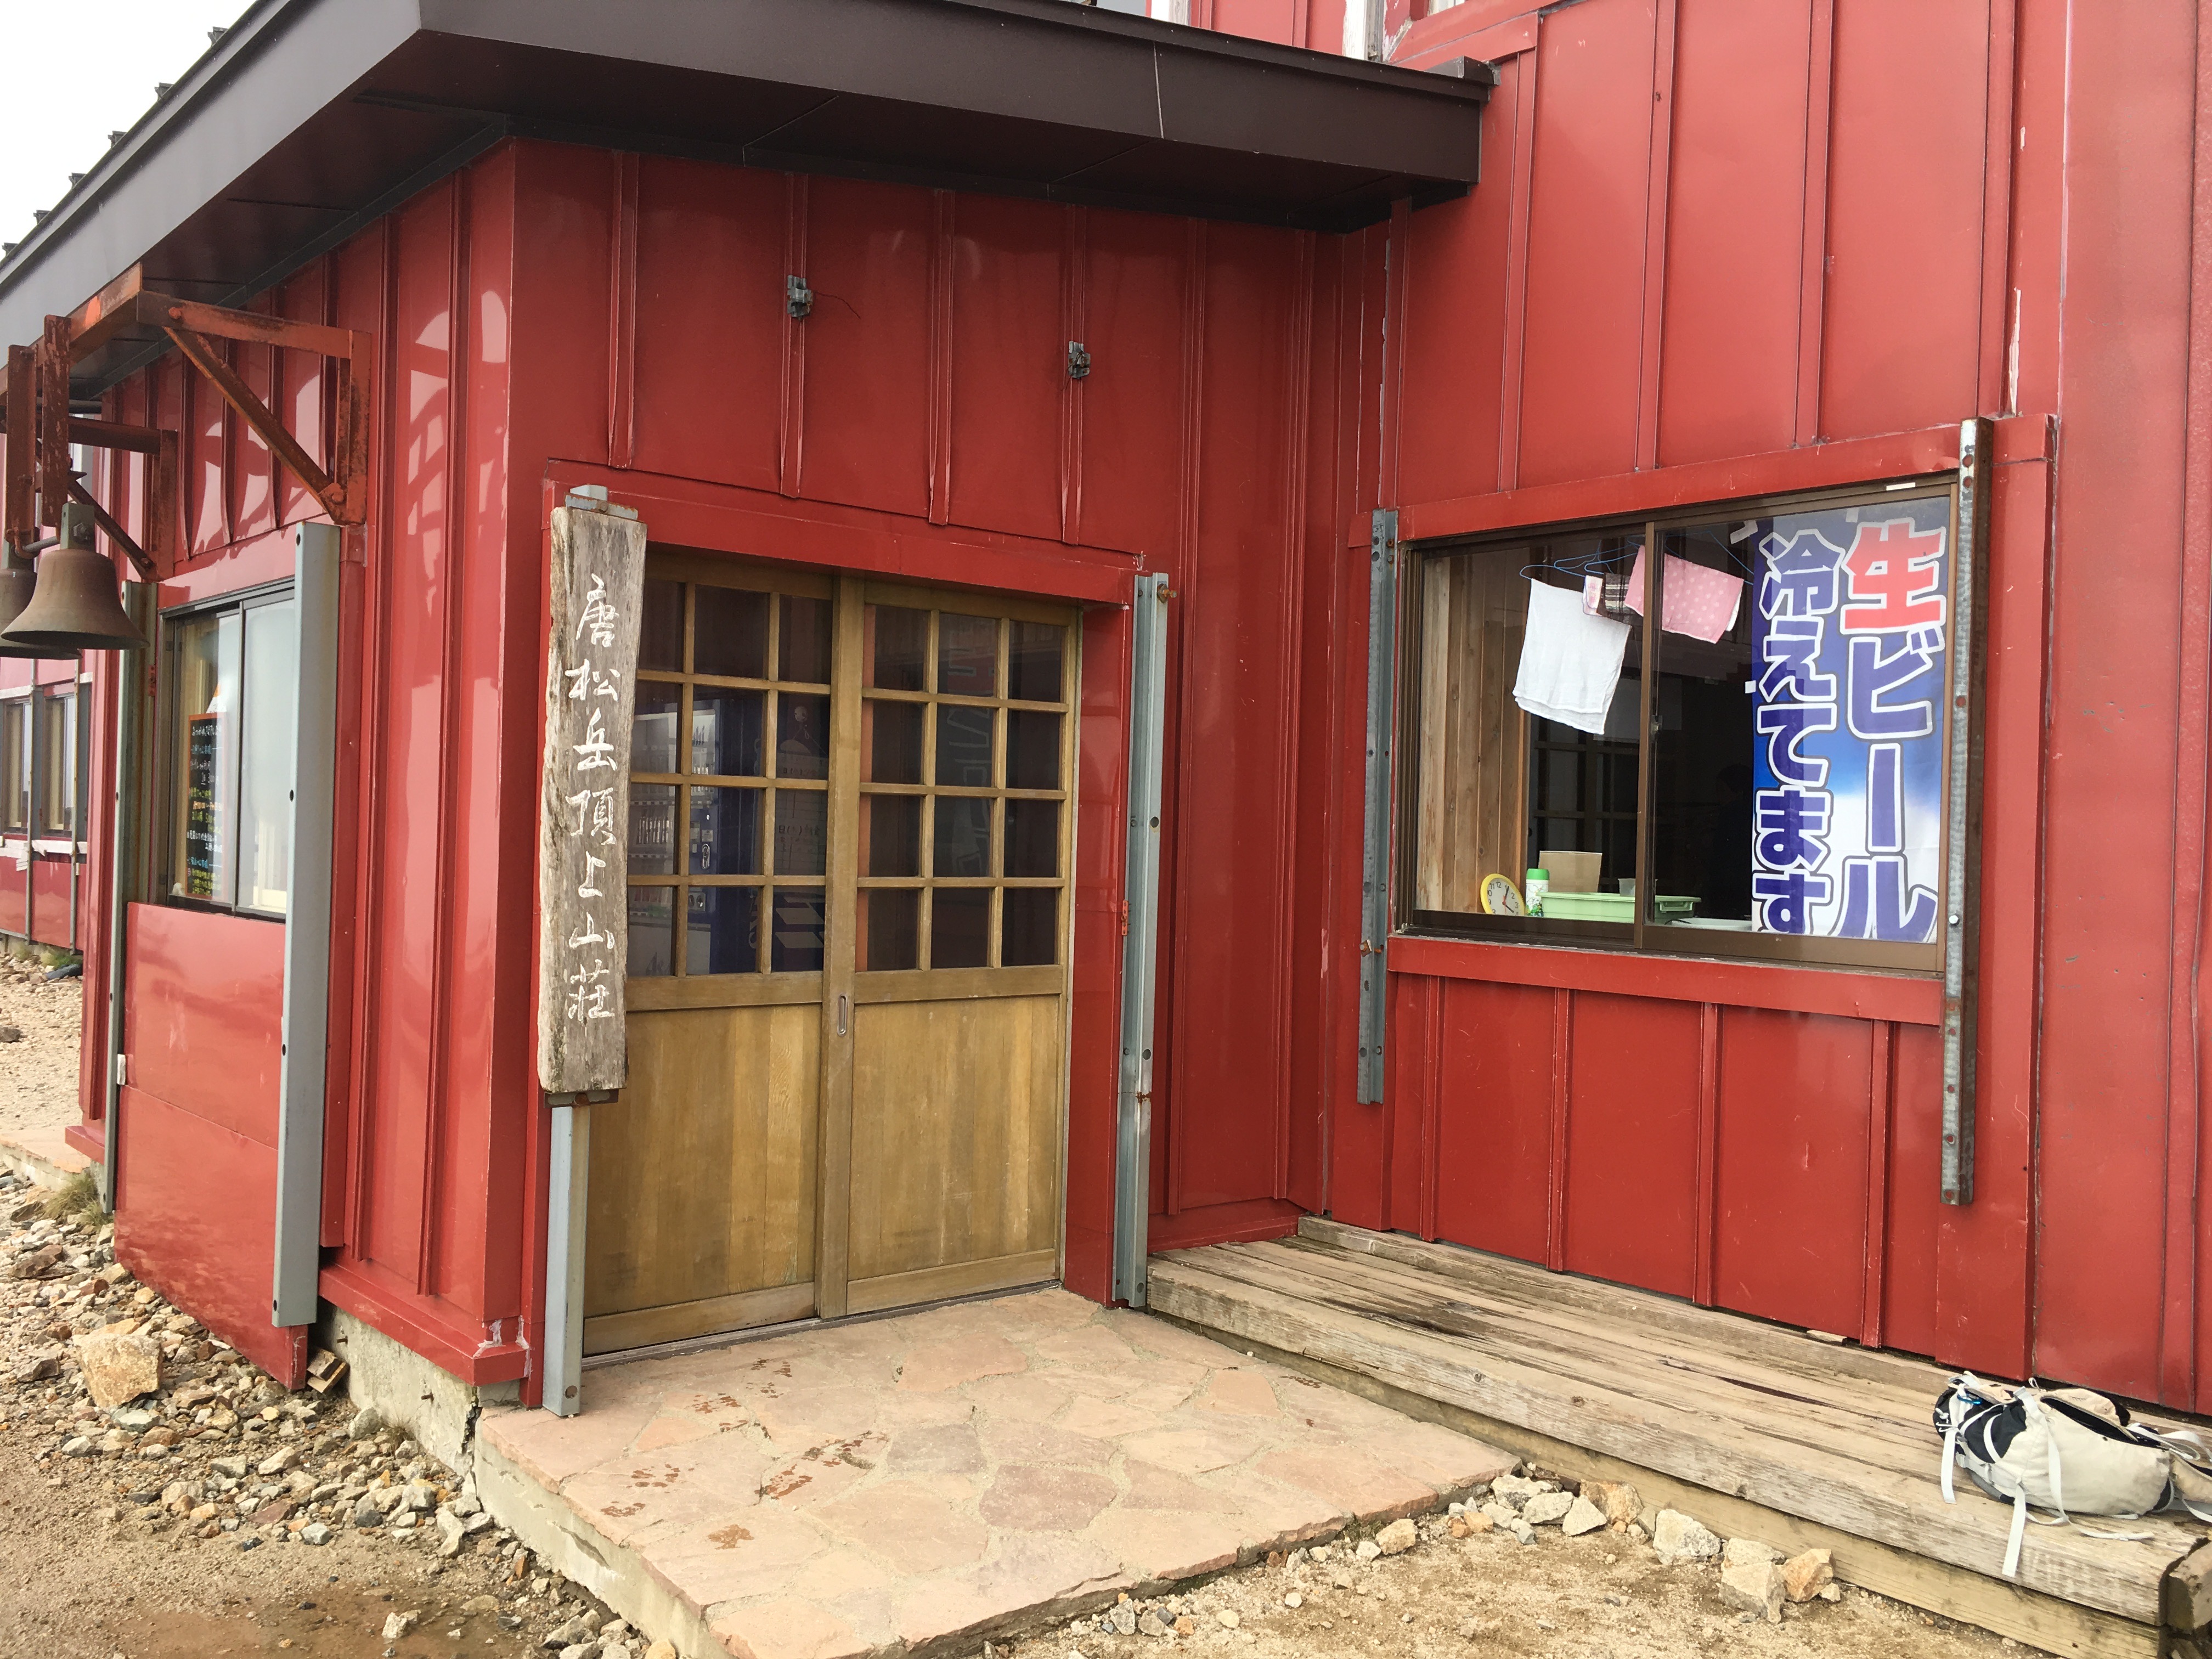
Happo Ike Hut (八方池山荘) –> Karamatsudake Hut (唐松岳頂上山荘) (4.56km)

The 6:35 AM highway bus from Shinjuku Bus Terminal direct to Hakuba Happo Bus Terminal arrived on time at around 11:45 AM. First things first, I went to the Montbell store on the second floor of the bus terminal building to purchase a fuel canister. Then, I got directions and a bus schedule for post-hike logistics from the information counter.

To reach the beginning of my hike, I took the Adam Gondola and two ski lifts up Happo One (pronounced “oh-nay”, meaning ridge) Ski Resort. At the top of Adam Gondola, I purchased a Nozawana oyaki for lunch and ate it on the next lift up. (“Oyaki” is a Nagano specialty buckwheat steamed bun.) The lifts were set really low, and I swung my feet in the long grass. Dairy cows relaxed on the verdant green ski slopes.

IMG_3747.jpg

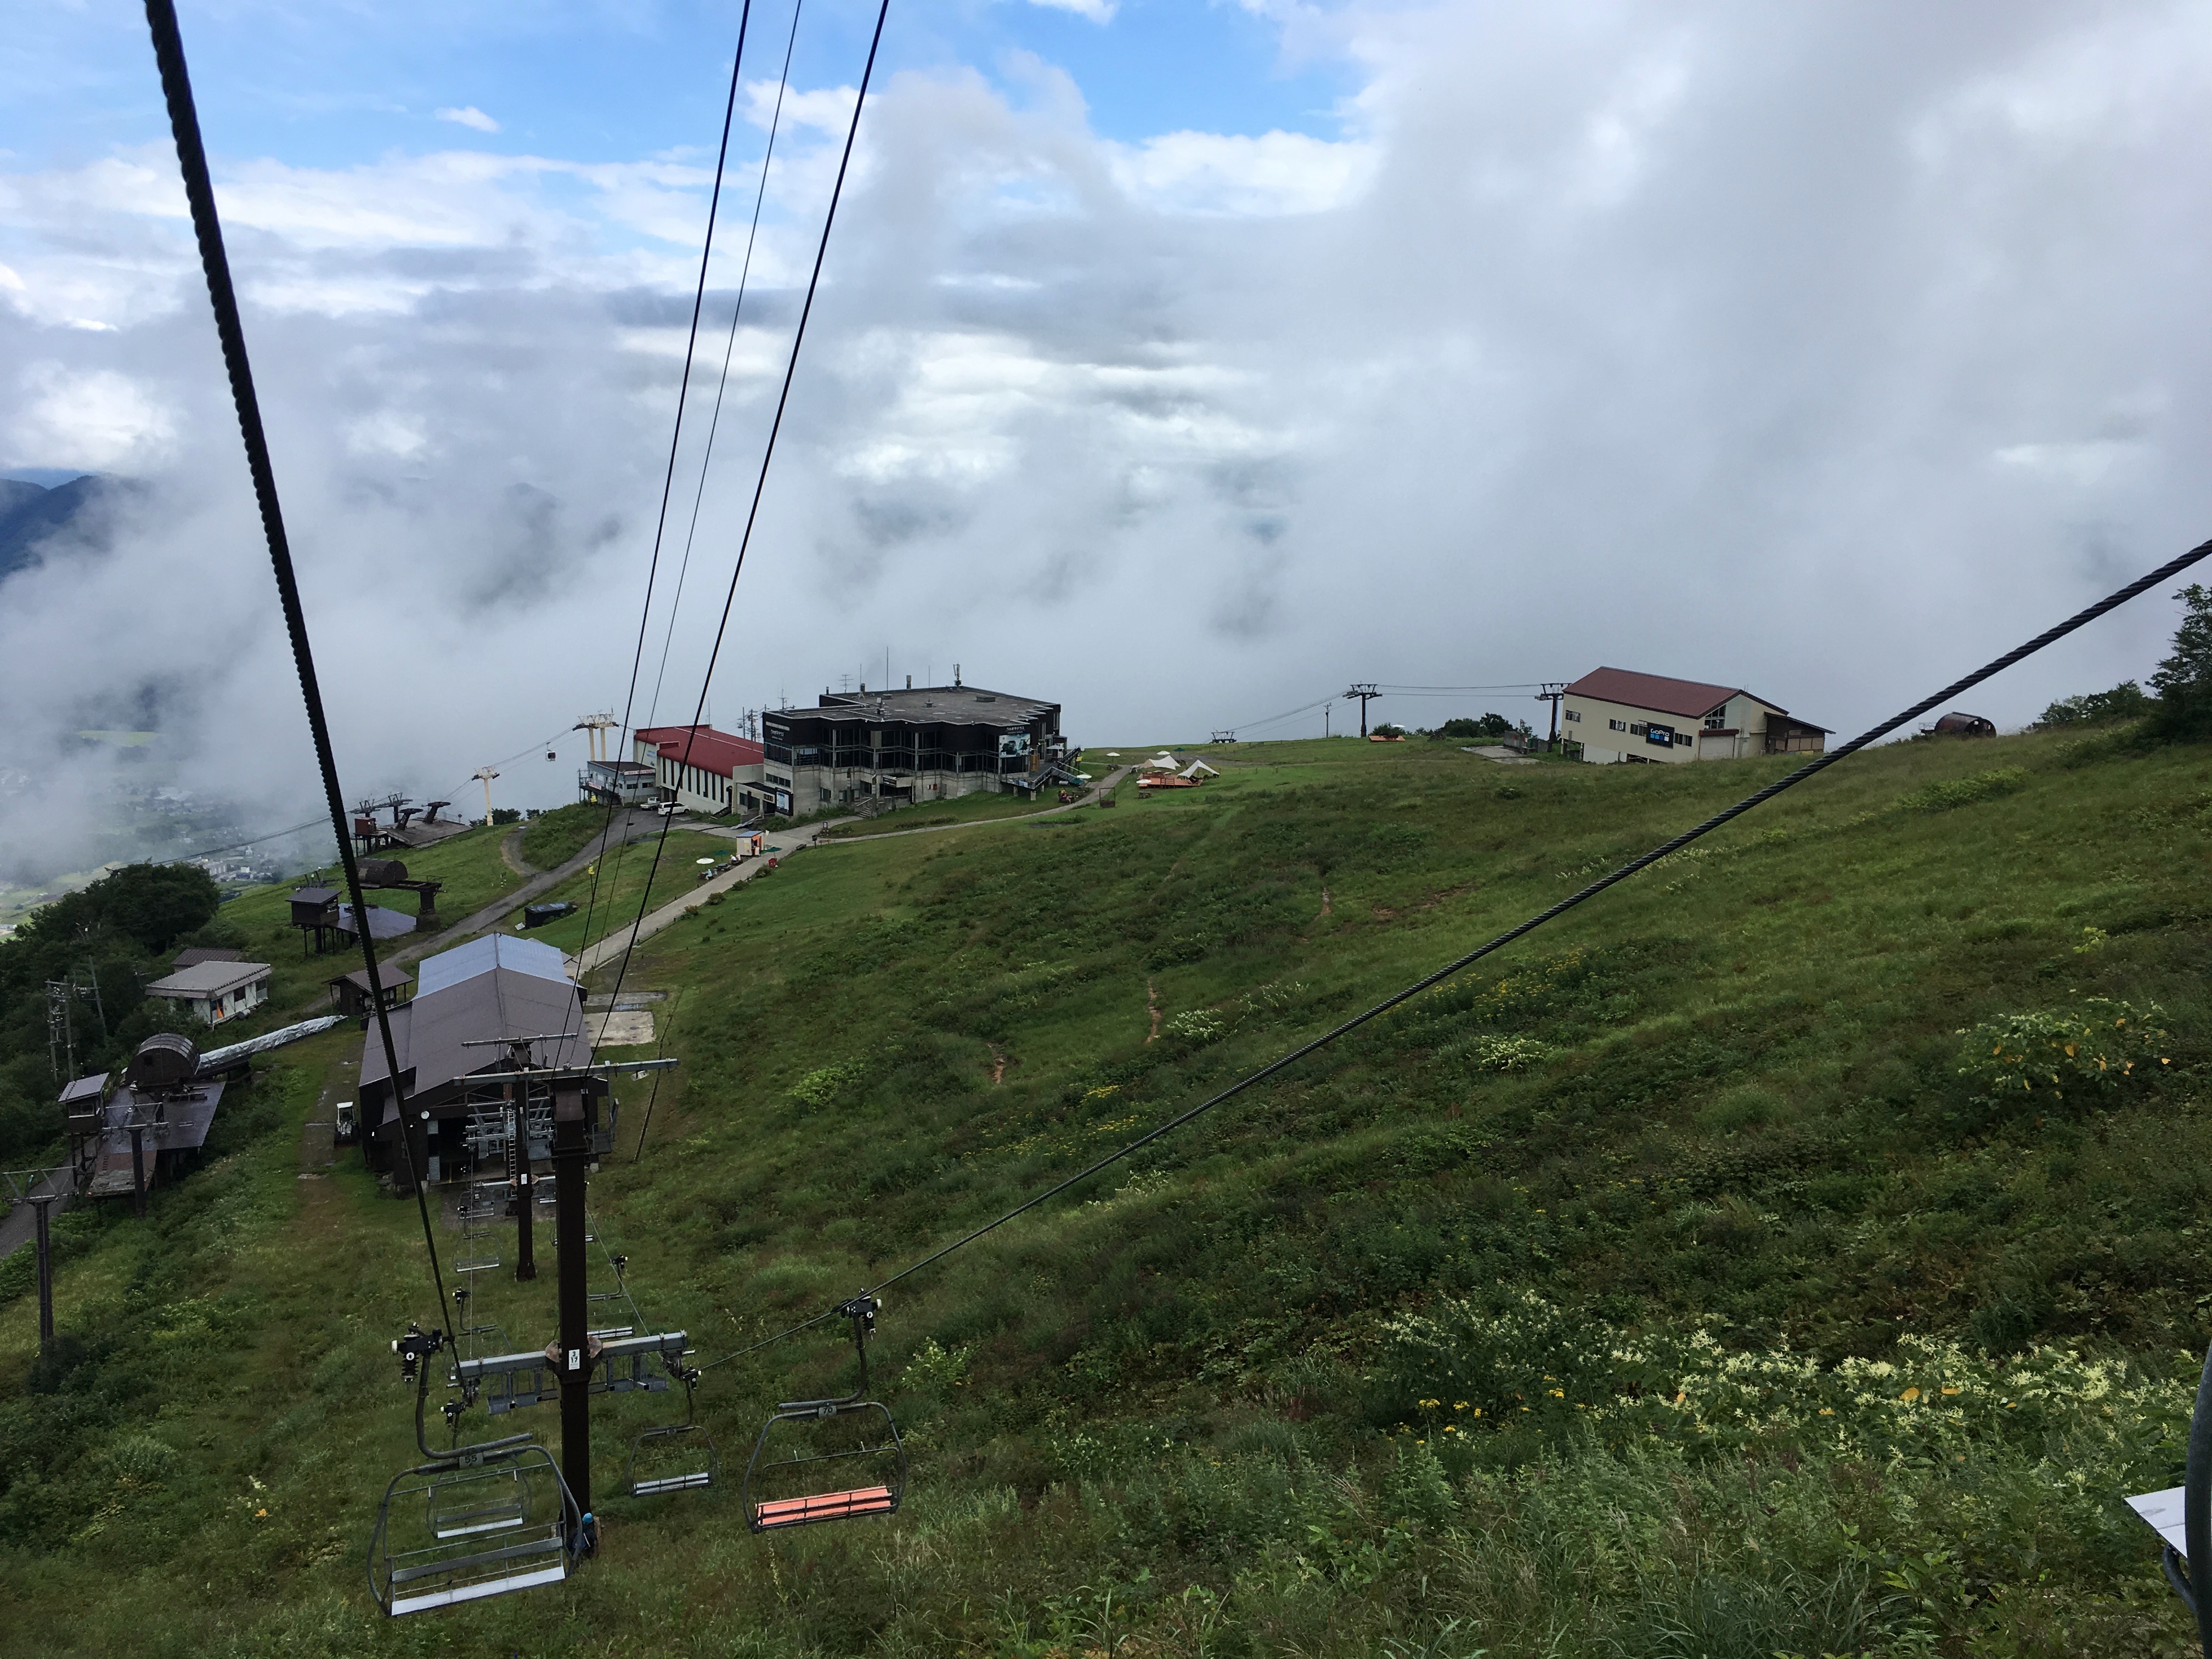
The lifts got me up to Happo Ike Hut by 1 PM. Upon asking where to get water, I was informed it was 100 yen for up to two liters. I had 500 ml on me and should’ve filled up at the bottom of the mountain for free. Rookie mistake!

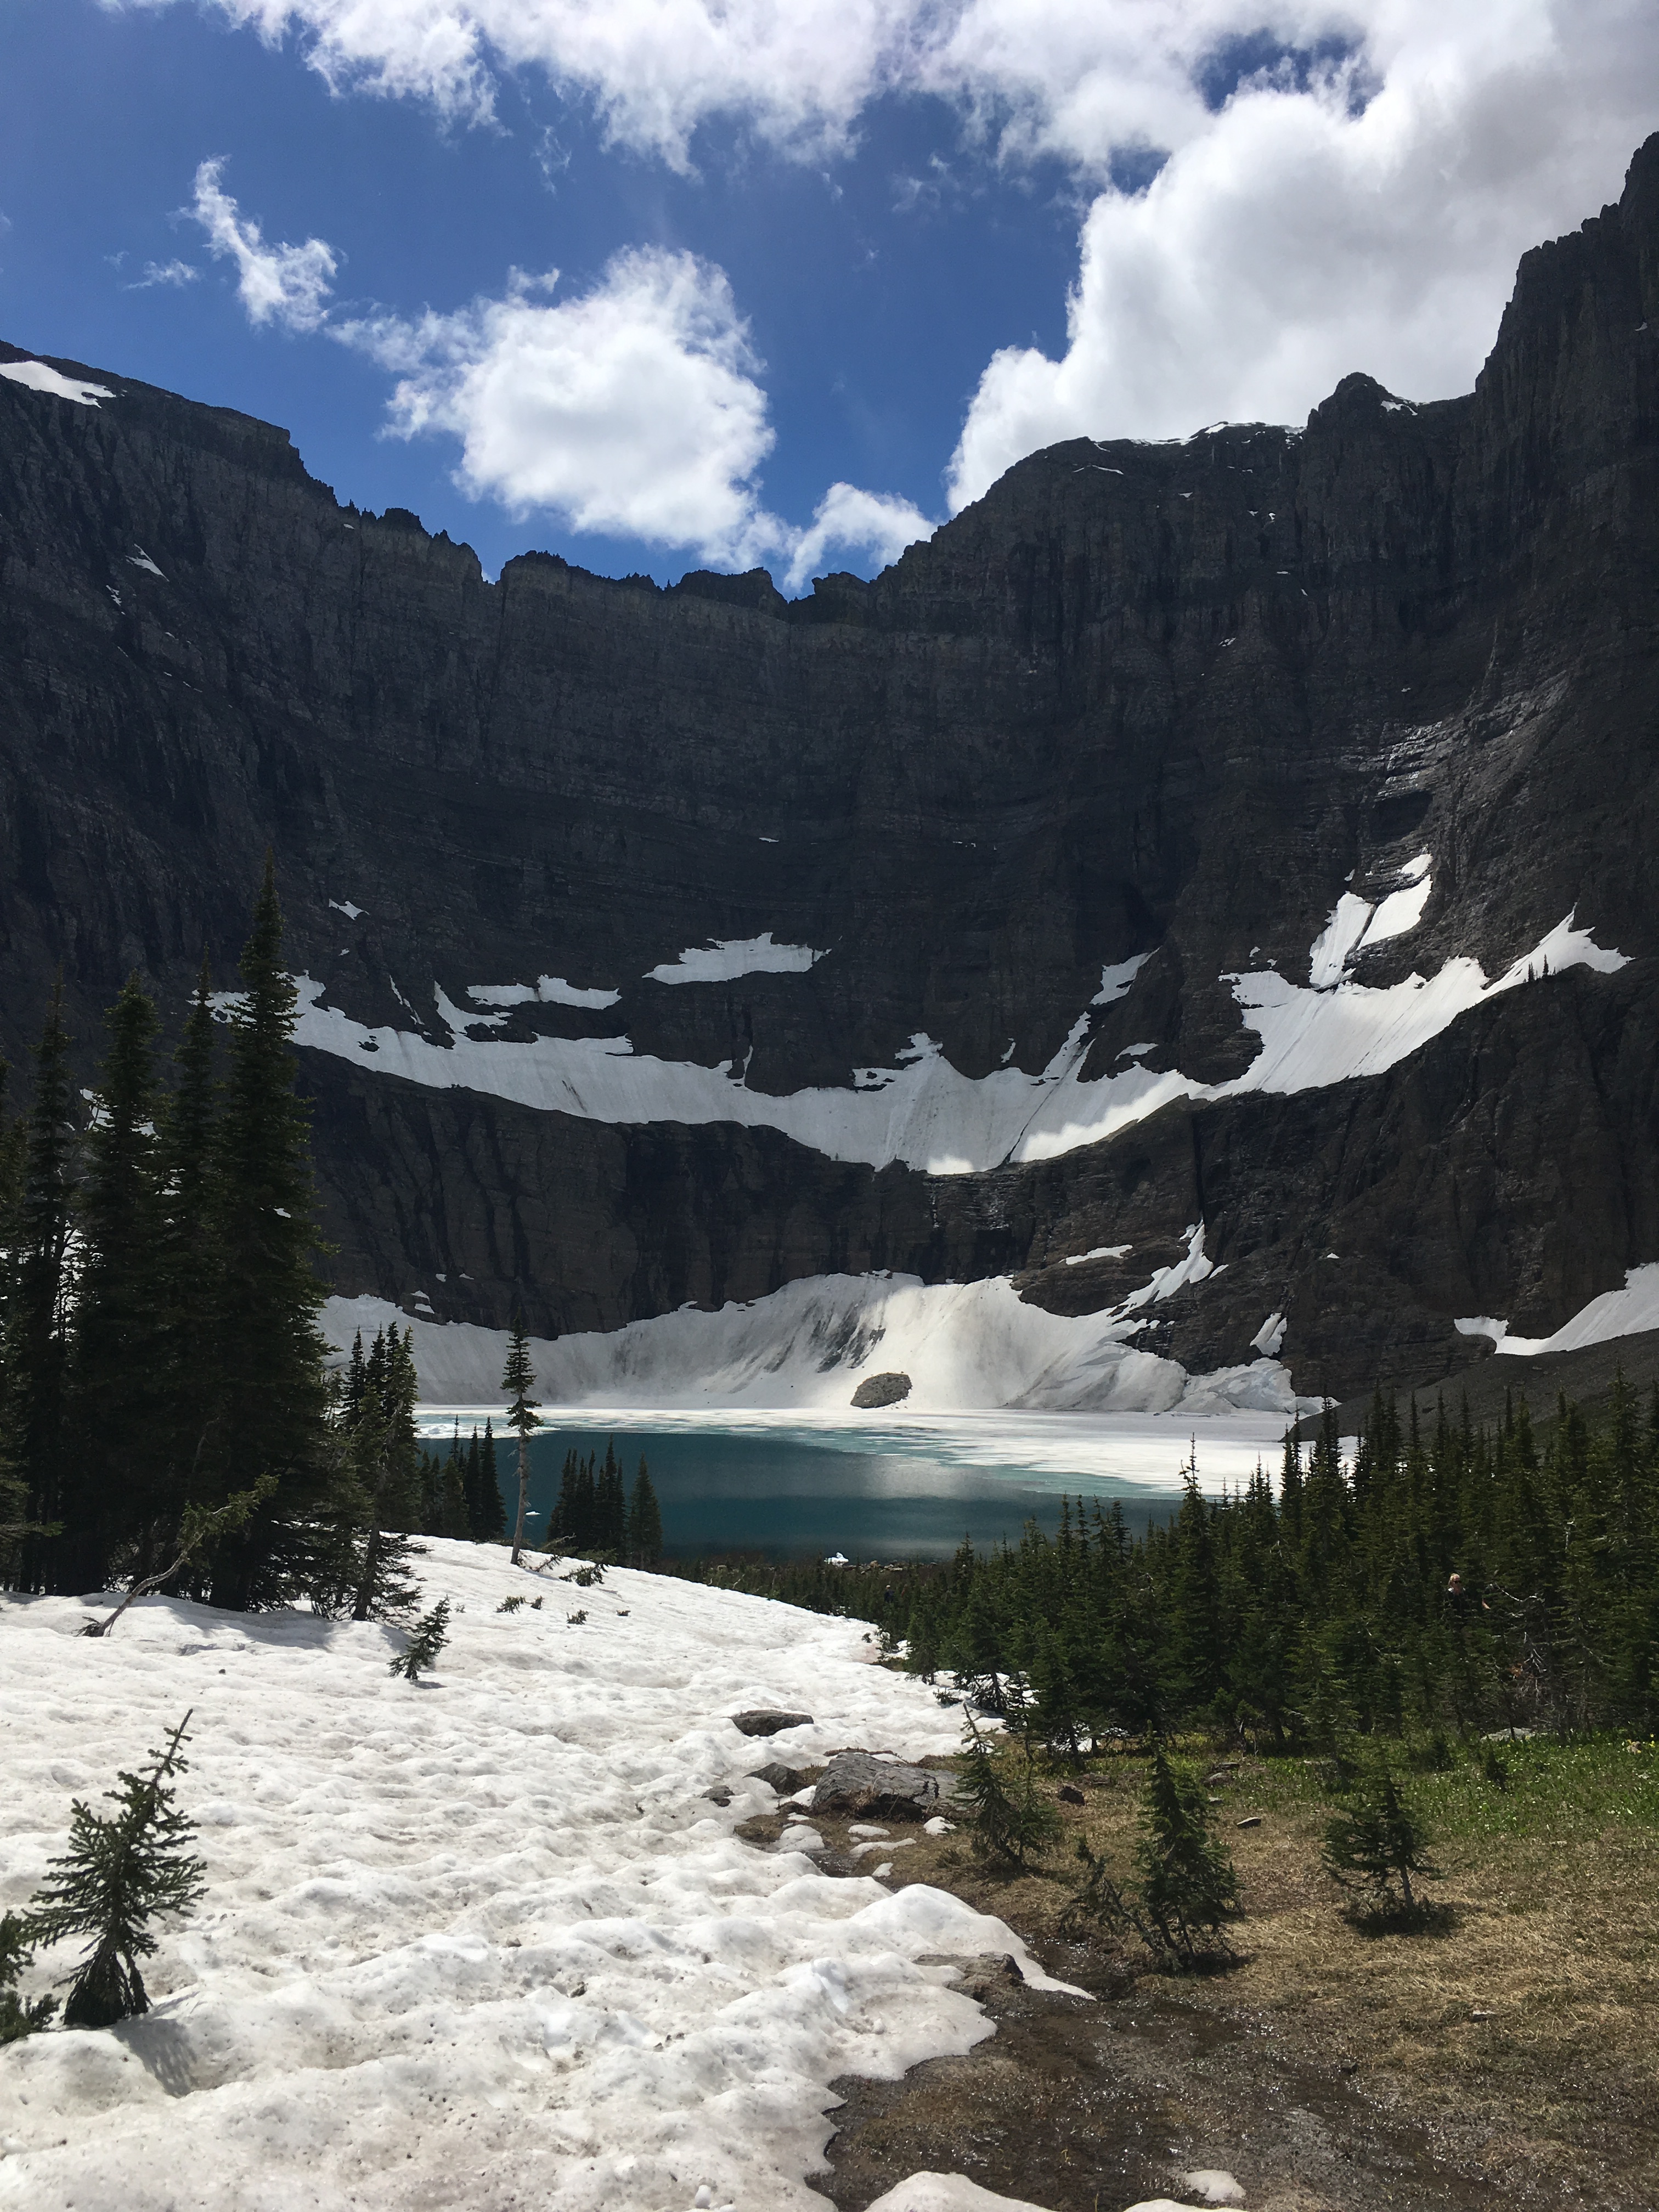
The weather forecast for the week was rainy, and when the bus had driven into Hakuba Valley the clouds were hanging low, covering to tops of the mountains on both sides of the valley. But by the time I reached Happo Ike pond at about 1:40 PM, the fog had begun to lift. I took a coffee break and enjoyed the reflection of the Hakuba range in the pond.

IMG_3783.jpg

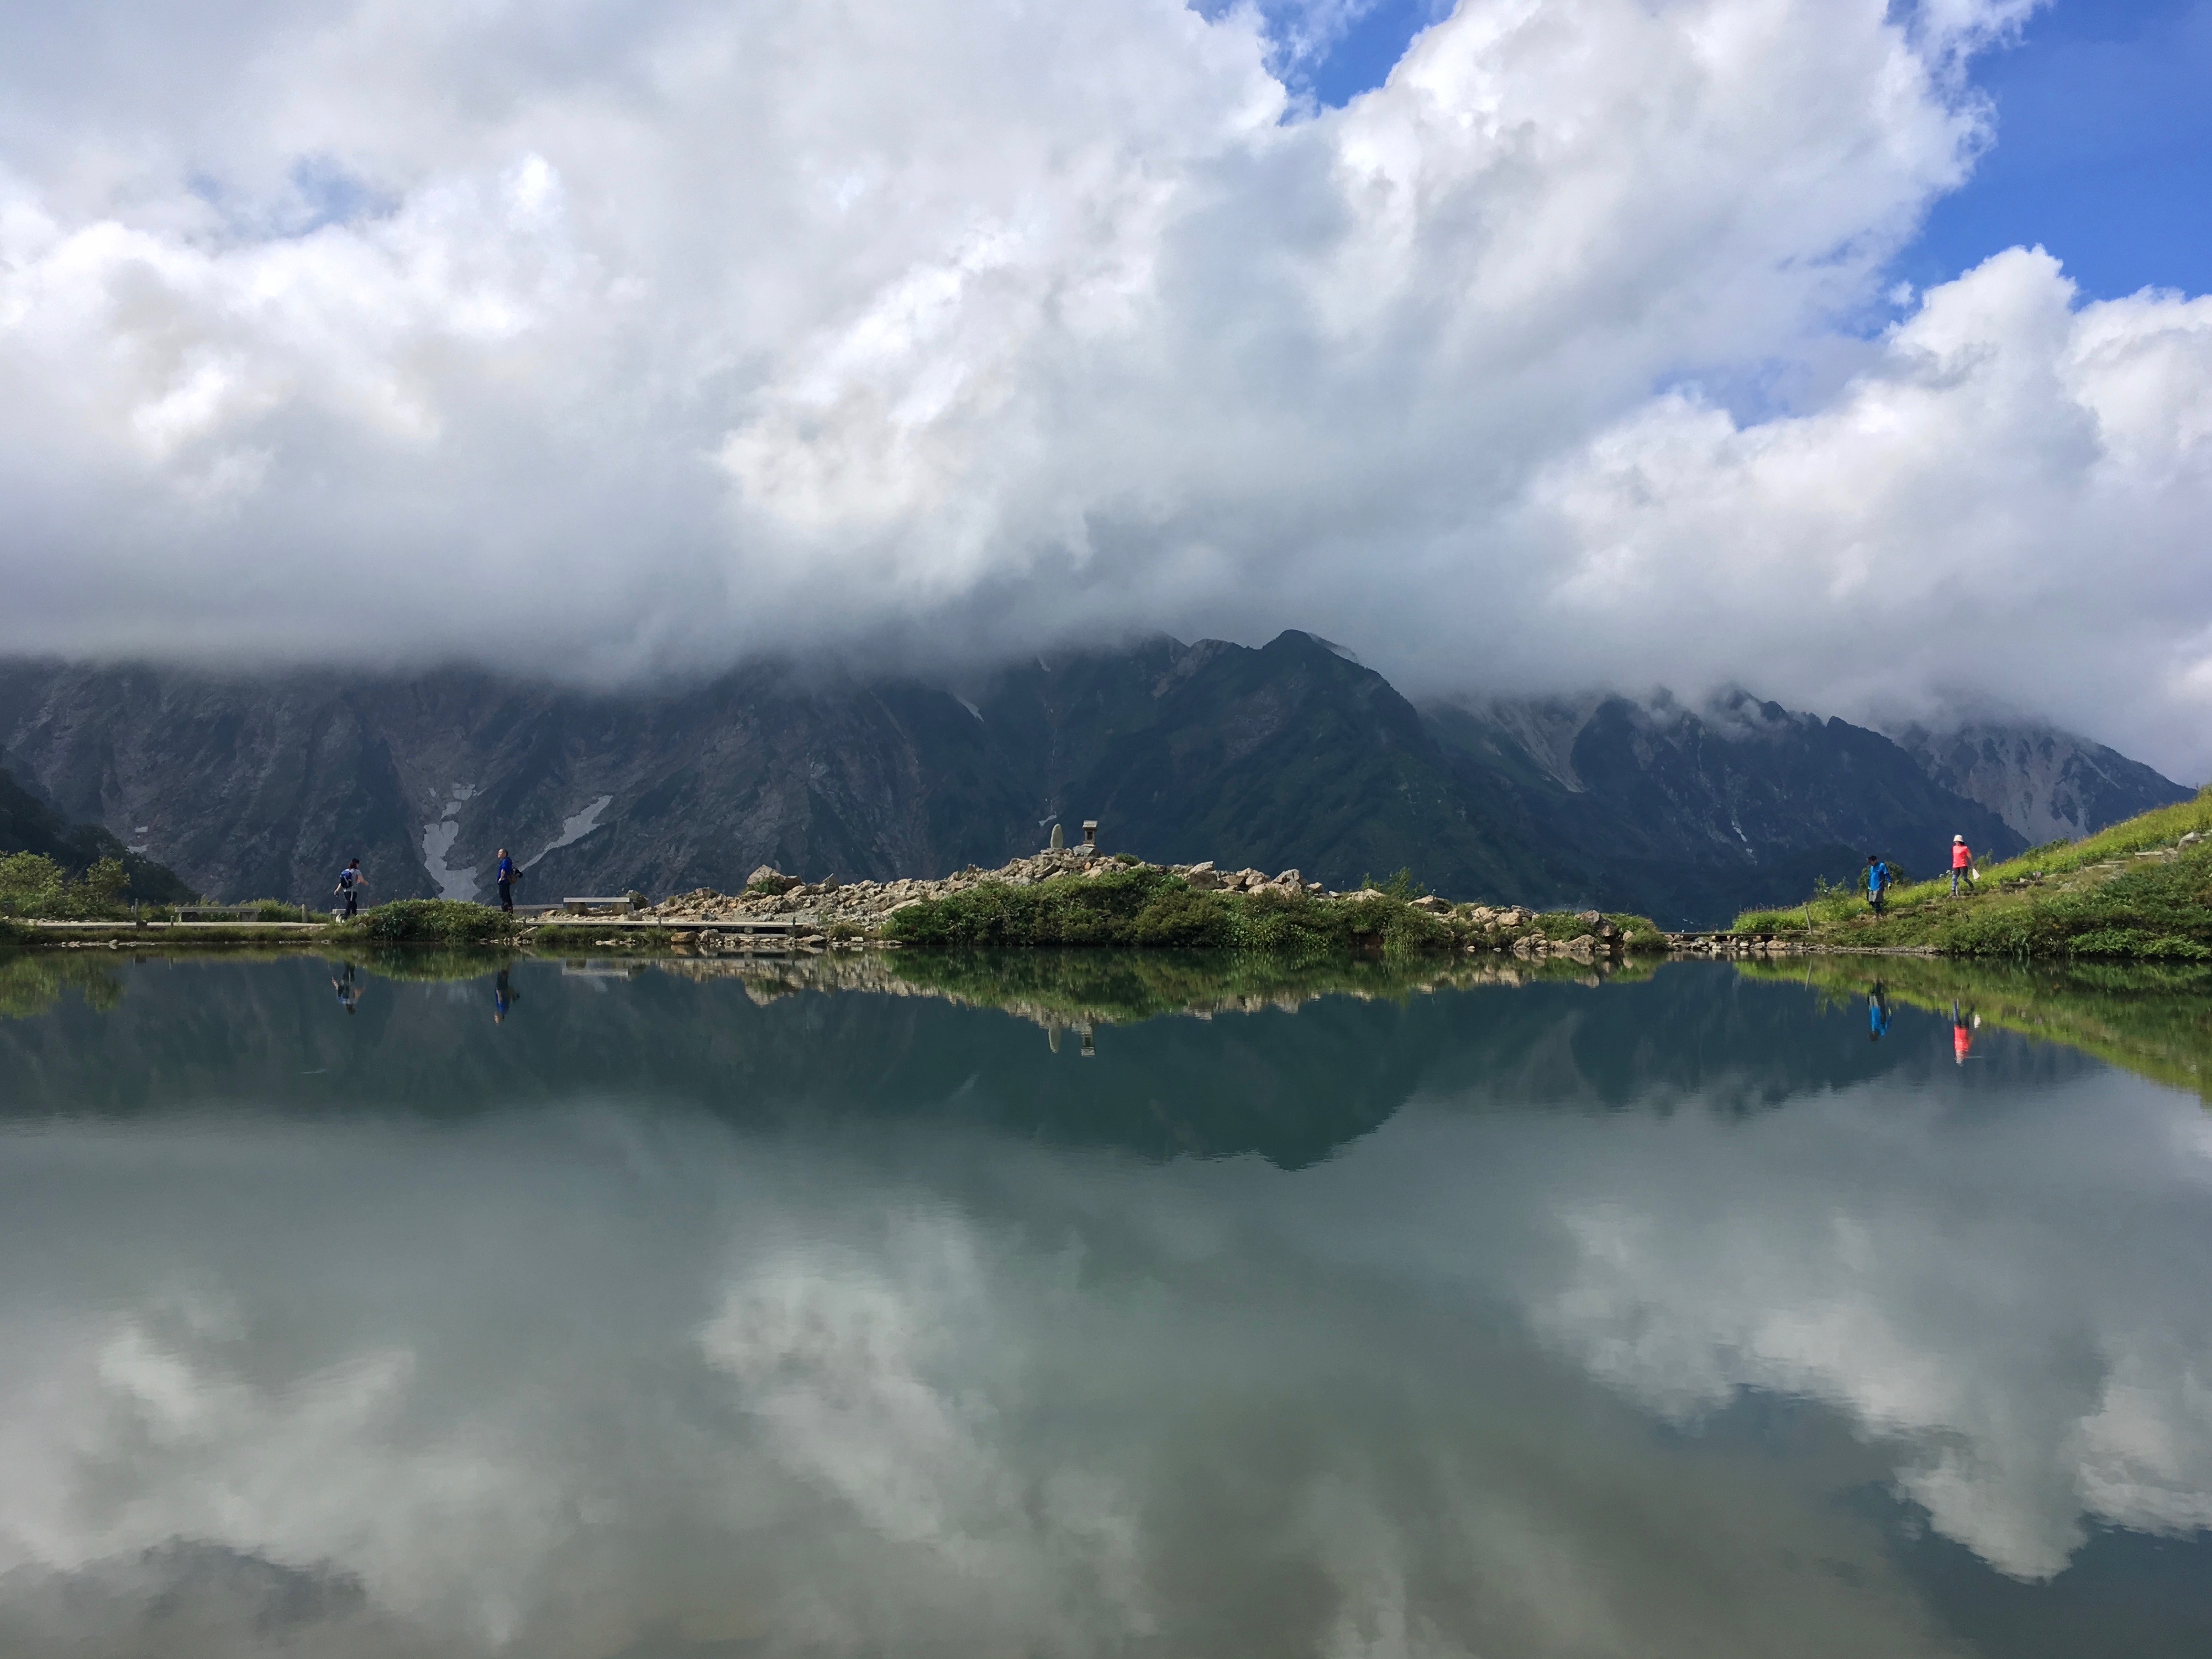
There’s a little shrine at Happo Ike to the dragon god who lives in the pond.

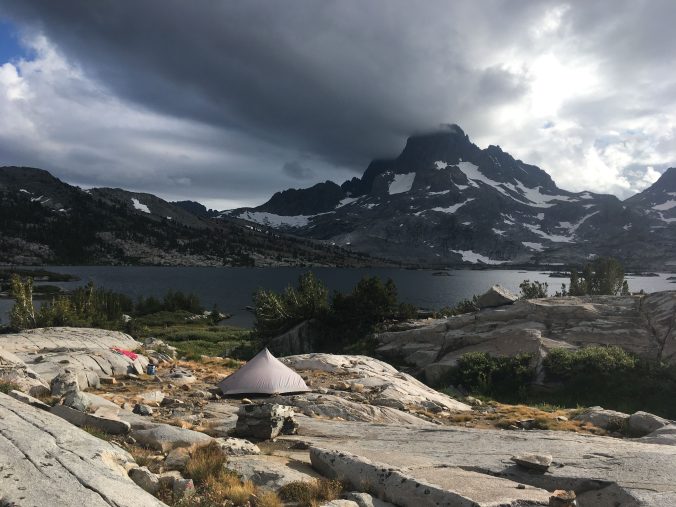
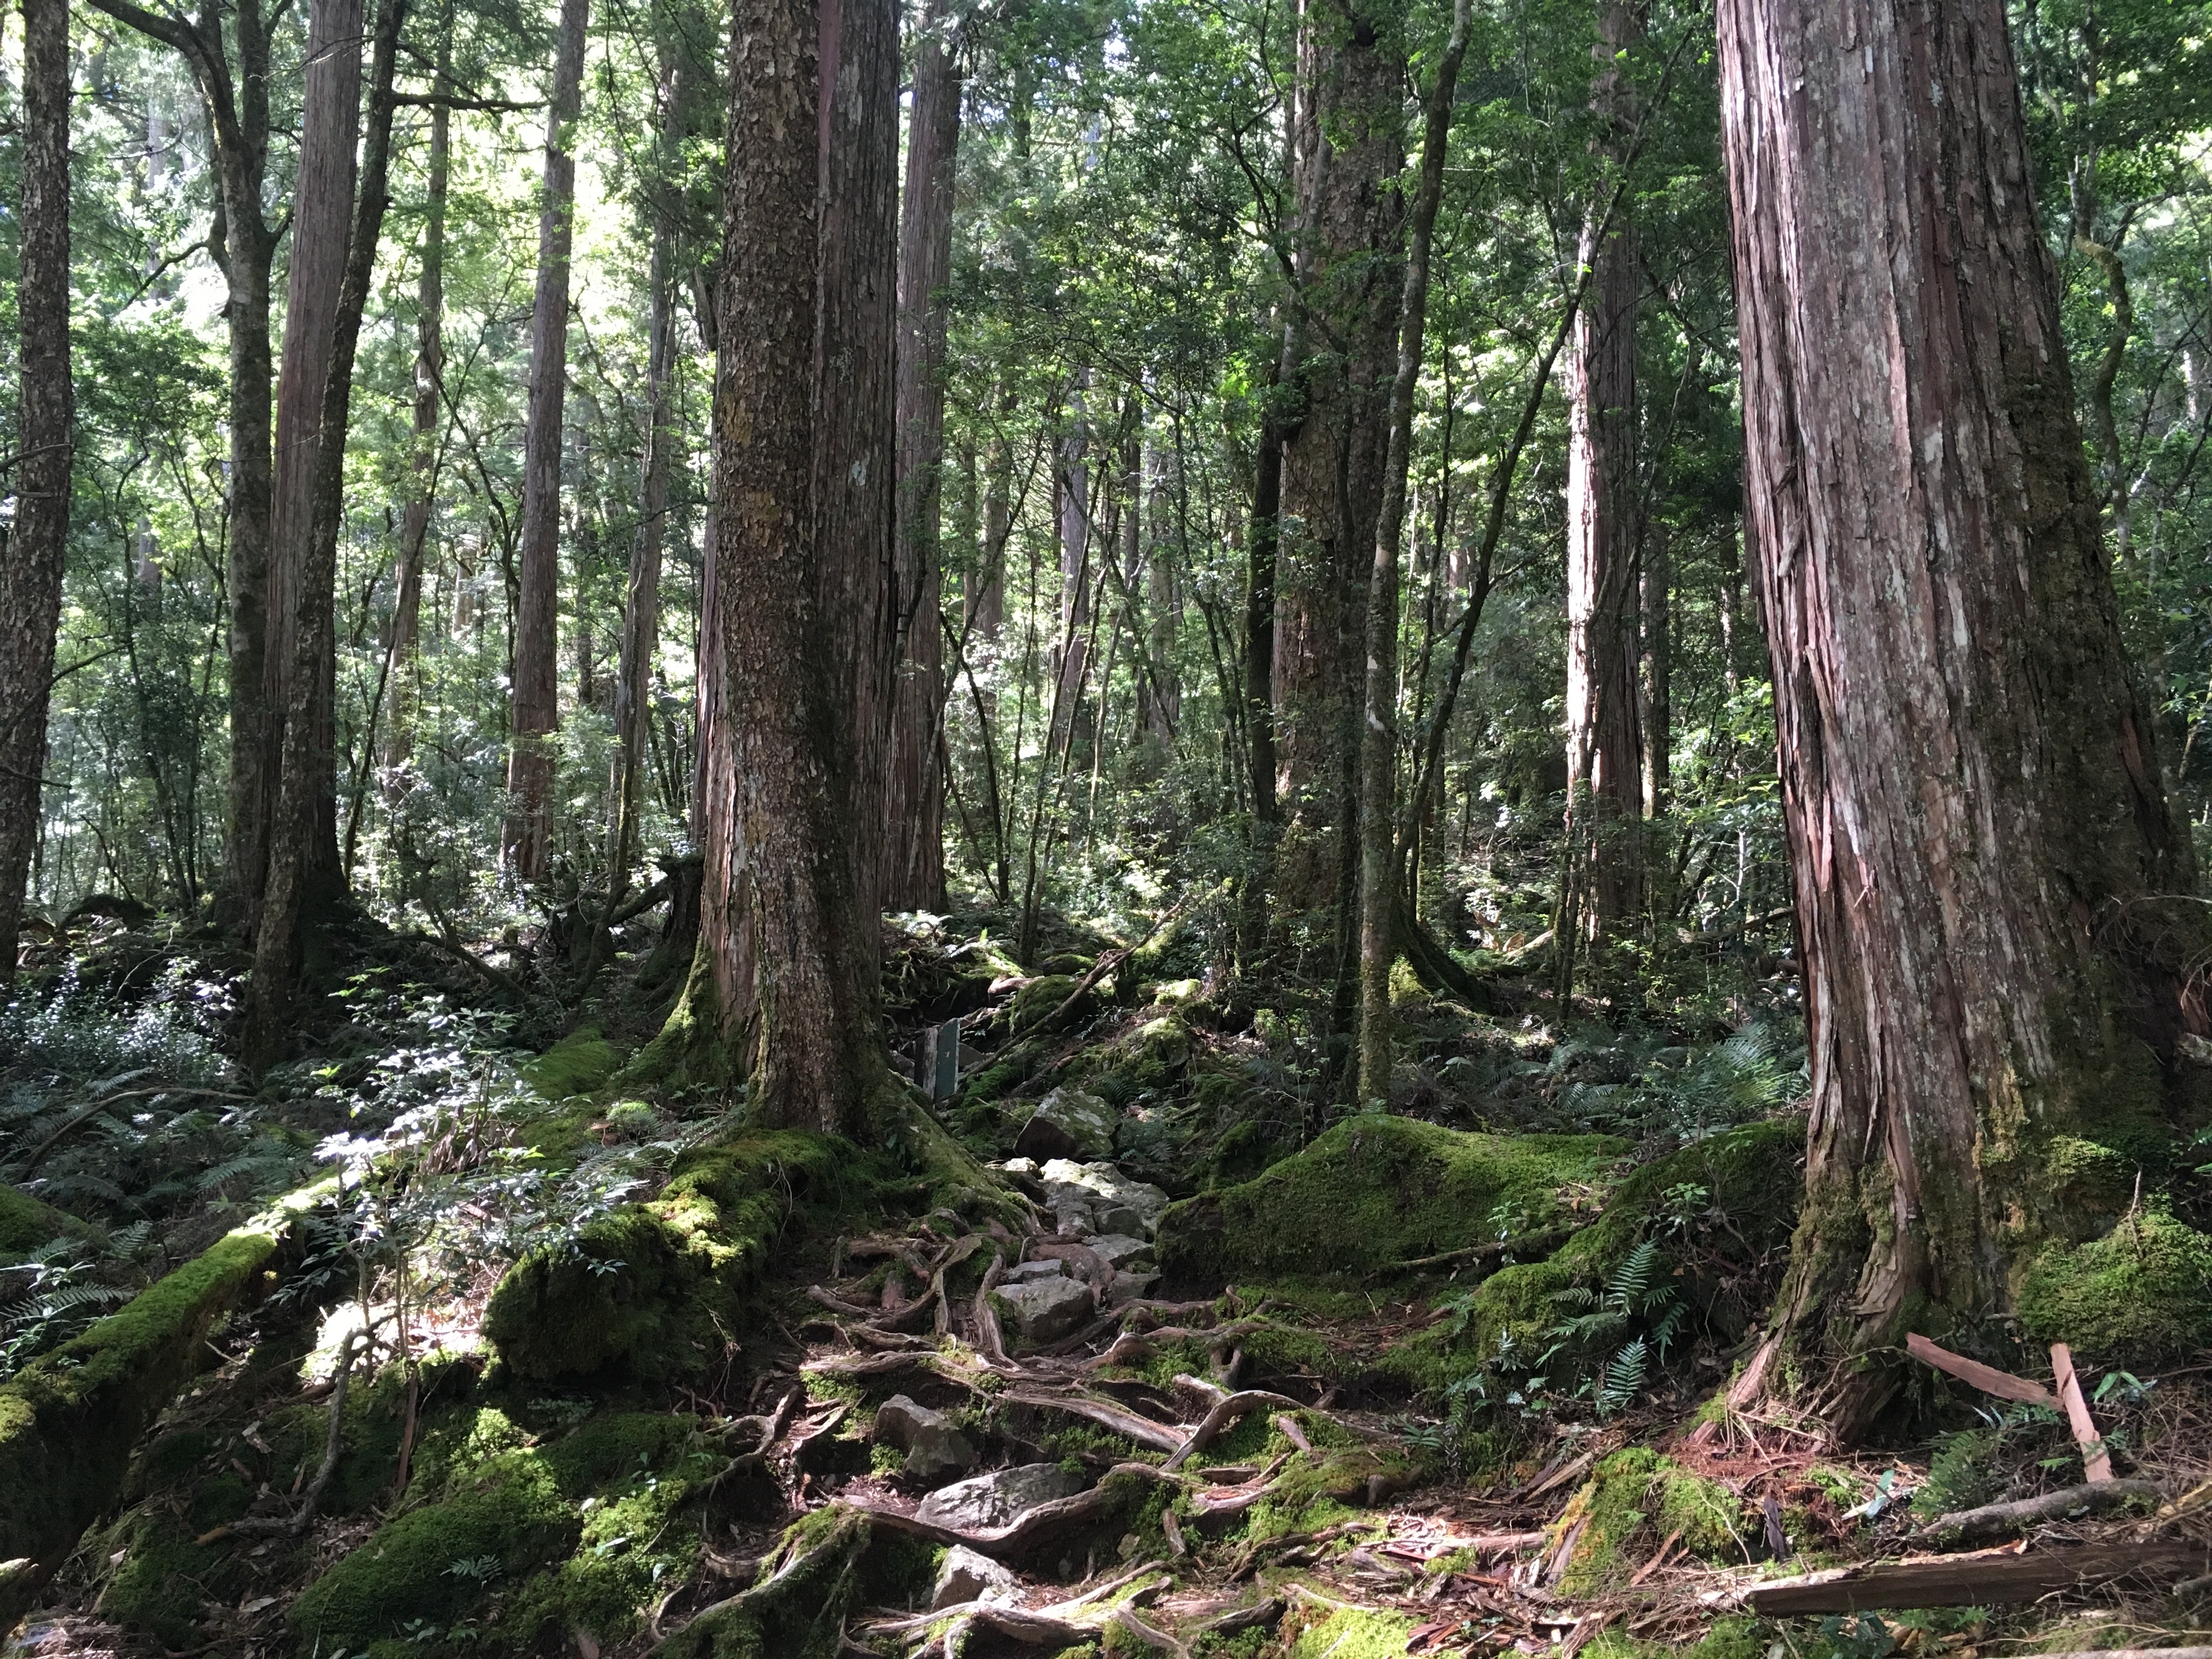
Beyond Happo Ike, you leave the tourists behind. Since I started hiking in the afternoon, I ran into only one other hiker on the way up to Karamatsudake Hut, where I camped for the night. He was an older gentleman who had driven up from Chiba in the morning, so we were on more or less the same schedule. Seeing the sleeping pad strapped to the outside of my pack, he asked if I was tent camping. He was curious how heavy my pack was. I said that the scale at the bottom of Happo One said 11 kilograms. He said his was 12 kg, and he was planning to stay at the hut, which meant he hadn’t packed food, tent, or sleeping bag… how come my pack was so light? Then, he realized he was carrying 2 kilograms worth of camera kit. I said, that totally explains it, because my tent is only 750 grams and my sleeping bag even less than that. That’s one benefit of having not gotten crazy about photography while hiking… yet.

I completed the anticipated 4-hour hike from Happo Ike Hut to Karamatsudake Hut in just about 3 hours. It’s a short hiking day, but I’d been up and traveling since 5 AM and was satisfied to call it a day. Welcomed by a sign offering draft beer, I checked-in and paid 1000 yen for a tent site. After a brief chat with the girl at reception about mountains in Taiwan, I set up camp. The campground consisted of scattered sites down the other side of the ridge from where I had climbed up, and offered amazing views of the Tateyama peaks dominated by Mt. Tsurugi.

IMG_3806.jpg

Karamatsudake Hut

IMG_3809.jpg

What my campsite looked like

IMG_3821.jpg

View of Karamatsudake Hut and tent sites

I’m relaxing and unpacking and somehow 1.5 hours disappeared. I climbed back up the ridge to go to the hut to use the restrooms, then returned to my tent to cook dinner as sunset fell on the archipelago of the Kita Alps in a cotton candy sea.

IMG_3825.jpg

Sunset on cloud-capped Mt. Tsurugi

IMG_3820.jpg

Scoping out the next day’s hike: looking north across Kaerazunoken

Day 2: Thursday, August 31

Karamatsudake Hut –> Hakubadake Chojo Shukusha (白馬岳頂上宿舎) (8.64km)

I am awakened in the middle of the night by rain inside my tent. It’s condensation being shaken off the inside of my tent by the wind blowing outside. I wiped down the inside of my tent with a small camp towel, changed the orientation of my head (since I had been sliding down toward one end of my tent) and slept much better for the rest of the night.

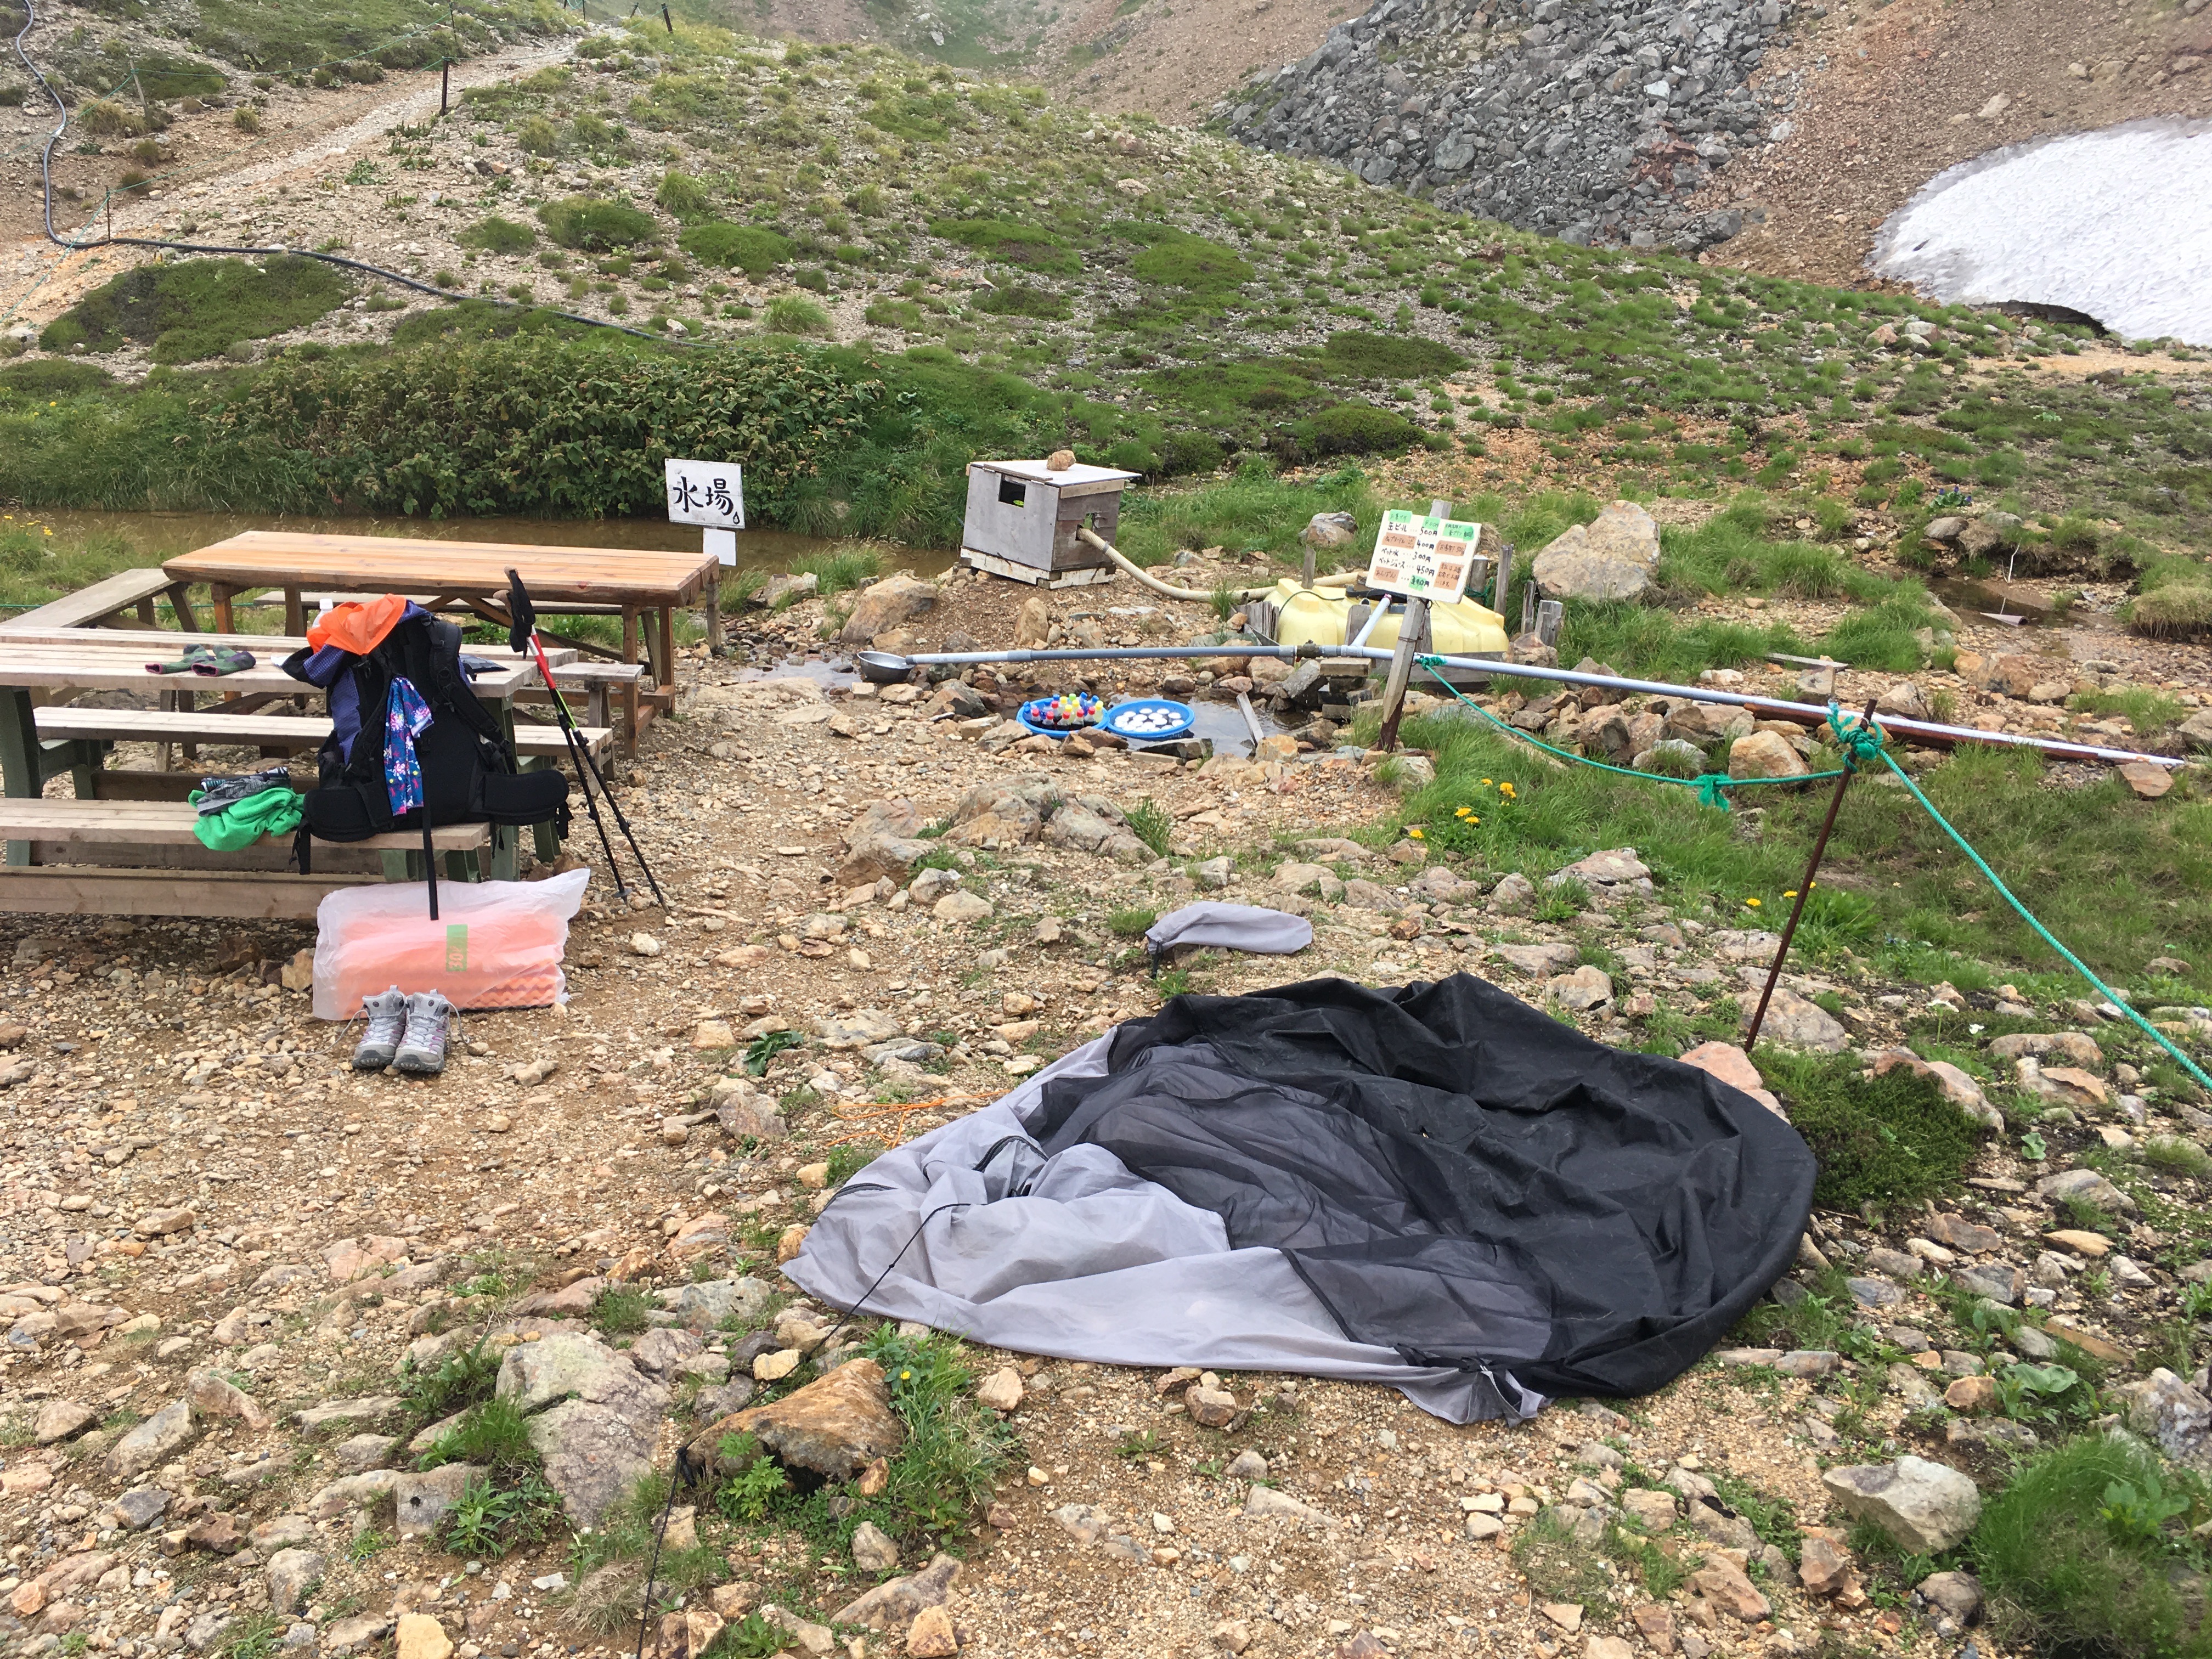
I had ambitious plans to wake up for sunrise but couldn’t actually motivate myself to get up. Anyway, when I finally got out of my tent there was pretty much zero visibility due to the mist. I packed up my tent and went to the hut to brush my teeth, pee, and make some coffee. Reception at the hut tried to sell me 1L of PET bottled water for 600 yen, but I purchased 1L of unfiltered river water for 150 yen and ran it through my Sawyer filter.

It was imperceptibly drizzling as I started the day’s hike and after about 20 minutes, I stopped for breakfast of a piece of Family Mart chocolate pound cake at the peak of Karamatsudake. It’s wrapper had conveniently puffed up into a balloon at high elevation to keep it from getting smushed in my pack.

IMG_3827.jpg

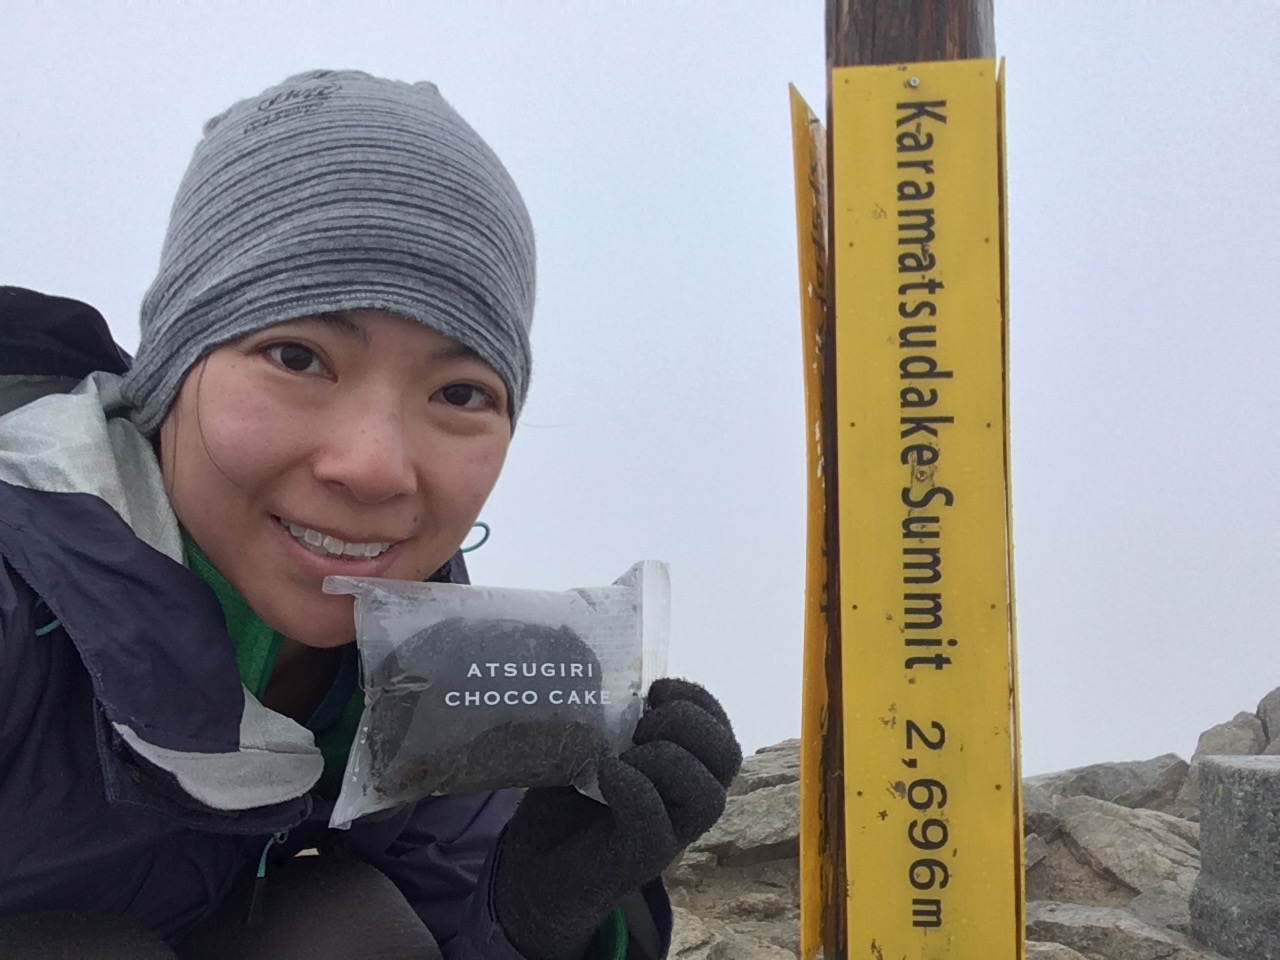
400 calories of chocolatey goodness

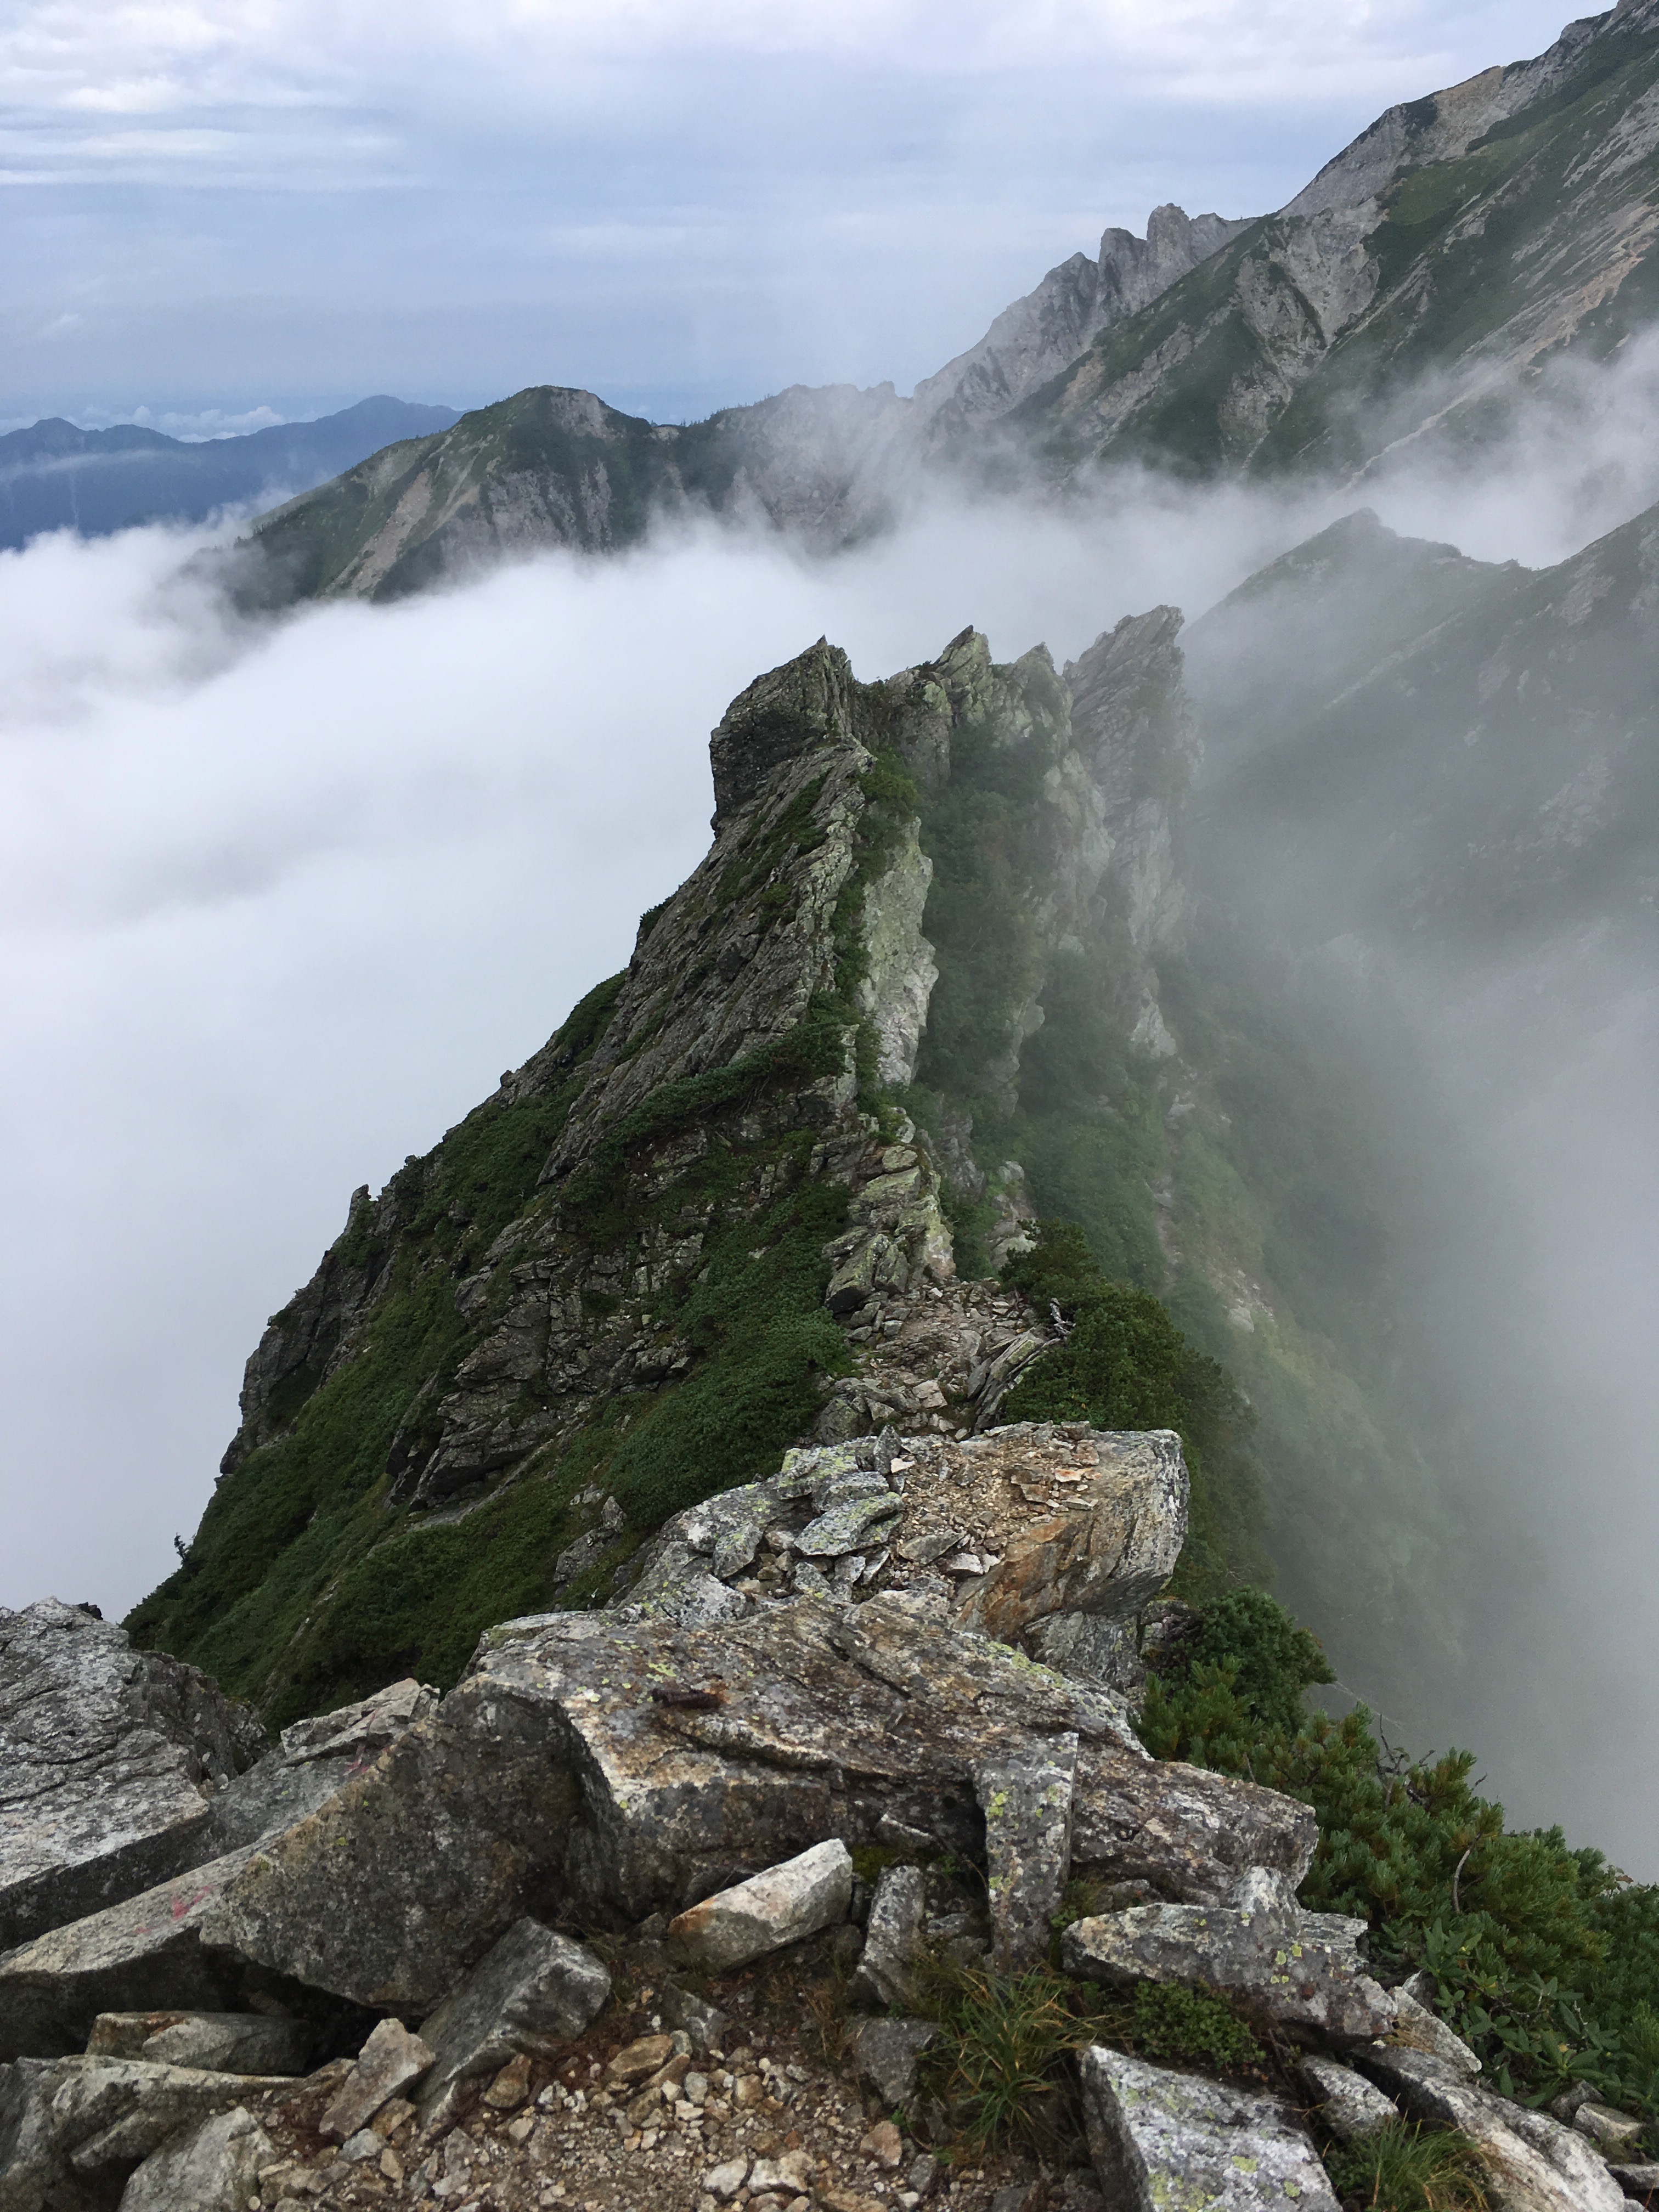
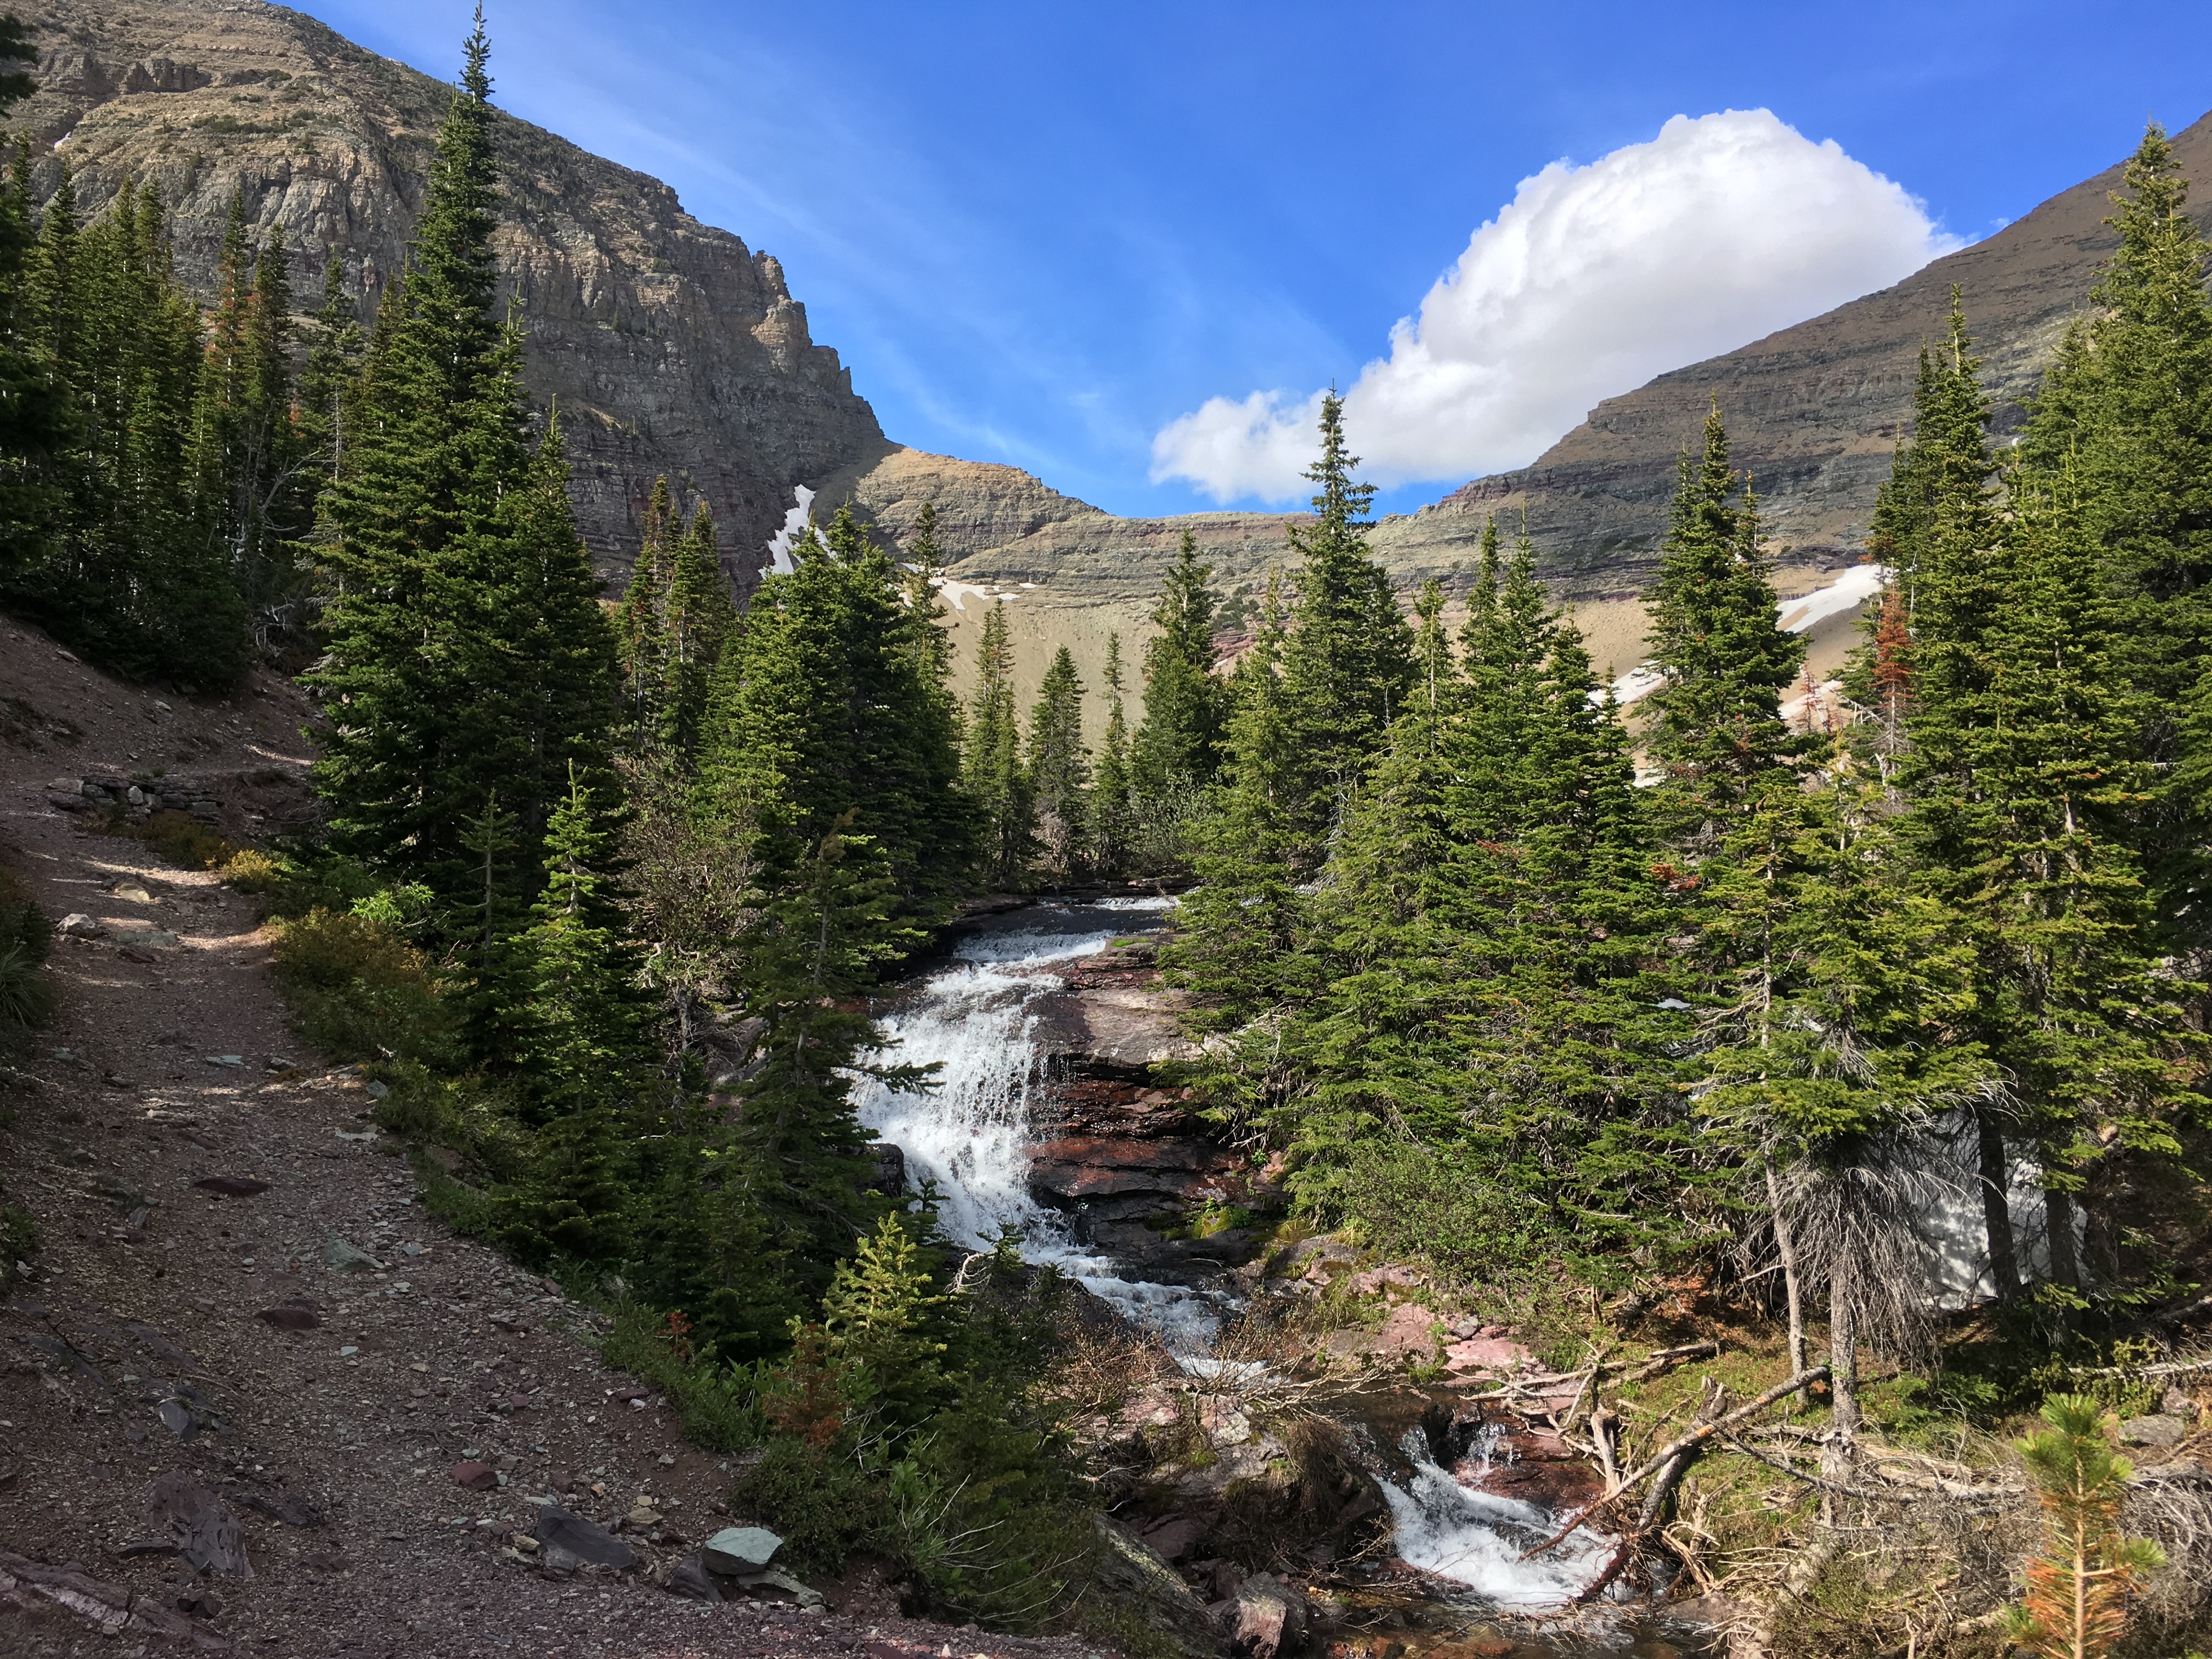
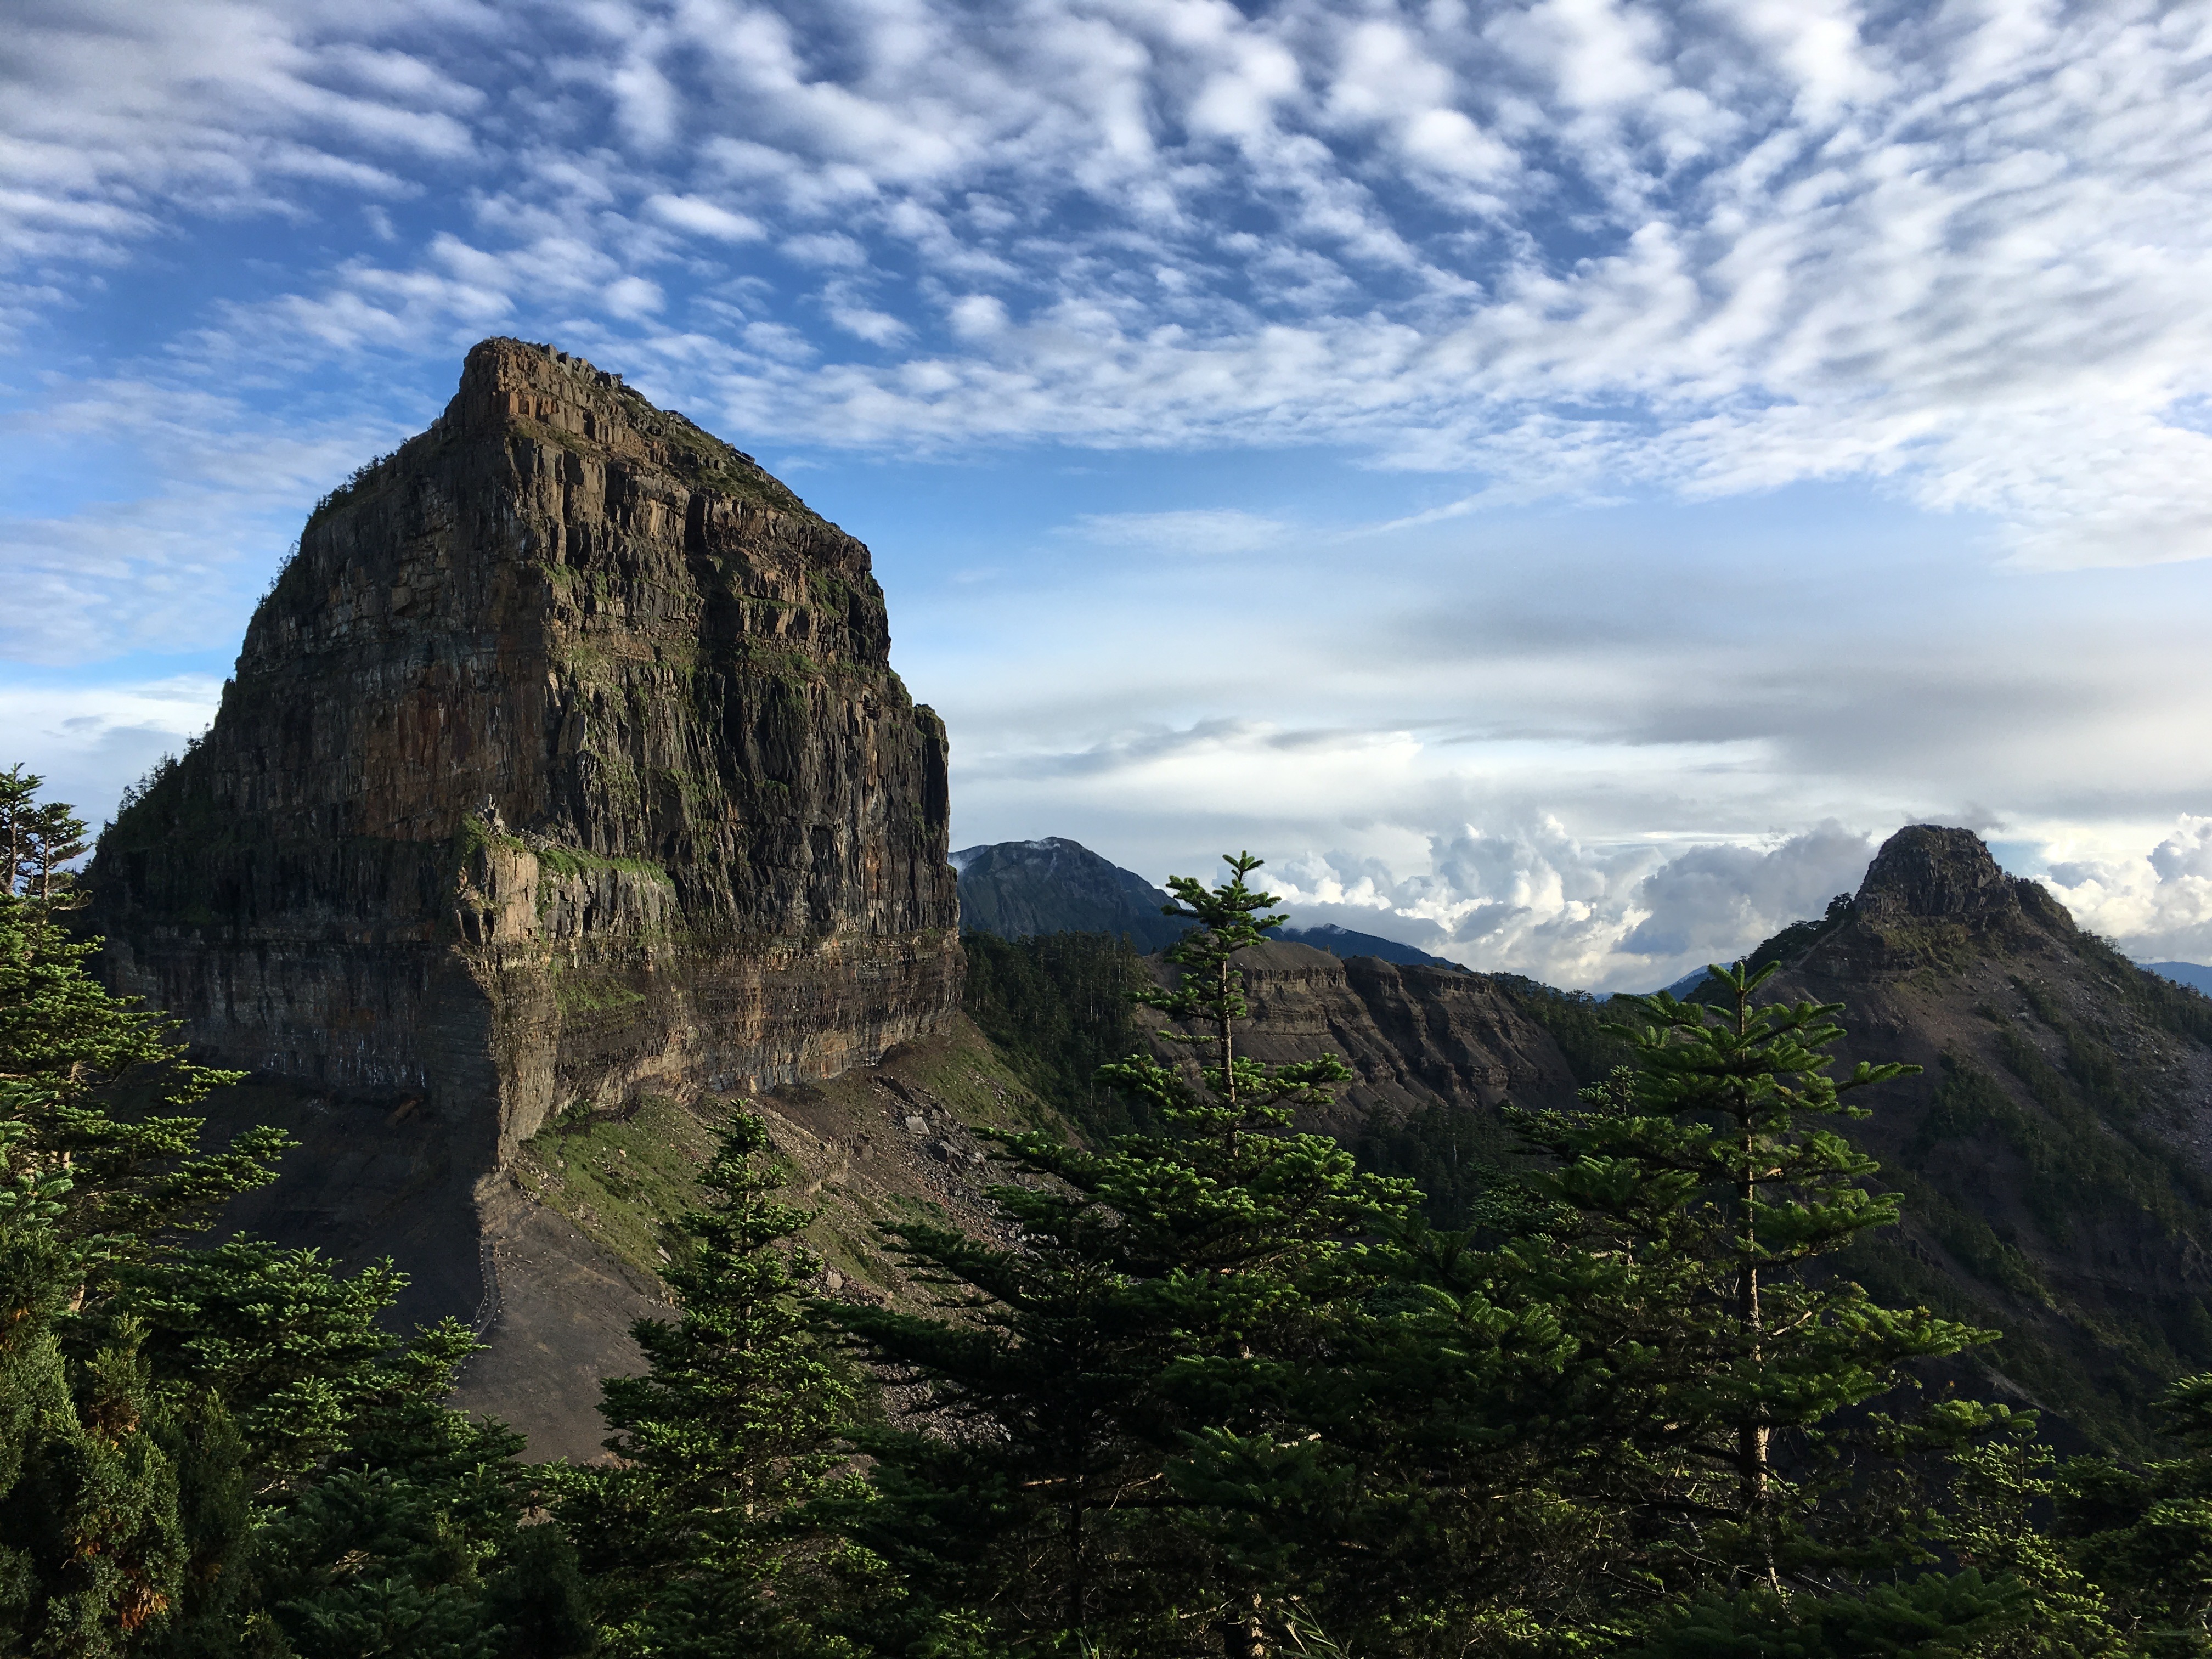
The next section of the hike was a rocky traverse called Kaerazu no Ken (不帰の険), which translates to “Cliffs of No Return”. It looked pretty sketchy based on the trip reports I’d read on Yamareco and my map had a dotted line labeled “danger”. So, in case of heavy rain and low visibility, I had a plan B of going south from Mt. Karamatsu and taking an easier traverse to Mt. Goryu. I was walking among wisps of cloud, but it wasn’t raining so I decided to follow plan A and go for it. Just past the first sign marking the beginning of Kaerazu no Ken, the trail wasn’t too bad. A family of ptarmigan waddled down the trail in front of me, unperturbed by my presence. But soon I had put away my trekking poles and found myself traversing cliffs on chains and swinging around rocky corners trying to stay balanced with a bulky pack on my back. Finishing the traverse without falling to my death, I was rewarded with a huge slogging uphill climb on switchbacks and then some more chains to the top of Tengu no Kashira (天狗ノ頭). From the top of Tengu no Kashira, you could see that the peaks to the south were super rocky and steep compared to the rolling ridge to the north, which looked much less extreme.

IMG_3829.jpg

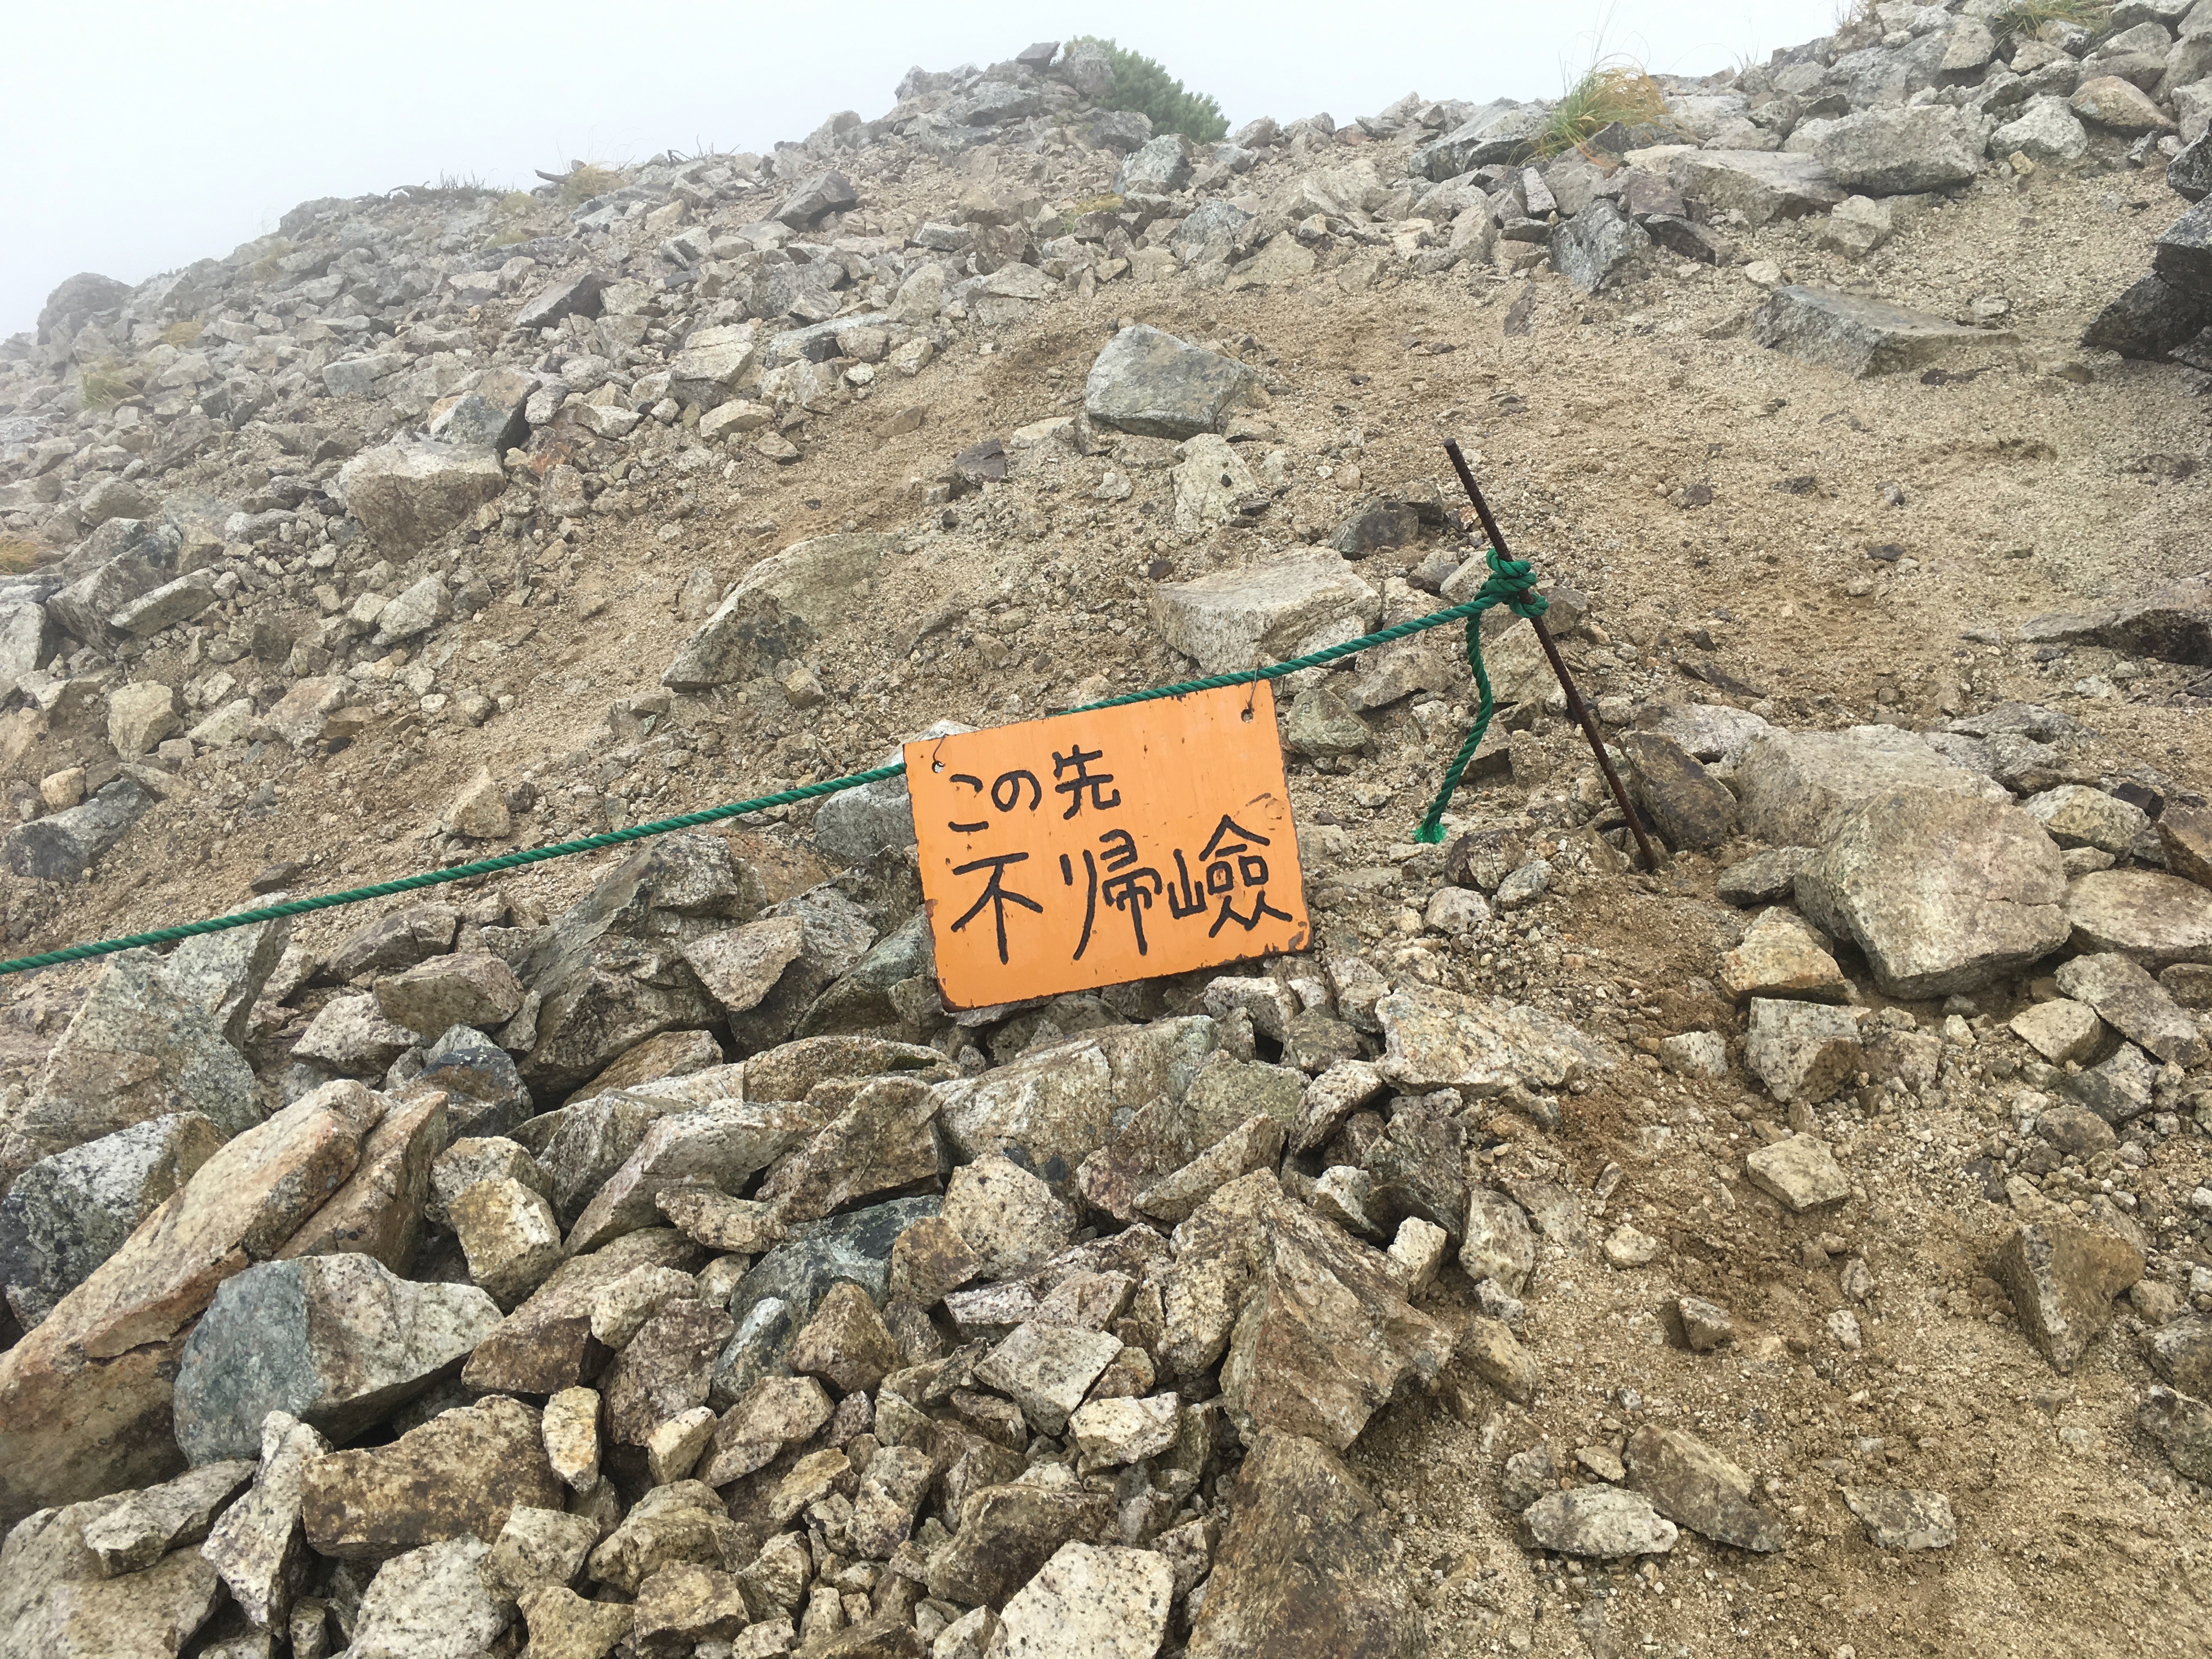
Sign warning hikers of the start of Kaerazu no Ken
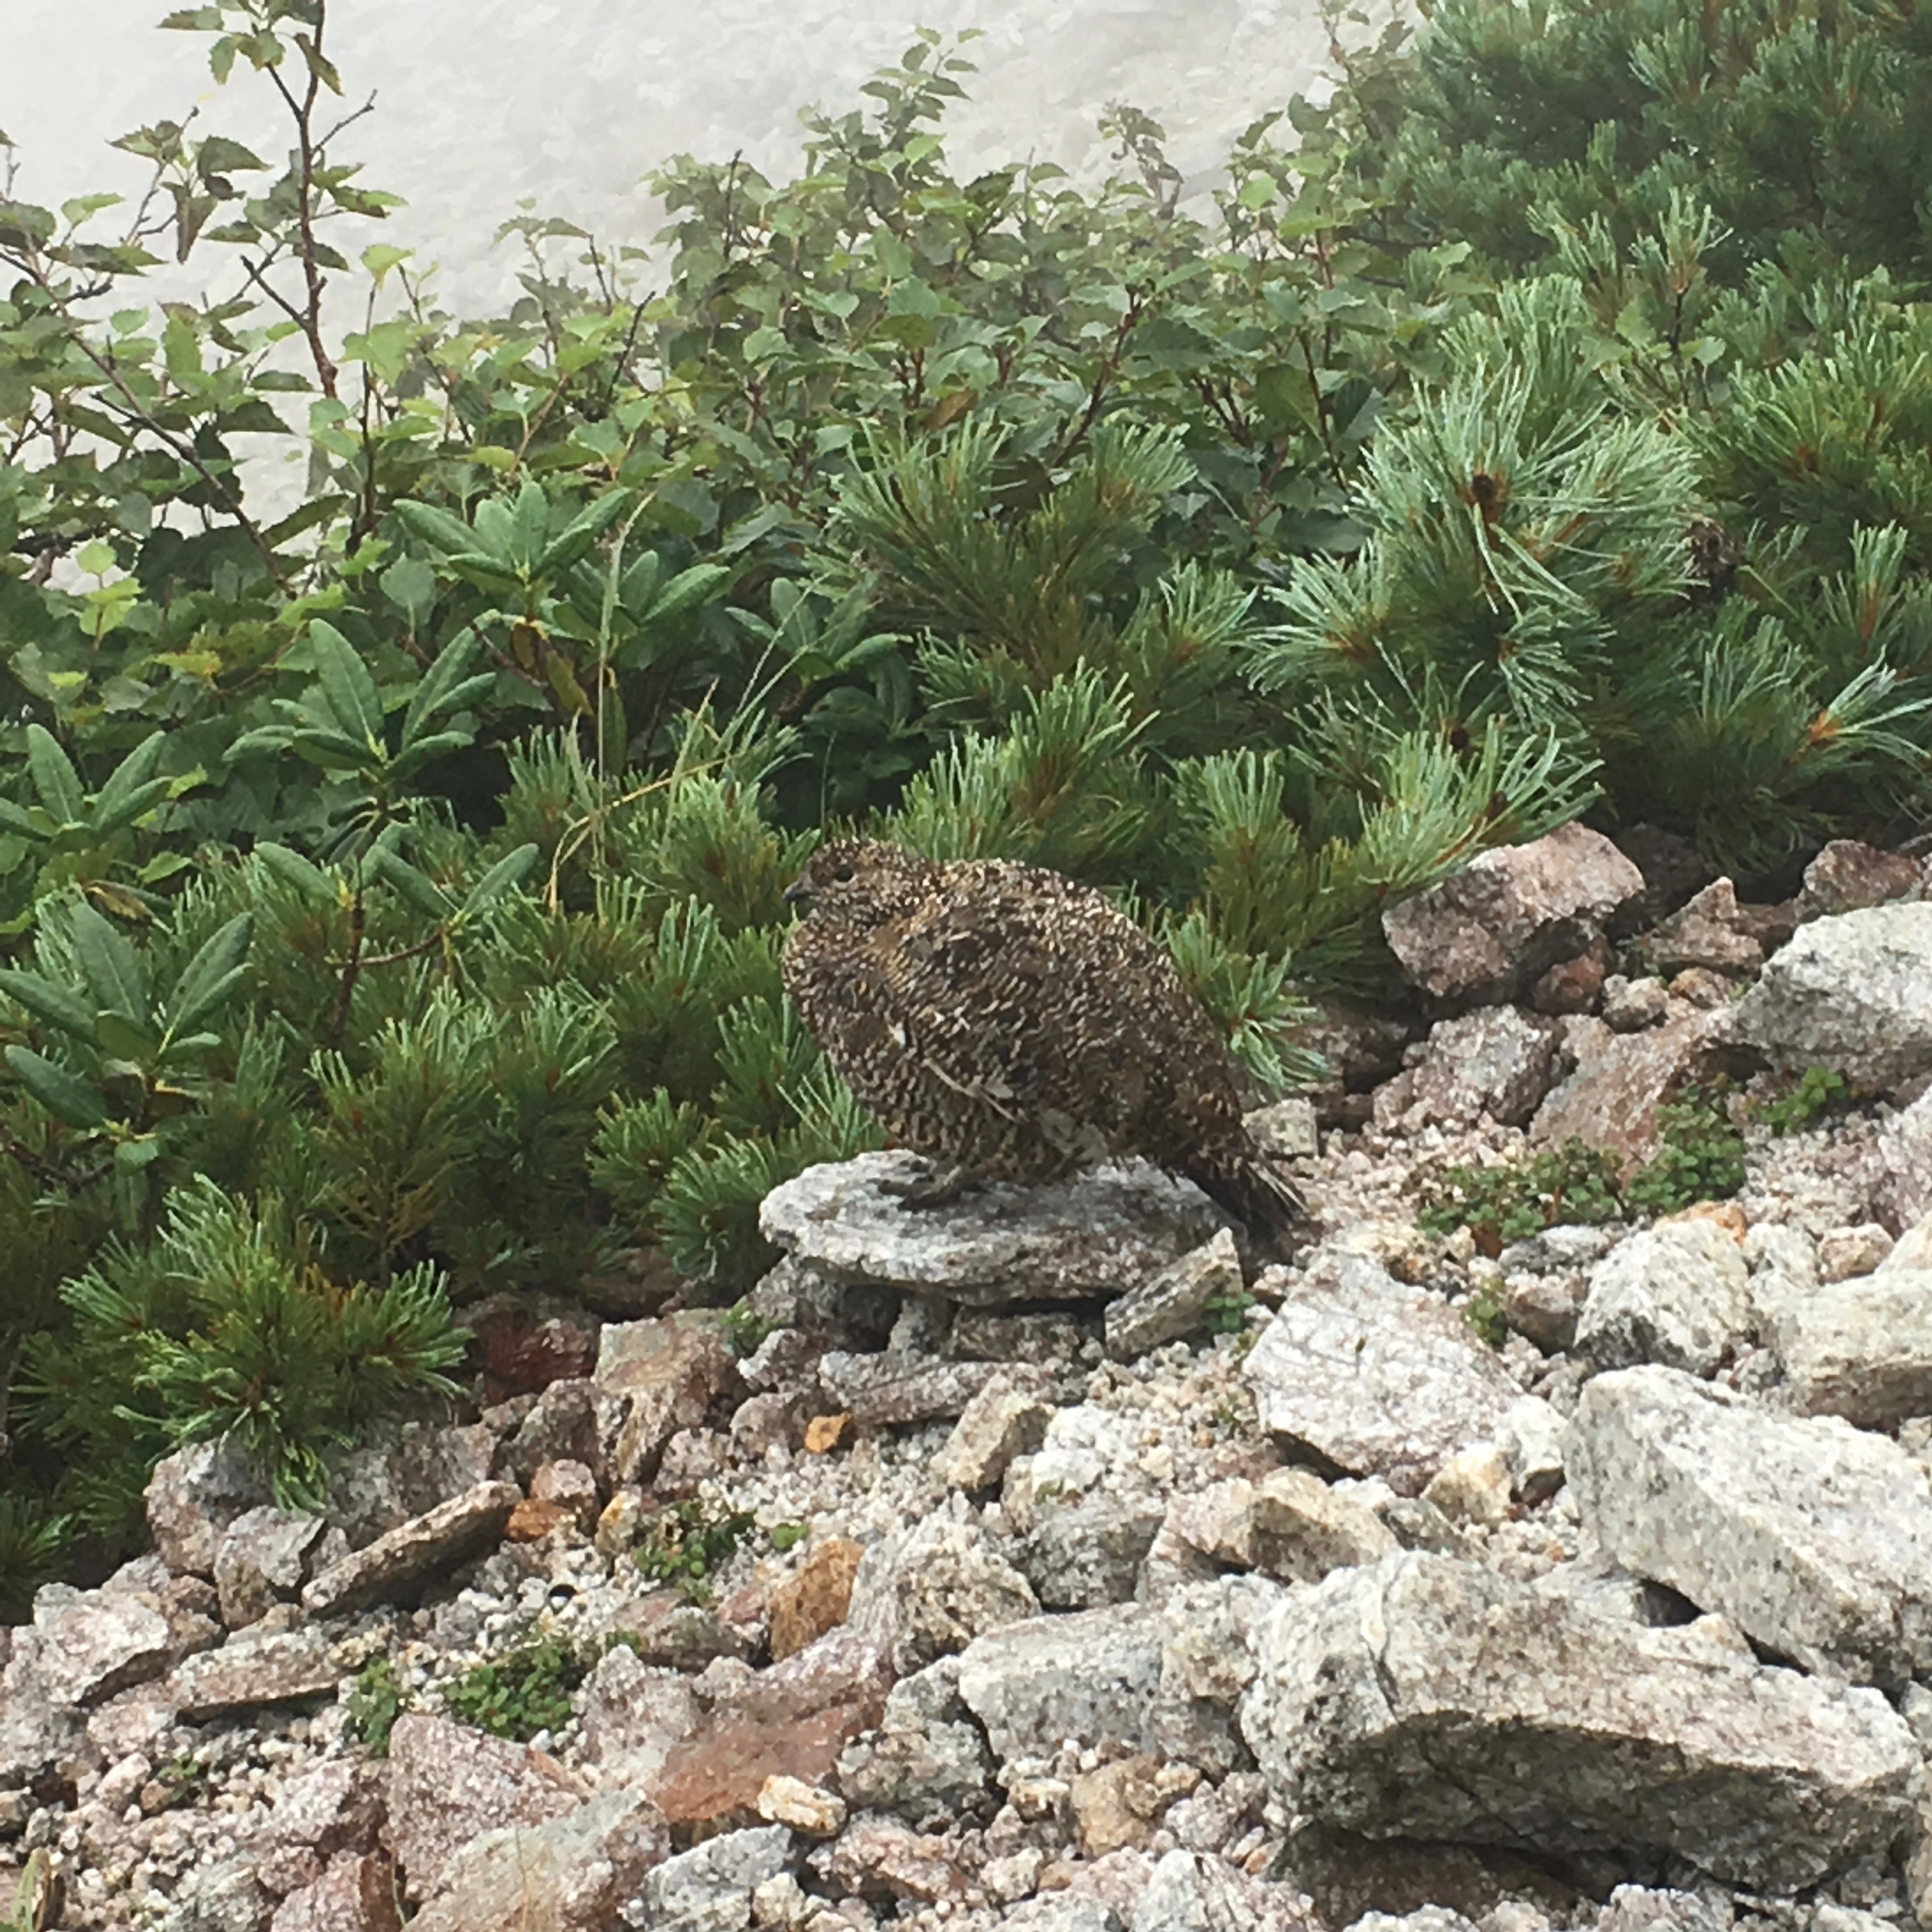
IMG_3838

Ptarmigan

IMG_3849.jpg

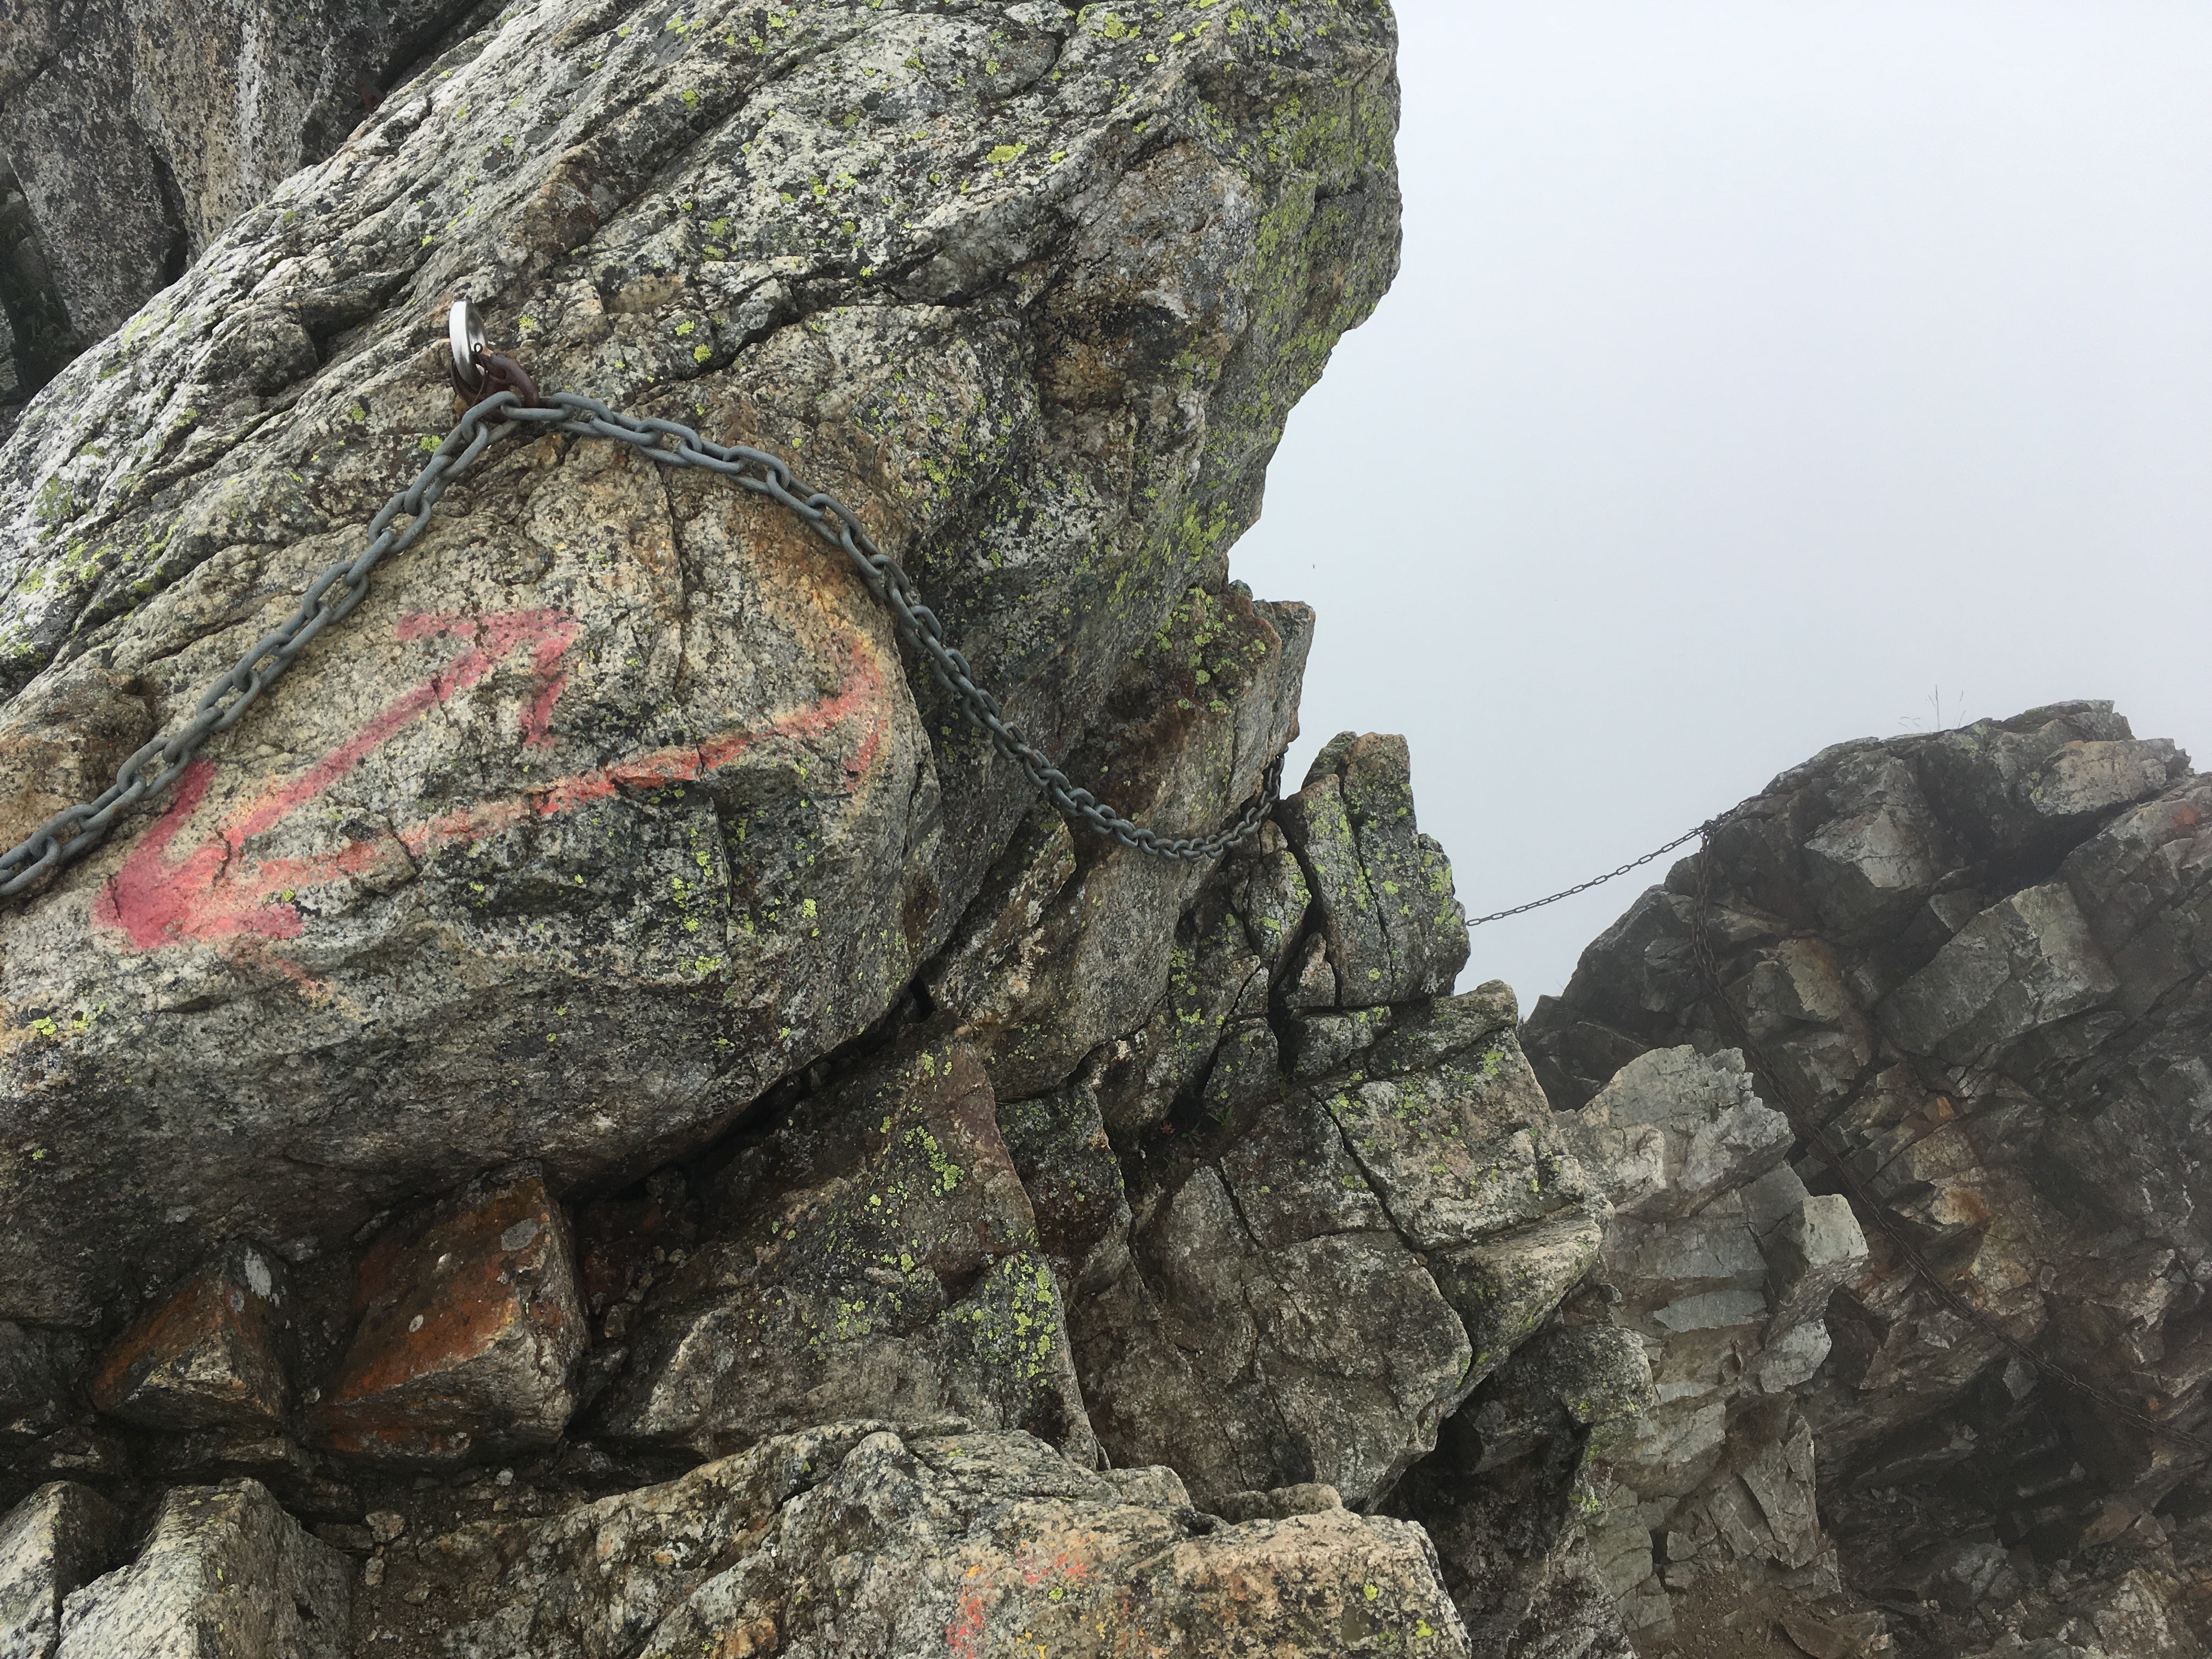
These chains will later make the cables at Half Dome a piece of cake

IMG_3856.jpg

“I think the trail goes that way?”

IMG_3859.jpg

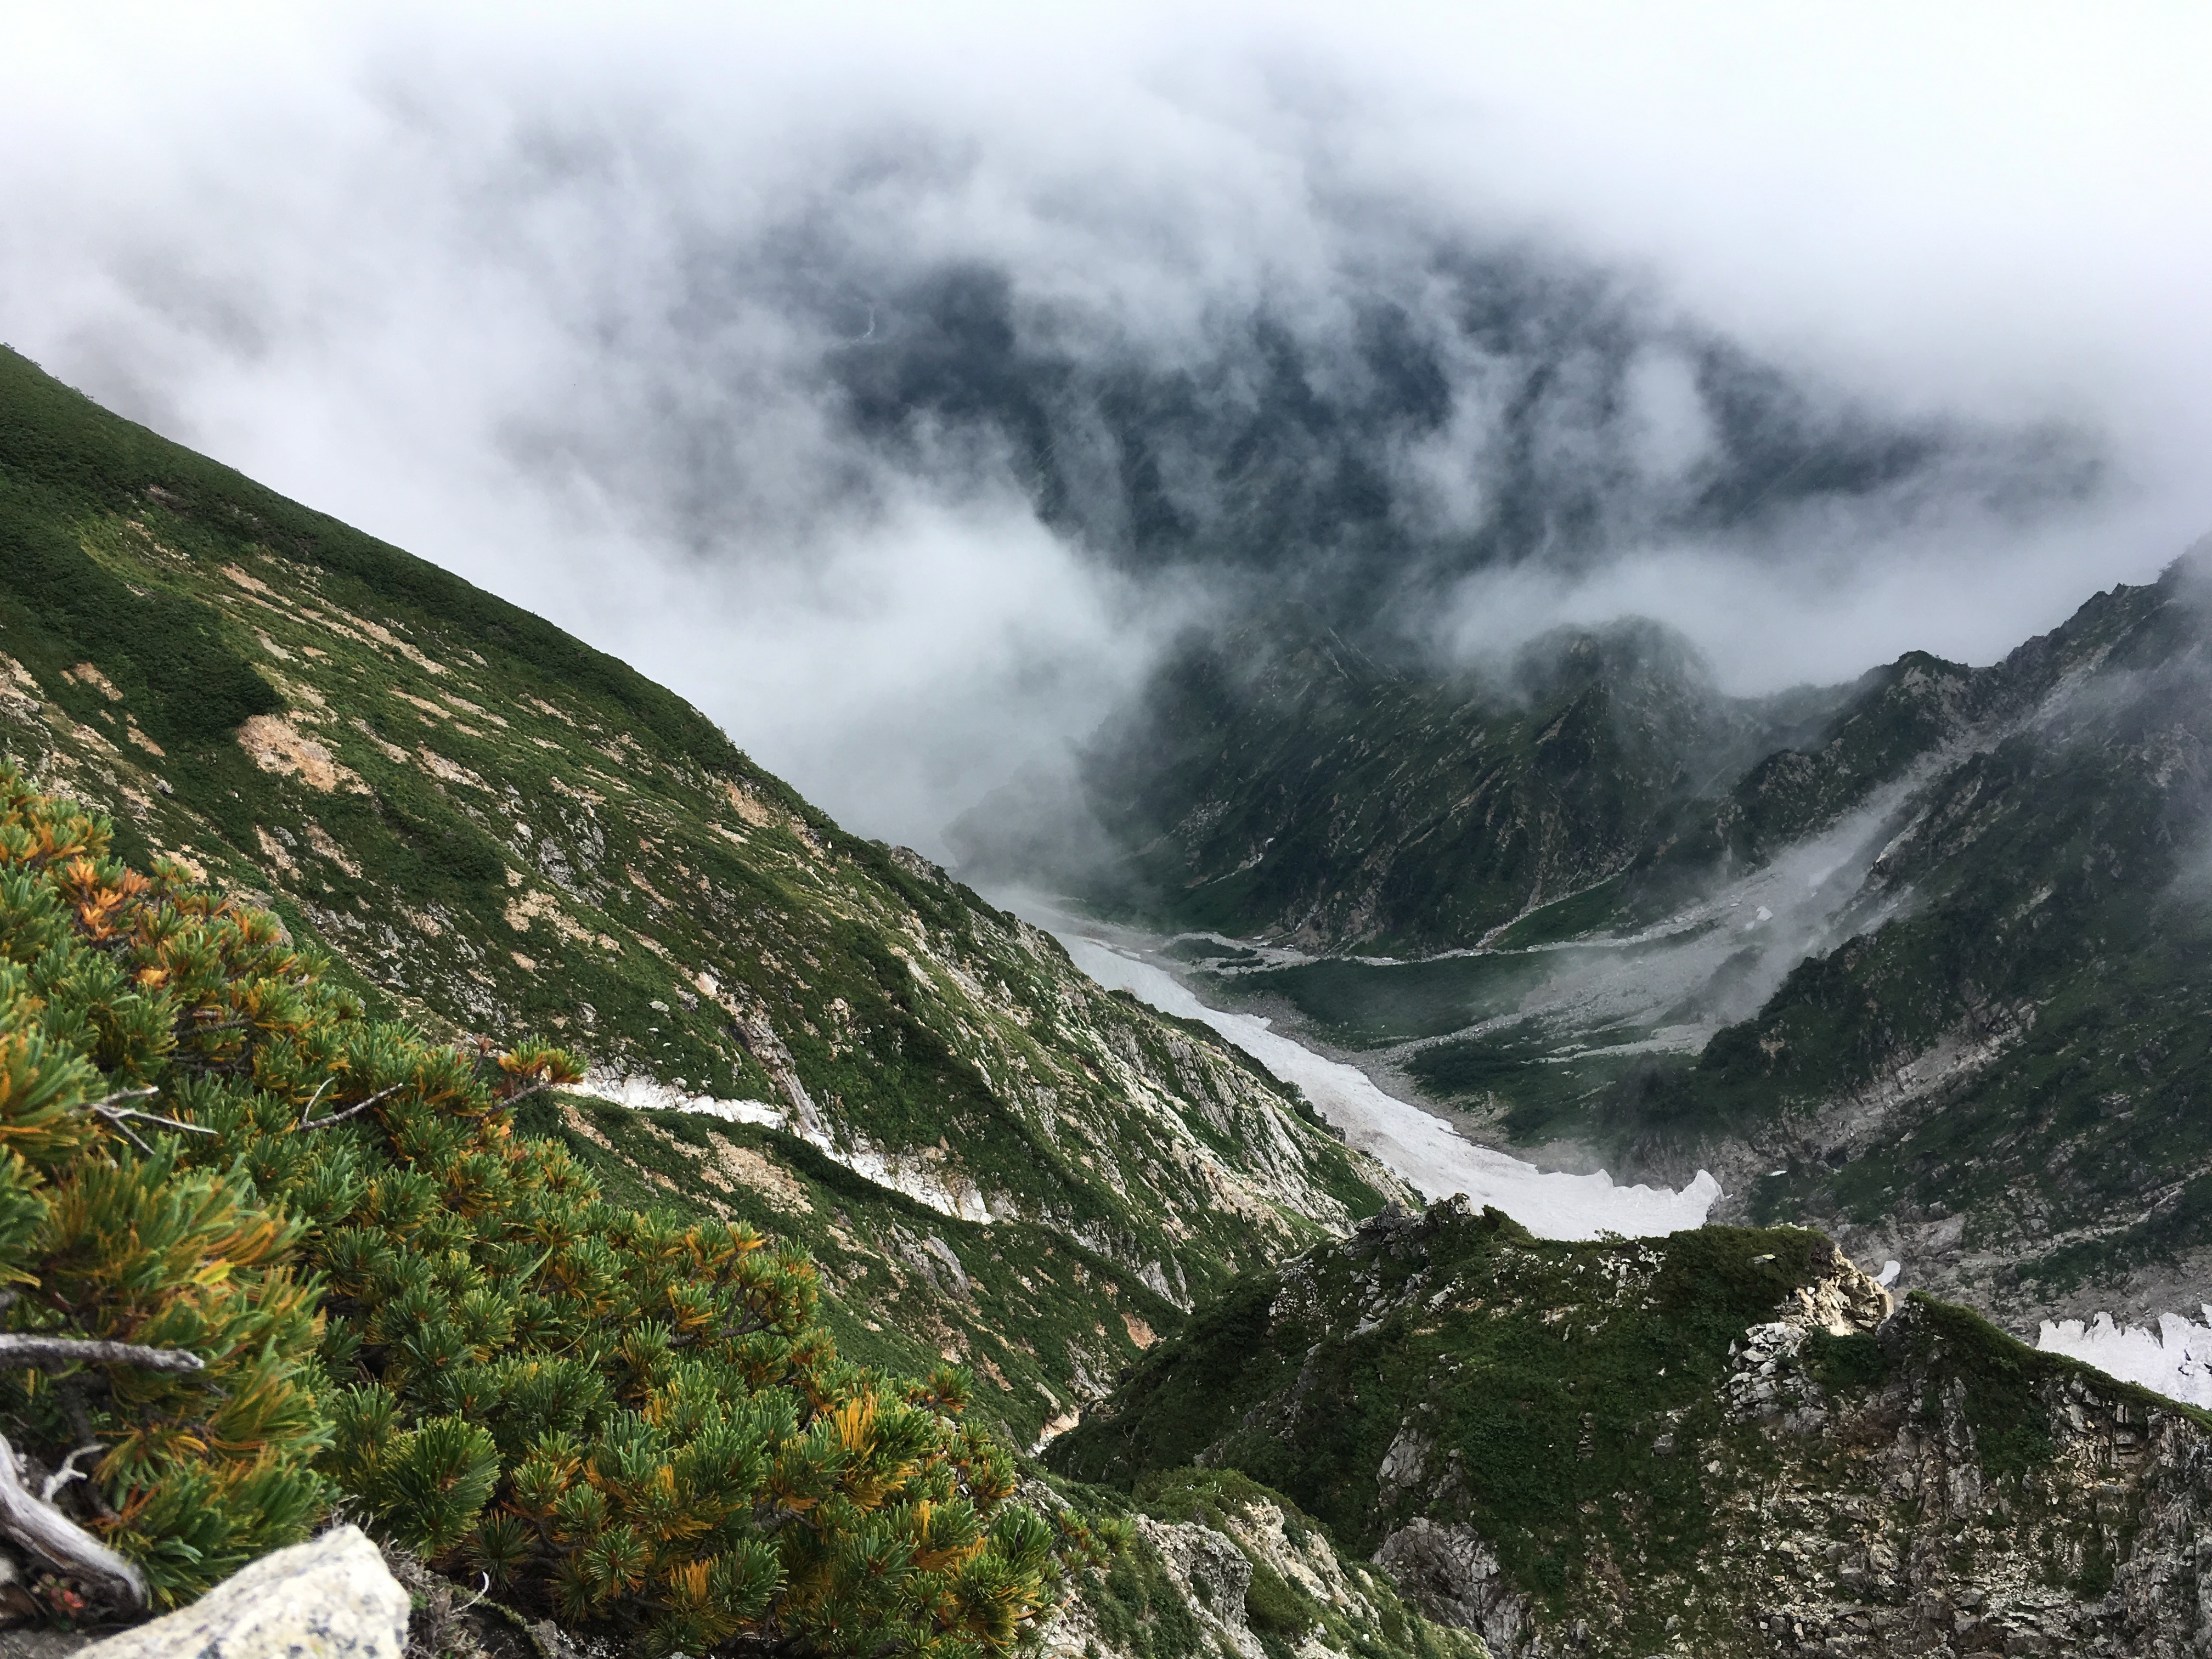
“Snow river” in the valley that will not melt through to the next snow season

IMG_3869

View south of Tengu no Kashira

IMG_3877.jpg

View north of Tengu no Kashira

I was pretty spent by the time I got to Tengu Hut. The clouds thinned and parted a bit and I quite successfully dried out my tent and aired out my feet over lunch at a picnic table in front of Tengu Hut.

IMG_3884.jpg

Lunch, tent drying, and water-getting at Tengu Hut

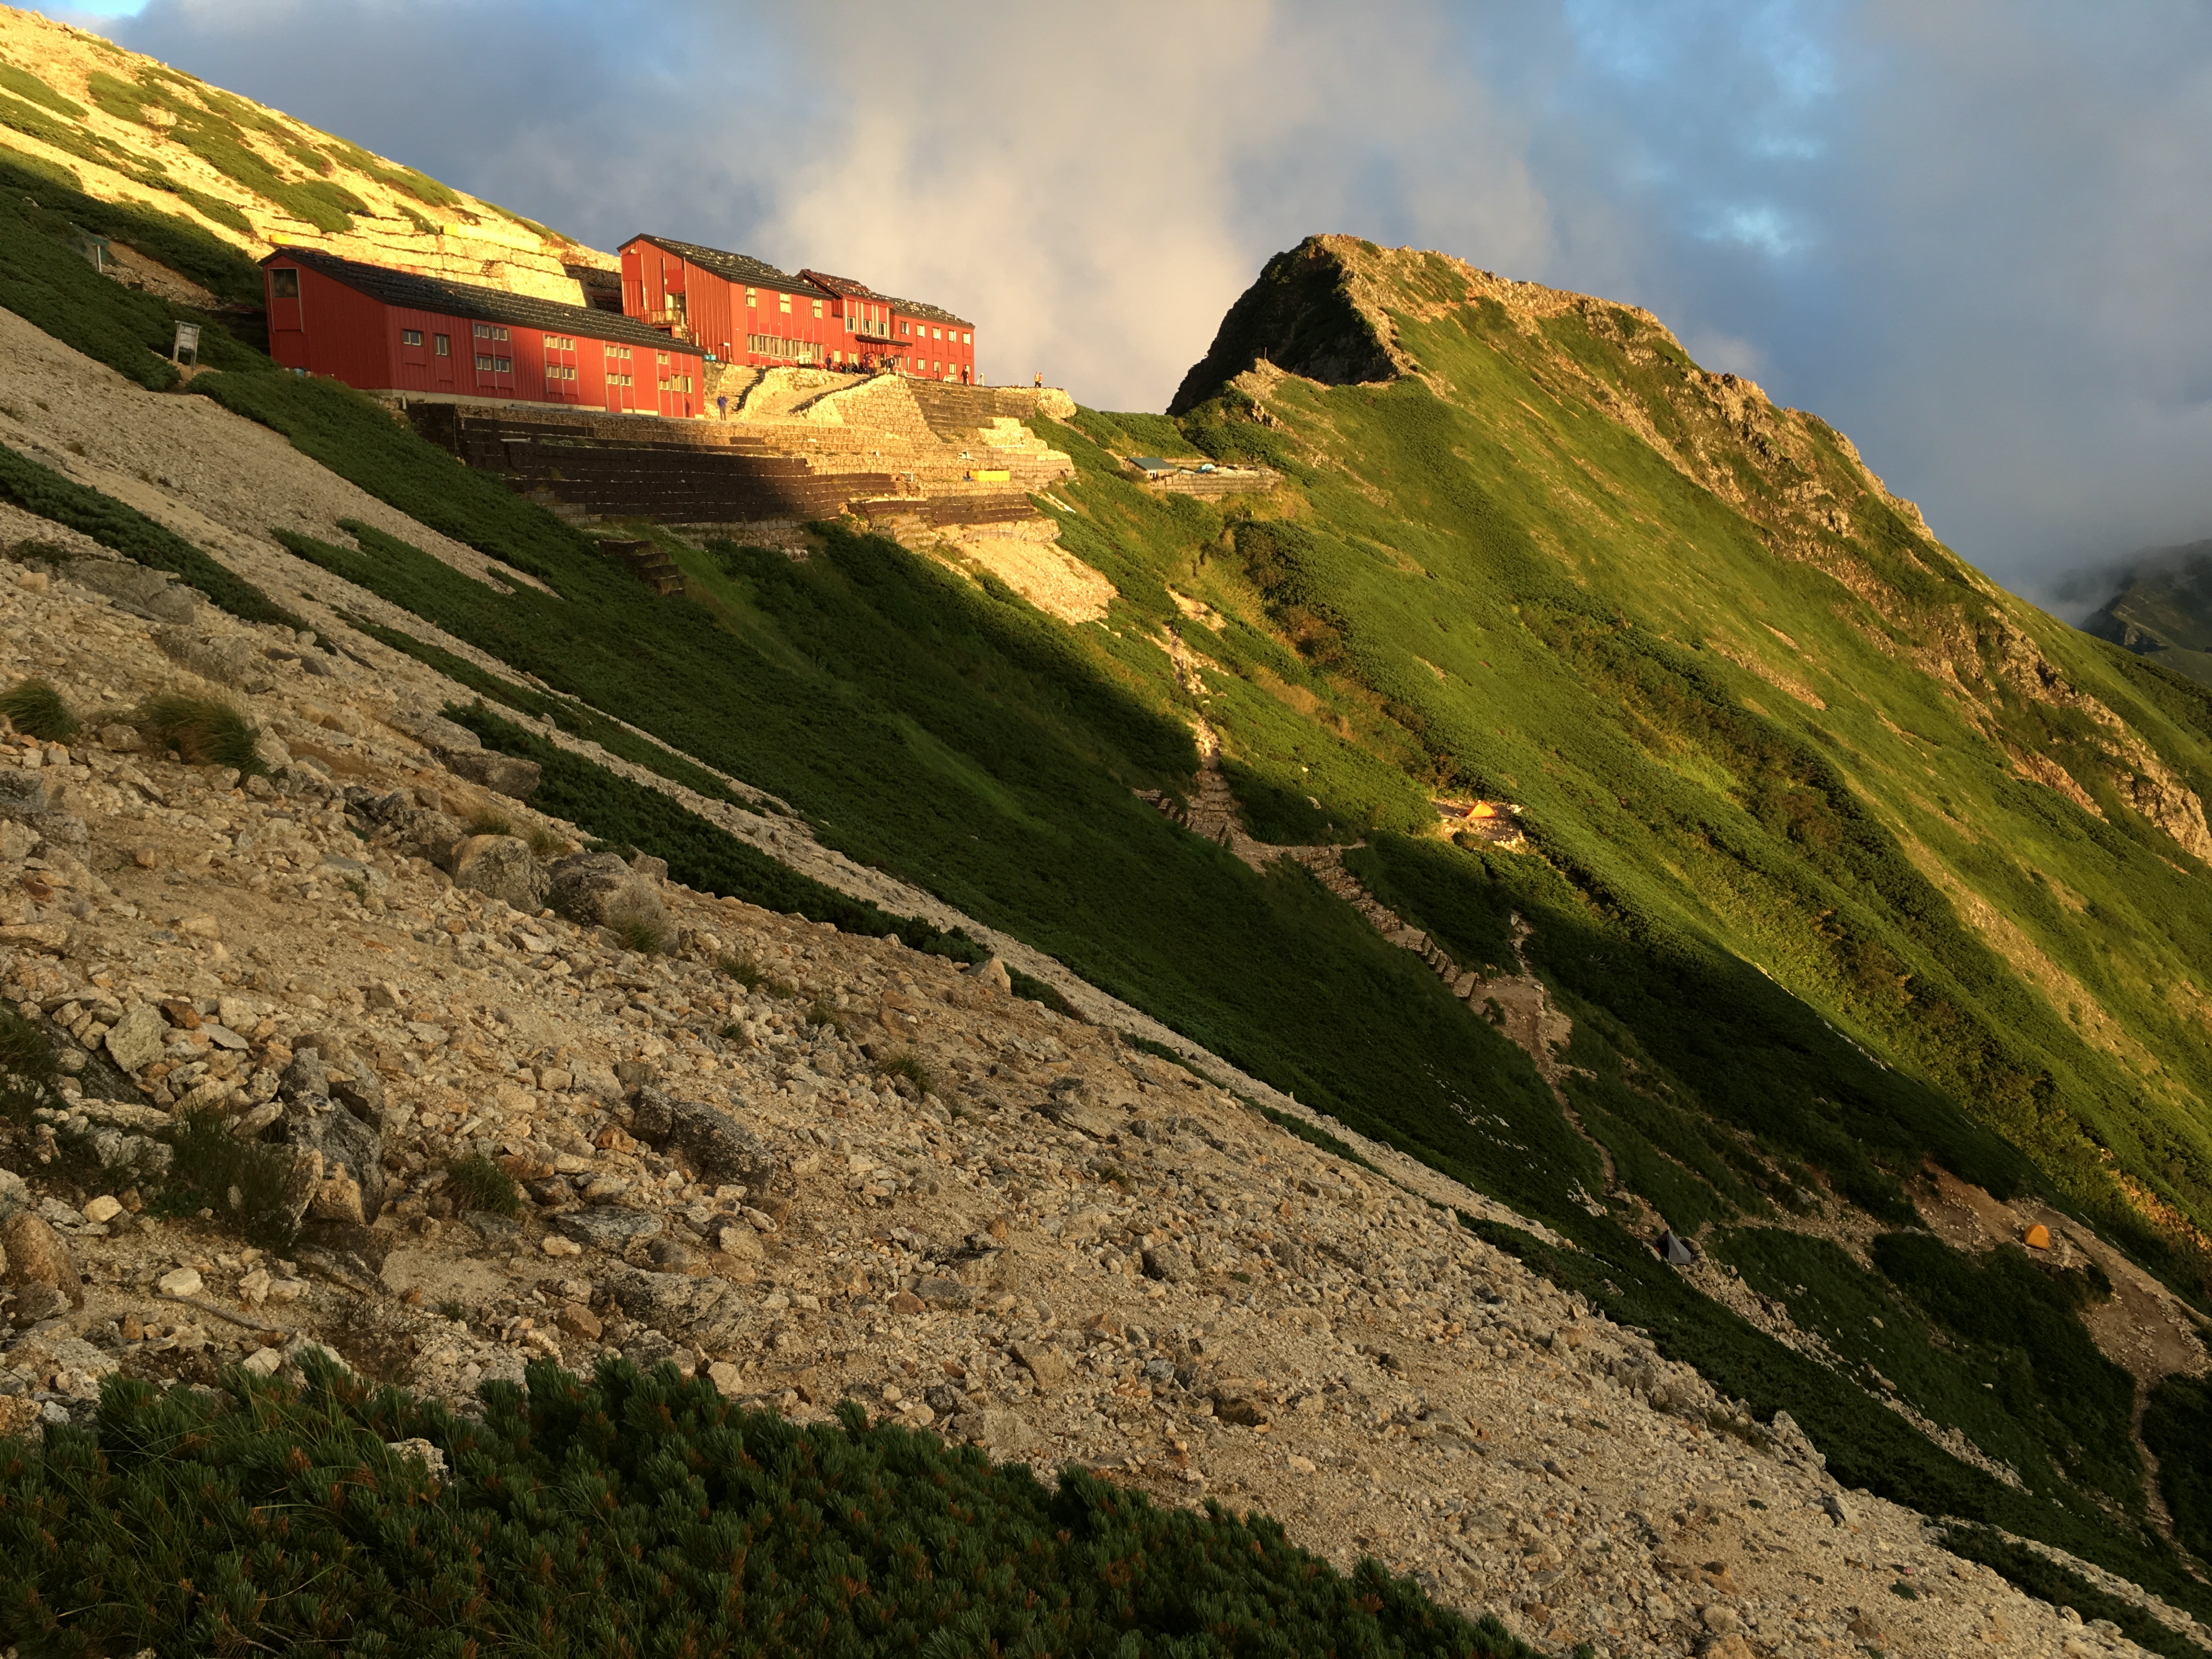
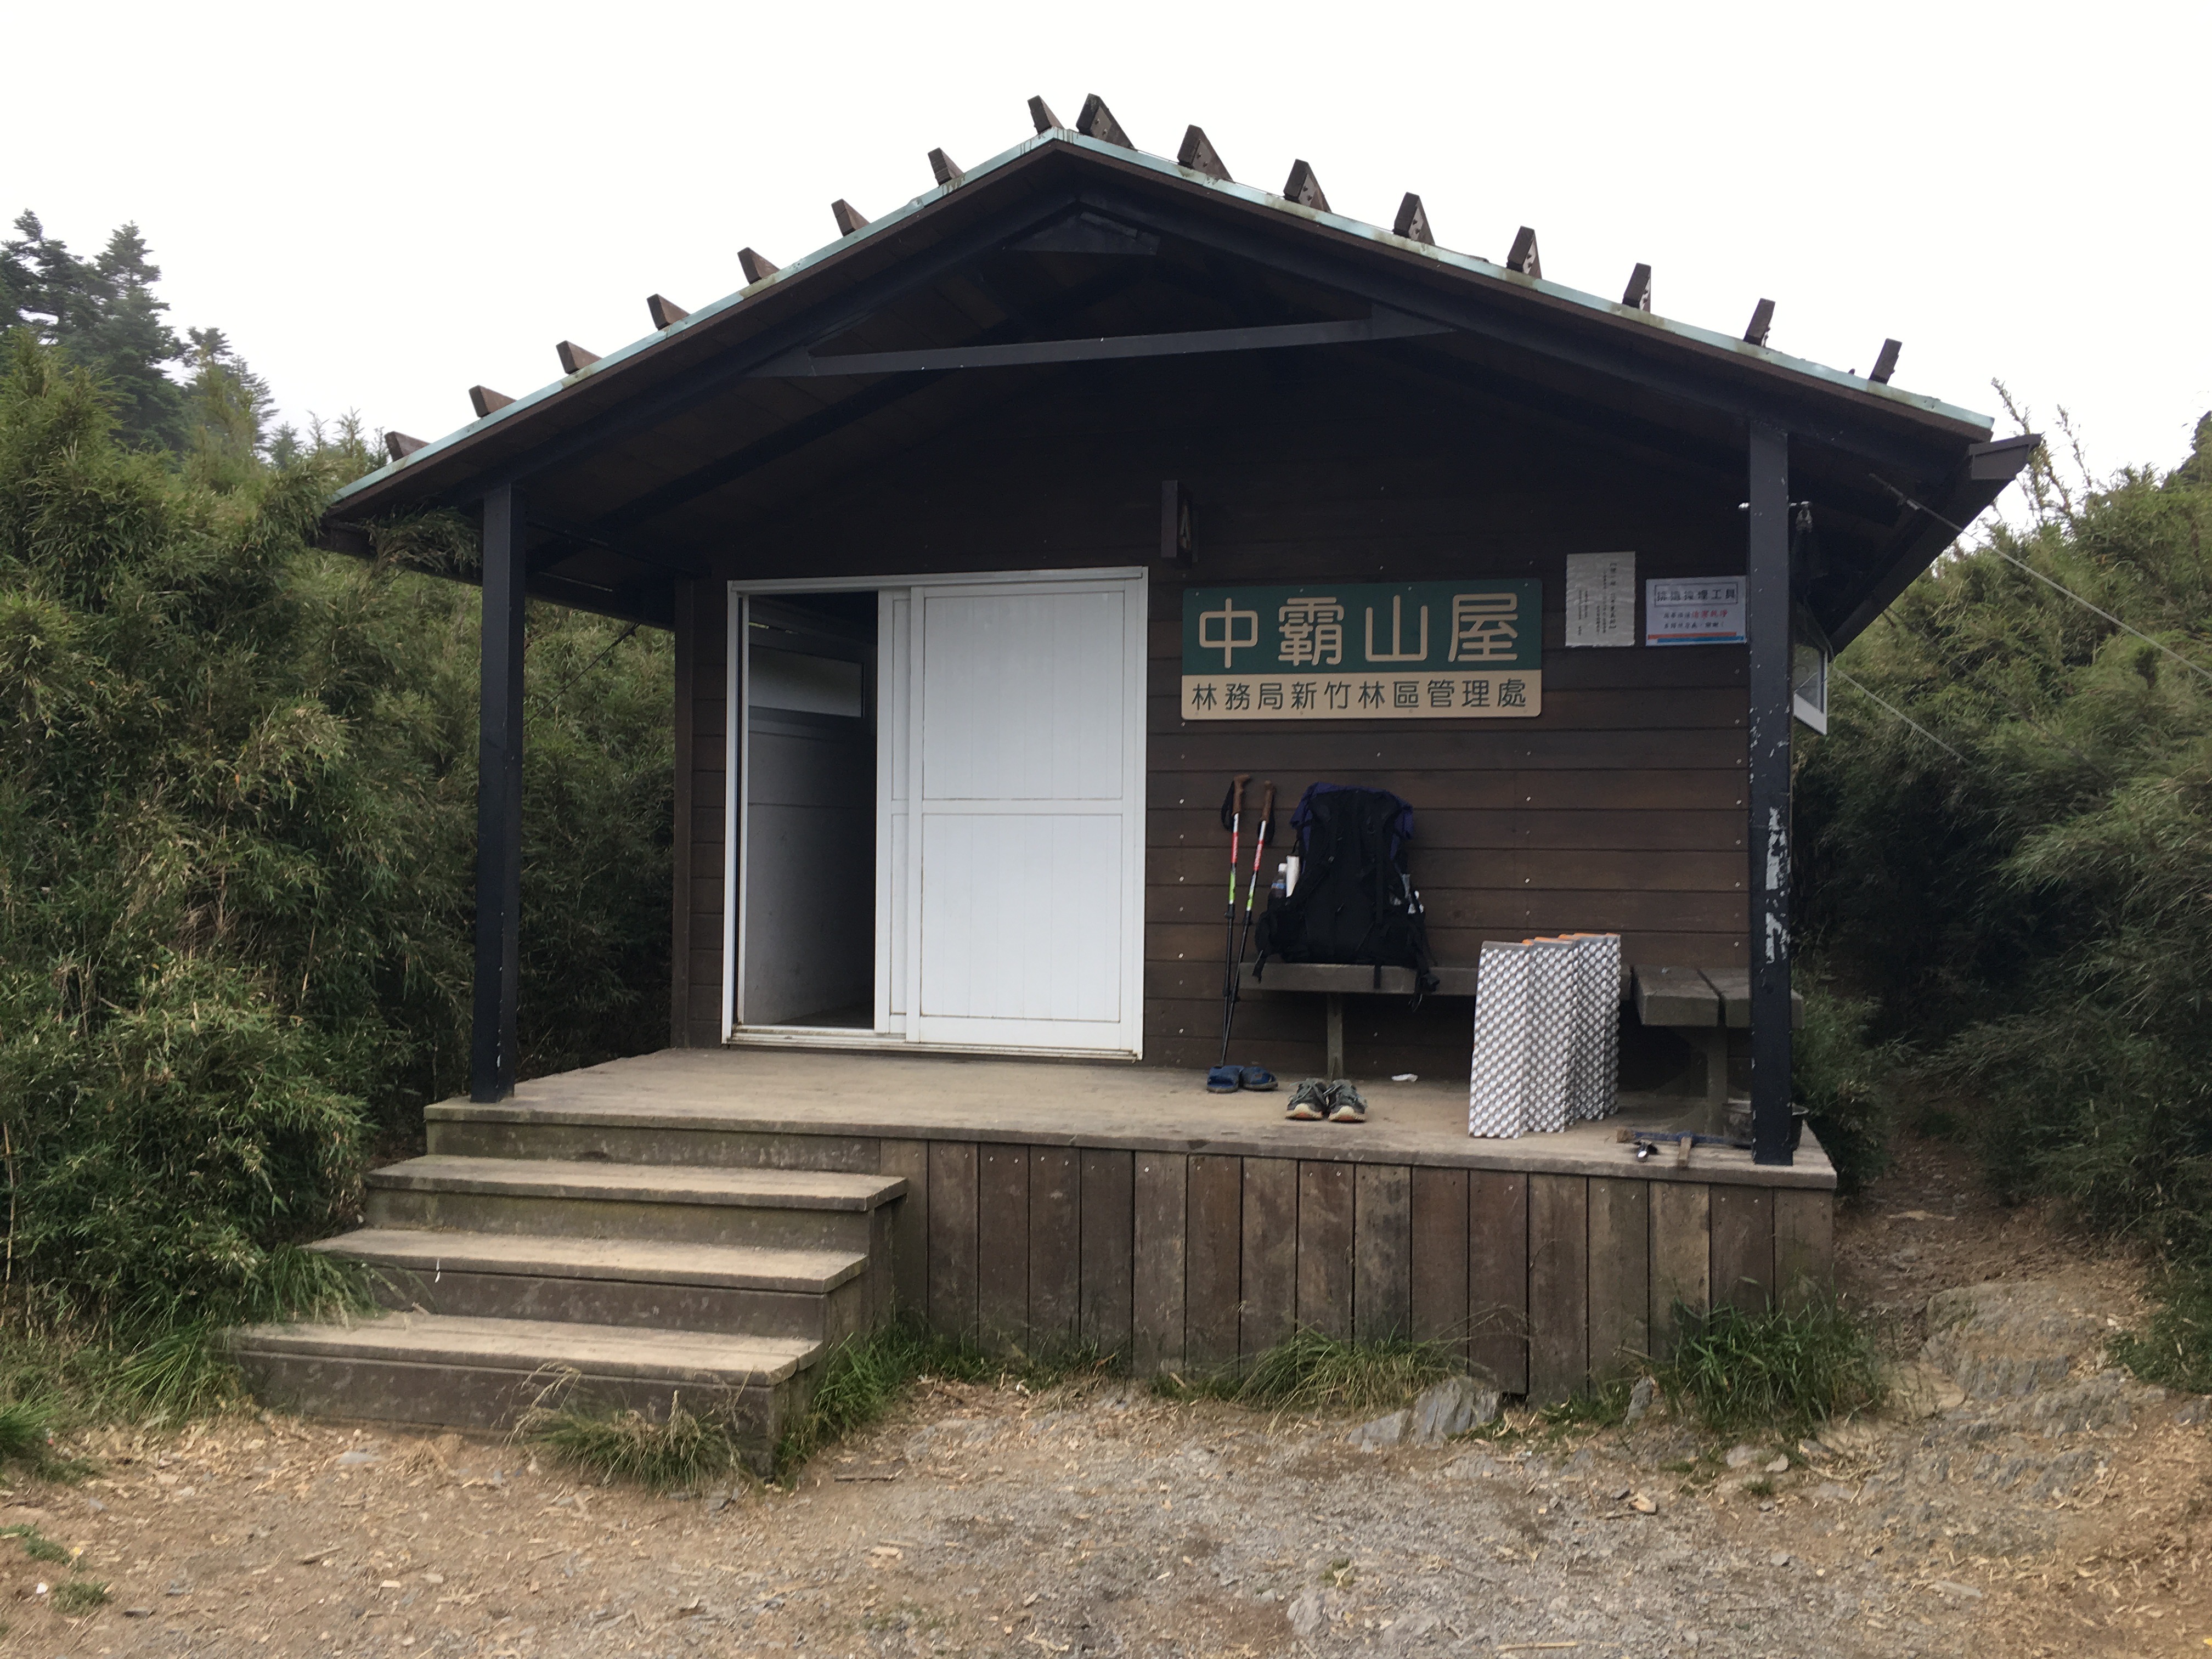
However, by the time I started back on the trail again, the mist had dropped again and there was no visibility as I crossed the small snowfield after Tengu Hut, making it a bit scary as I couldn’t see where I was going. Then, there was a climb up brilliant white marble (?) scree to the top of Hakuba-Yarigatake. Since there was still no visibility, I took the easy route around Sakushidake (杓子岳) instead of summiting another peak. Past the Hakuba saddle there were supposed to be alpine flower meadows, but I couldn’t really see anything. I finally spotted a sign for the municipal run Hakubadake Chojo Shukusha hut (白馬岳頂上宿舎), paid my 1000 yen to camp out back and warmed up in the restaurant.

Day 3: Friday, September 1

Hakubadake Chojo Shukusha –> Tsugaike Shisenen Ropeway Station (6km)

Sometime during the night, I pulled my Buff down over my eyes and ended up sleeping past sunrise again. It was the coldest night I’d spent so far in my tent and sleeping bag, and when I awoke I stuffed my hiking clothes inside my sleeping bag to warm them up and unzipped the mesh door of my tent to my heat up some breakfast in the vestibule of my tent while still sitting in my sleeping bag. It’s a brilliant blue sunny sky out. Darn it! I missed a beautiful sunrise. After eating, I zipped my tent back up and put on my now toasty warm hiking clothes. The sun was just beginning to warm my tent as well, as I pushed my pack out through the tent door, collapsed the tent and collected my tent stakes. The tent was pretty dry from the sunny morning, so I didn’t have to worry about drying it during the day.

IMG_3896.jpg

Breakfast

I made my way up to the top of Mt. Shirouma. There is a another huge hut right there! Yesterday, I couldn’t see anything. This is why I like overnight hiking: you get two chances to see stuff. At Mt. Karamatsu, the night before, I had a beautiful sunset, but no view in the morning in the morning. Last night, there I couldn’t see anything when I arrived at the campsite, but this morning there is not a cloud in the sky.

Behind the privately run Hakuba Sanso hut near the peak, there was a spot on the ground that marked each of the landmarks in the distance. Looking southwest, I could see Yatsugatake. Unfortunately, there was no Fuji view that morning. Toward the south, I saw Shakushi and Hakuba-Yari peaks which I crossed yesterday. In the distance, I could see Yarigatake and Mt. Hotaka, and closer Mt. Tsurugi; toward the west, Toyama city and Noto penninsula surrounding Toyama Bay, further west, the Sea of Japan.

IMG_3904.jpg

Hakubadake Chojo Shukusha Hut

IMG_3907.jpg

View from Hakuba Sanso Hut

IMG_3908.jpg

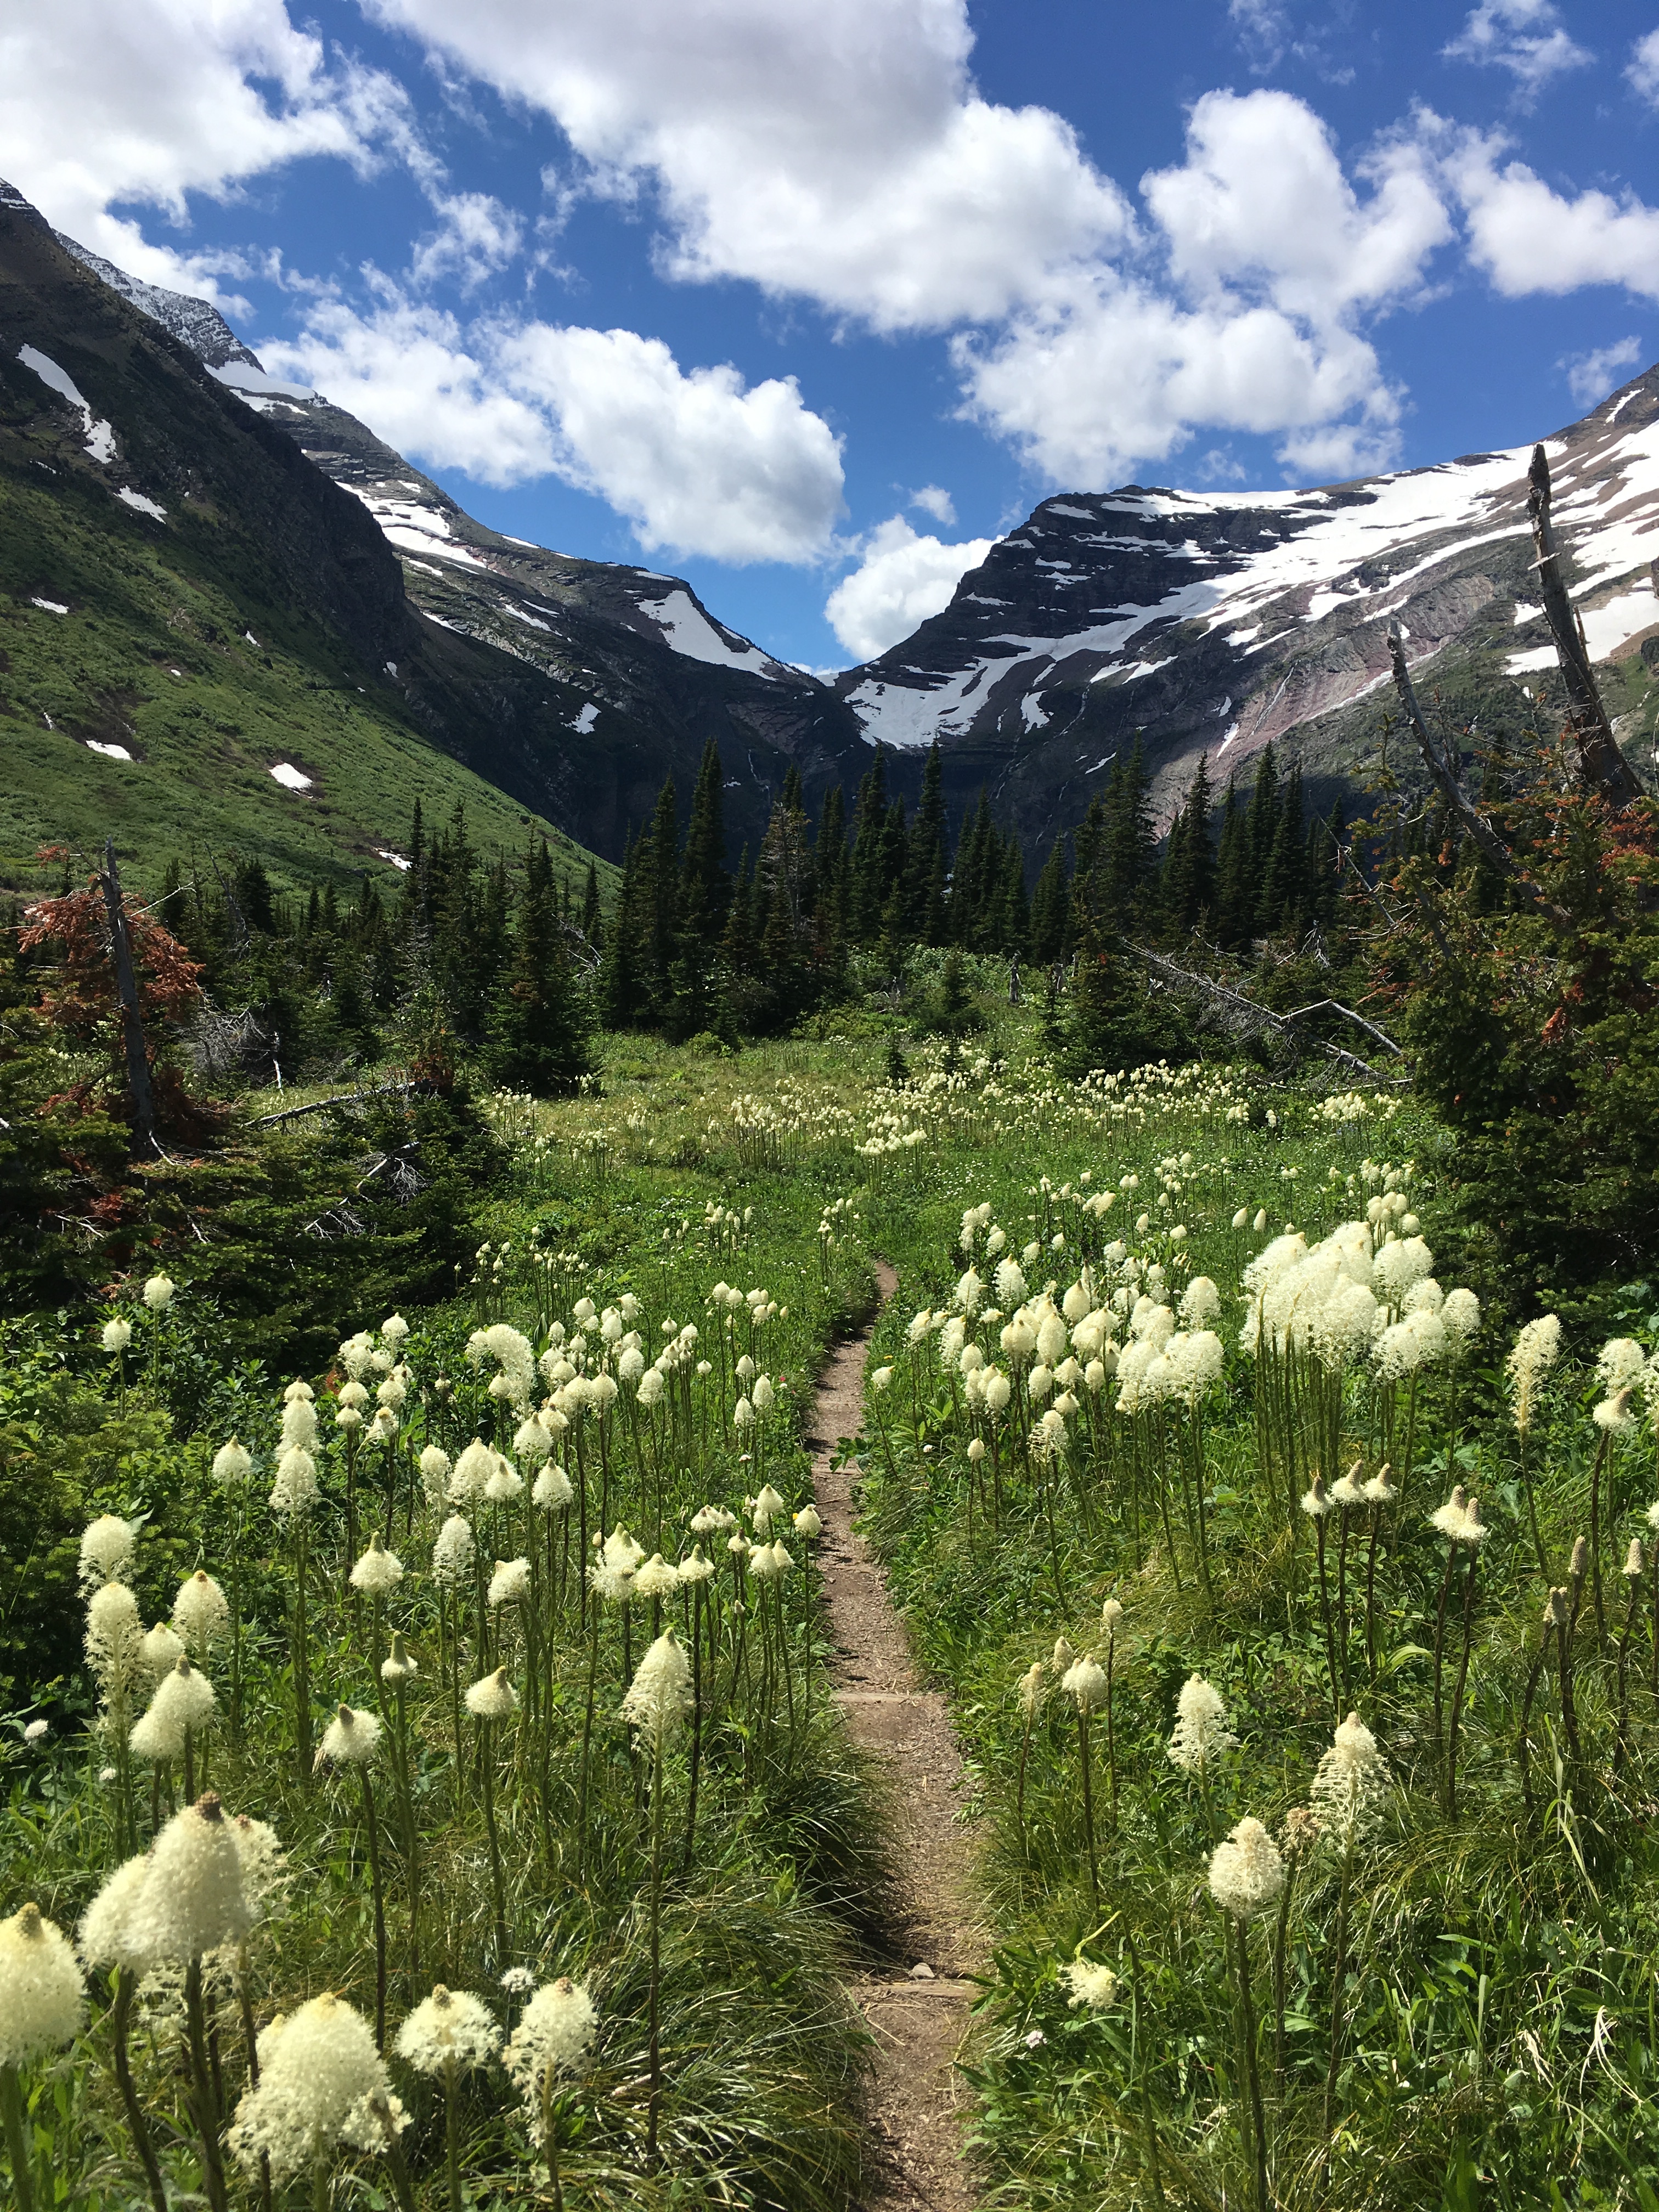
There was more of this view in full 360 degrees from the top of Mt. Shirouma. Toward the northeast was the mellow ridge leading to Mt. Korenge that I would walk that day. The ridge rising above the clouds looked like the backbone of a sleeping dragon. And then it sank beneath the rising clouds.

IMG_3913.jpg

Dragon’s backbone of Mt. Korenge (View from summit of Mt. Shirouma)

After an initial steep decent, it was an easy and flat walk on crushed rock the size of large gravel. I passed by large cairns lurking mysteriously in the fog. The white rock changed to red, indicating iron content. My map showed a side trail leading on to the site of an old refinery and mine office.

The rocks on the slope up Mt. Korenge tinkled like glass when I walked over them. I picked one up and it felt lighter than it looked. An almost pumice. Atop Mt. Korenge, I took a break for a second breakfast of coffee, nuts and salami. I packed out an abandoned tupperware that obviously had held someone’s lunch in it. (It was a nice tupperware, but I was afraid to open it to wash it out and ended up just throwing it away when I got down to the gondola station at Tsugaike.)

IMG_3938.jpg

Mt. Shirouma behind me

At Hakuba Oike Hut, I picked up some water (free!) and admired the flat campground looking onto an alpine meadow. Should be pretty on a clear day. Where is the pond? I followed the sign for Tsugaike to the other side of the hut and see the edge of the water in the mist and the trail going around the pond. After following the trail for the while, I think, this is a huge pond! More like a lake? I could only see the edge of the clear green water but it feels like the trail has been going around it for quite a while. The trail becomes some pretty fun rock hopping with occasional X and O symbols directing the way. It was like this all the way to the top of Mt. Norikura, which is not much of a peak but the high point on a flat mountain top. (No use hiking here to snowboard down, you’d just be stuck!) Finally, the sky opens just briefly enough for me to see the whole Hakuba Oike pond and take a photo.

IMG_3958.jpg

Hakuba Oike pond

There was more rock hopping until I reached a small snowfield, and after the snowfield the rock hopping got quite a bit more challenging. Climbing down big boulders with a heavy pack on is much more difficult than with only a day pack, because you don’t want to destroy your knees and ankles from impact. Finally, finally, I reached the raised wooden platforms set over a marsh I’d been spying from up above.

IMG_3969.jpg

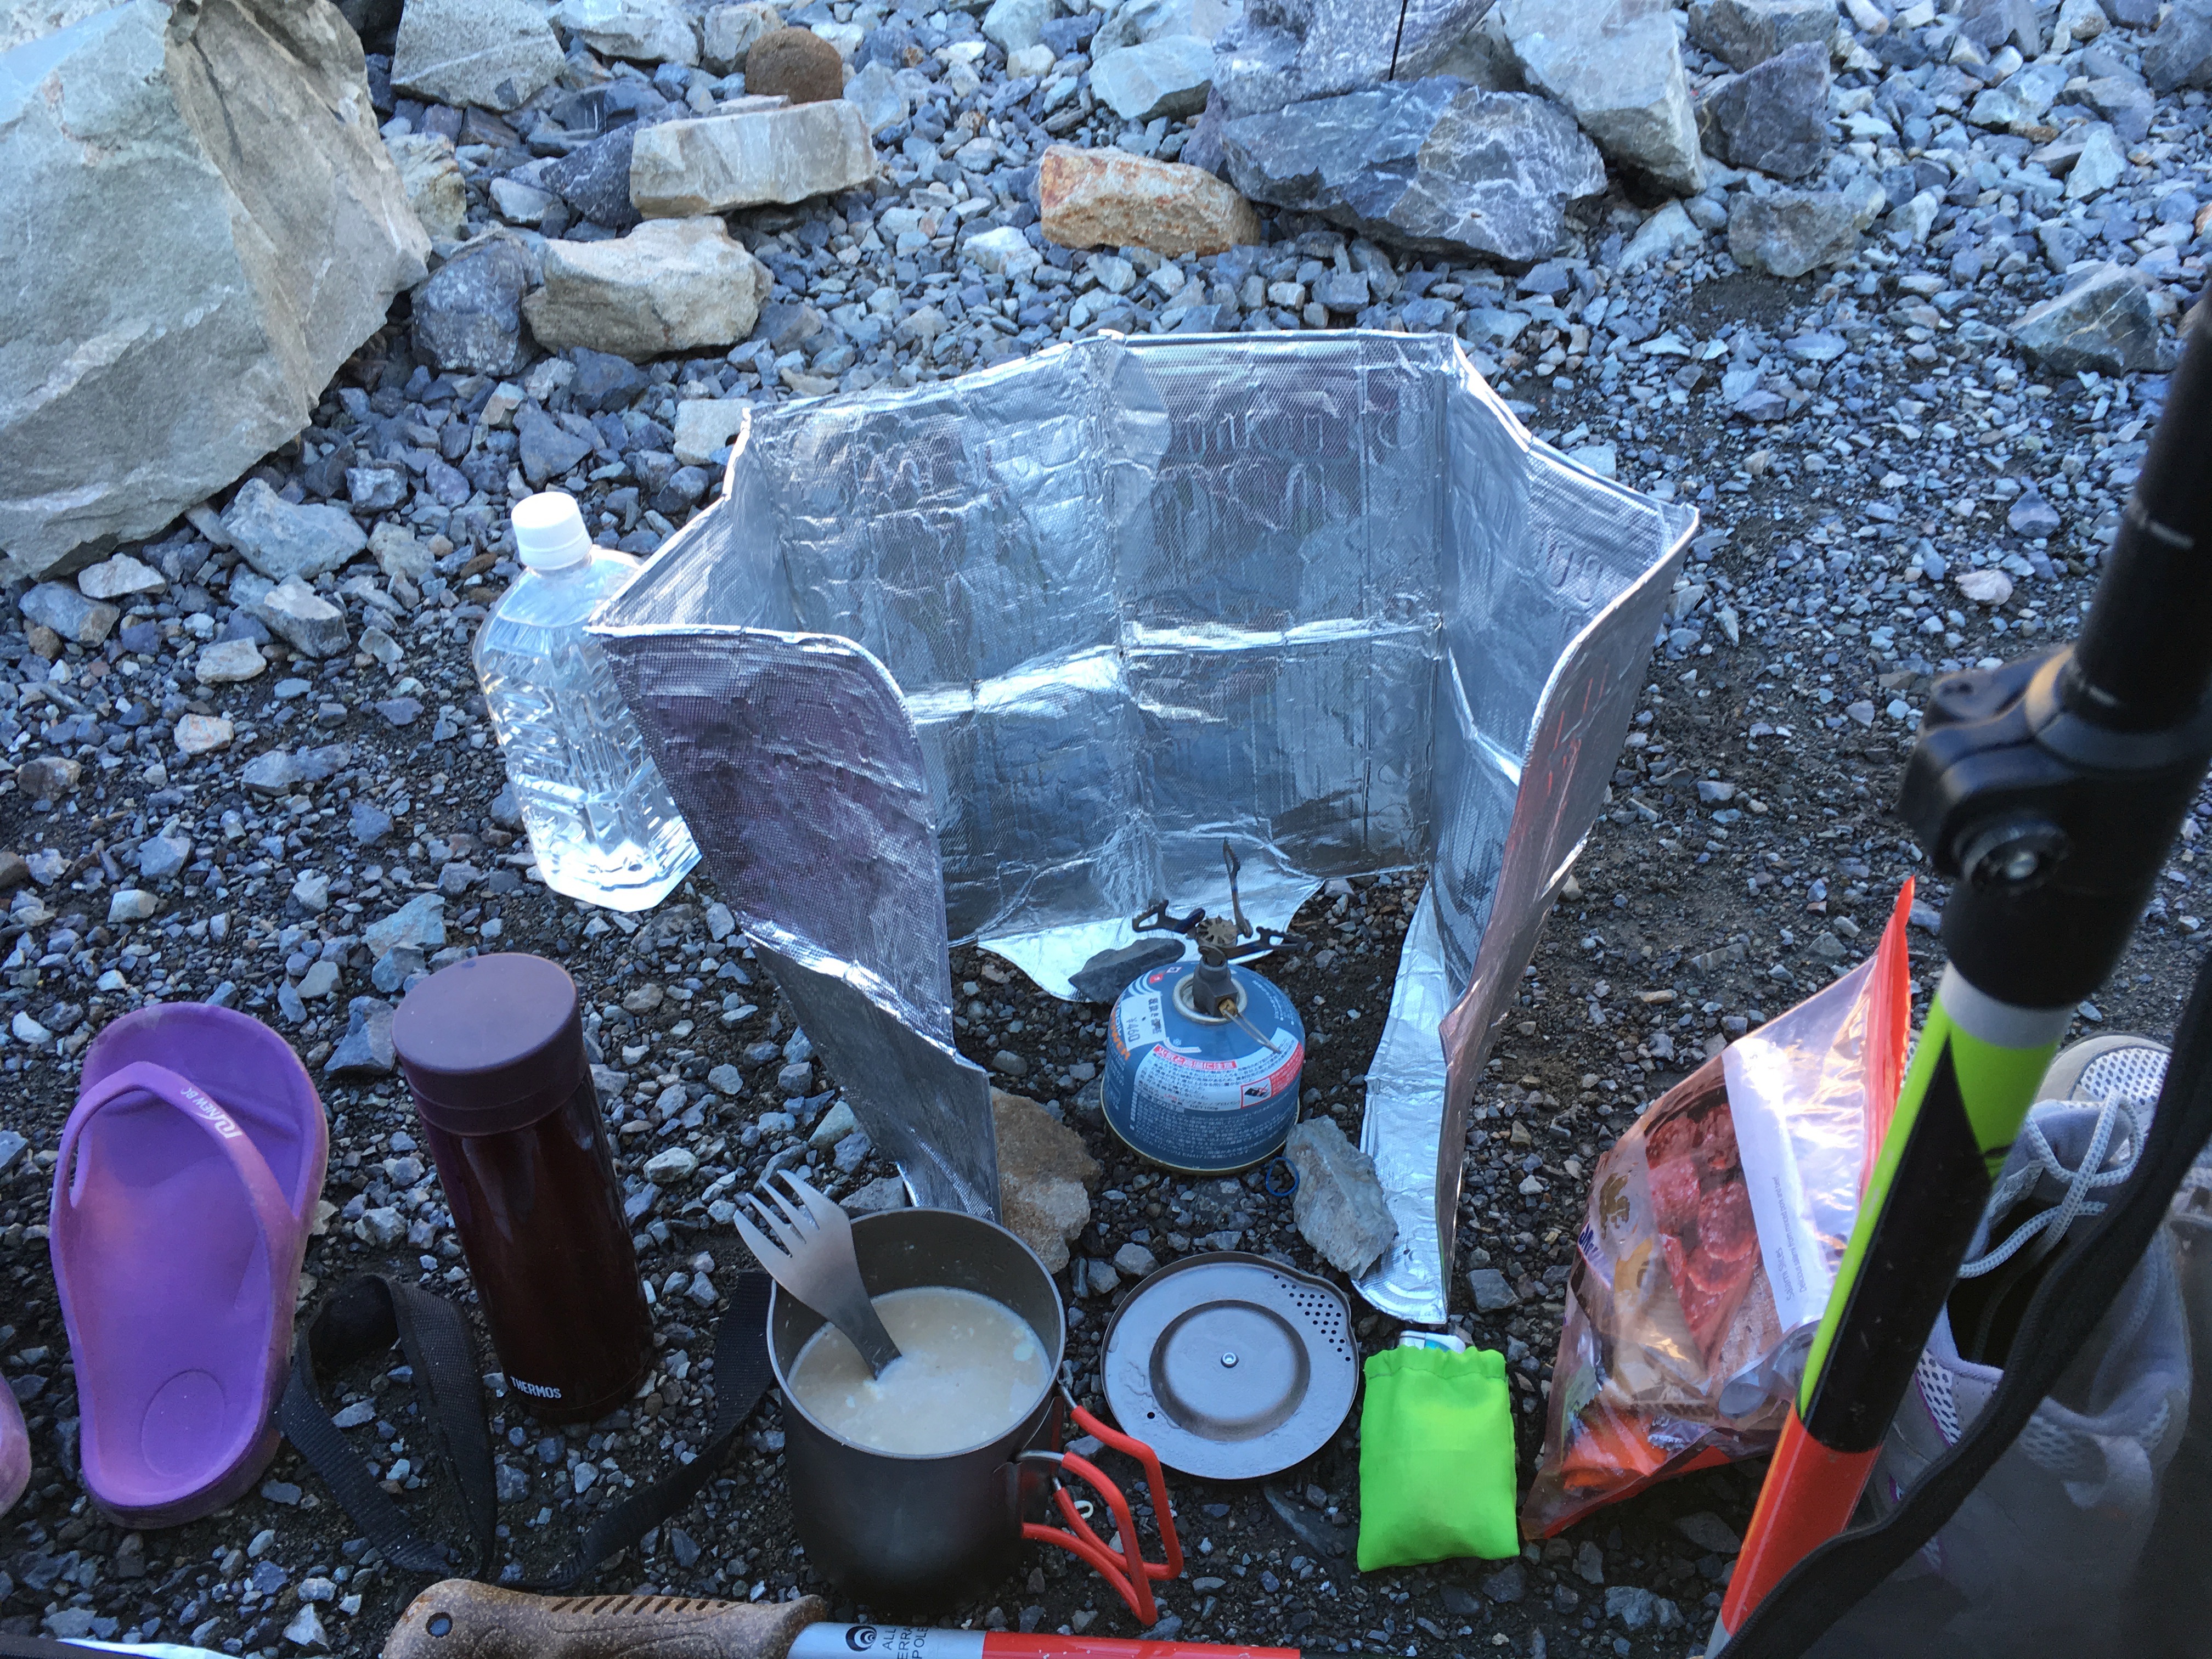
The wooden walkway was being replaced, and there were pallets of new wood to be installed off to the sides of the pathway. I hopped over onto one of the pallets and made myself comfortable. Since I didn’t really pack lunch for this last day, I end up cooking half a pack of quick cook pasta and a cube of kimchi jigae soup, since that’s what I have left. Yes, I have become one of those Japanese hikers that cooks hot lunch!

IMG_3975.jpg

Lunch break!

As I was packing up after my lunch break, one of the workmen made his way over and asked me when I was heading down. He was looking for someone to walk down with. I’m a little weirded out initially, but he started telling me about his job. He and his team have been up at Tsugaike since July living in two trailers by the top of the Tsugaike ropeway. His company also did the wooden walkways at Happo-Ike, which I passed the first day of my hike, as well as at Mt. Naeba and Mt. Hotaka. I commented that it was a nice job to be able to work in all those beautiful places. He replied that he only comes to the mountains to work, his hobby is golf. He pointed out some bear scat on the trail. I haven’t seen a bear while in Japan yet!

We ran into a hiker testing the water at a spring. This water is safe, he called out to us, so we stopped for a drink and a chat. This typical retiree hiker explained he thought it would be boring to just set a goal of climbing the Hyakumeisan, so his personal goal is to test all the water sources on the Hyakumeisan. He says that so far, all the water sources he’s tested have been potable. Good to know right?

IMG_3978.jpg

Guided by someone who’s walked up and down the trail everyday for months, I made it down to Tsugaike ropeway safely, with no injuries and finished my hike in good time. After getting to the bottom of Tsugaike Ski Resort, I consulted the bus schedule. I could’ve either hopped a bus direct from Tsugaike back to Tokyo, but I ended up busing back to Happo Bus Terminal where busses are more frequent so I could catch an onsen before returning to Tokyo.

IMG_3980

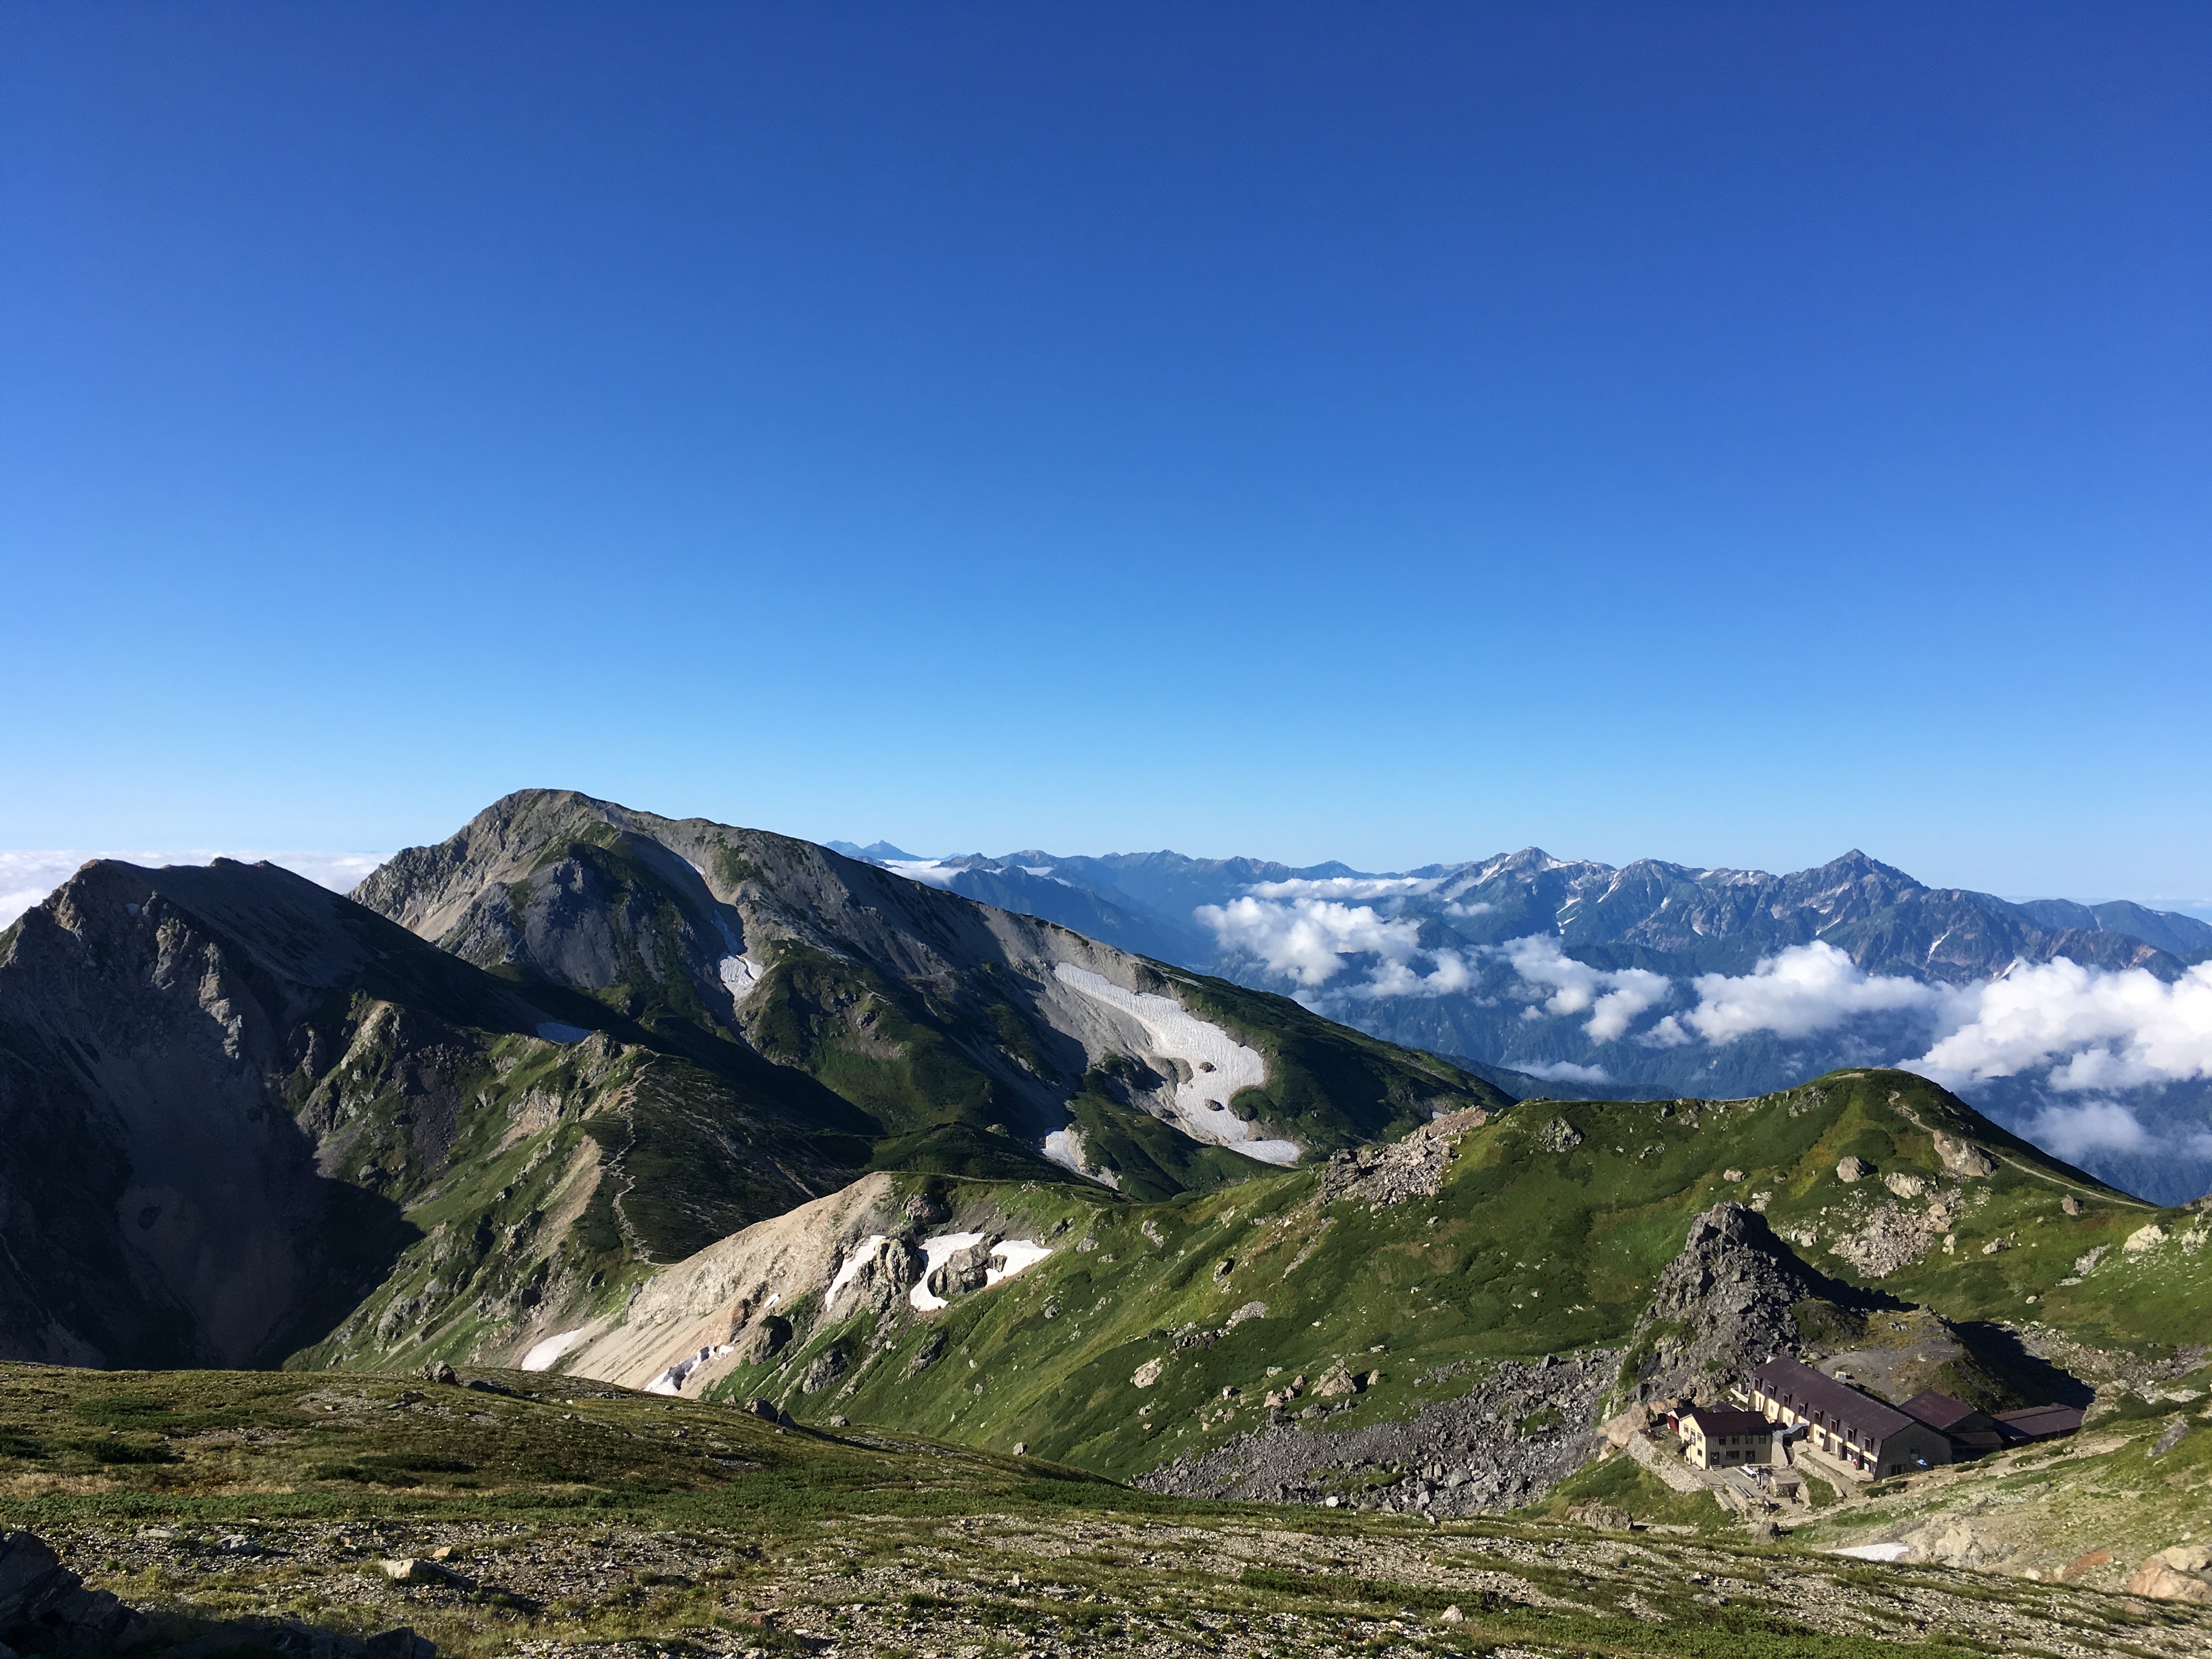
The ski resorts of Hakuba Valley come into view

IMG_3982

Tsugaike Gondola, the end of my hike

Logistics and Costs

I picked Hakuba for this last minute hike because the logistics were easy. I took a highway bus to and from Shinjuku, ski resort gondolas and lifts to and from the trail heads, and one of the Hakuba town buses from Tsugaike back to Happo Bus Terminal.

Shinjuku <–> Happo Bus Terminal Highway Bus: 8700 yen round trip

Happo-One Ski Resort: one-way up Adam Gondola – 1550 yen (1400 yen if you have a jRO search and rescue insurance card)

Tsugaike Ski Resort: one-way down the ropeway – 1360 yen

Tsugaike –> Hakuba bus: 560 yen

Tent site at Mt. Karamatsu: 1000 yen

Tent site at municipal Shirouma Hut: 1000 yen

Trip Tips

I wouldn’t have done Kaerazu no Ken by myself if it was raining. If it had been raining that morning at Mt. Karamatsu, my Plan B was to go south to Mt. Goryu, instead of north to Mt. Shirouma, because that ridge is less dangerous. Kaerazu no Ken was pretty sketchy and since I was alone, I was very careful and it took me 1.5 times the estimated course time on the map to complete it, because I didn’t want to lose my grip or footing anywhere and fall into an abyss…

There are two huts at the top of Mt. Shirouma, Hakubadake Chojo Shukusha (白馬岳頂上宿舎) and Hakuba Sanso (白馬山荘). Hakuba Sanso does not have tent sites.

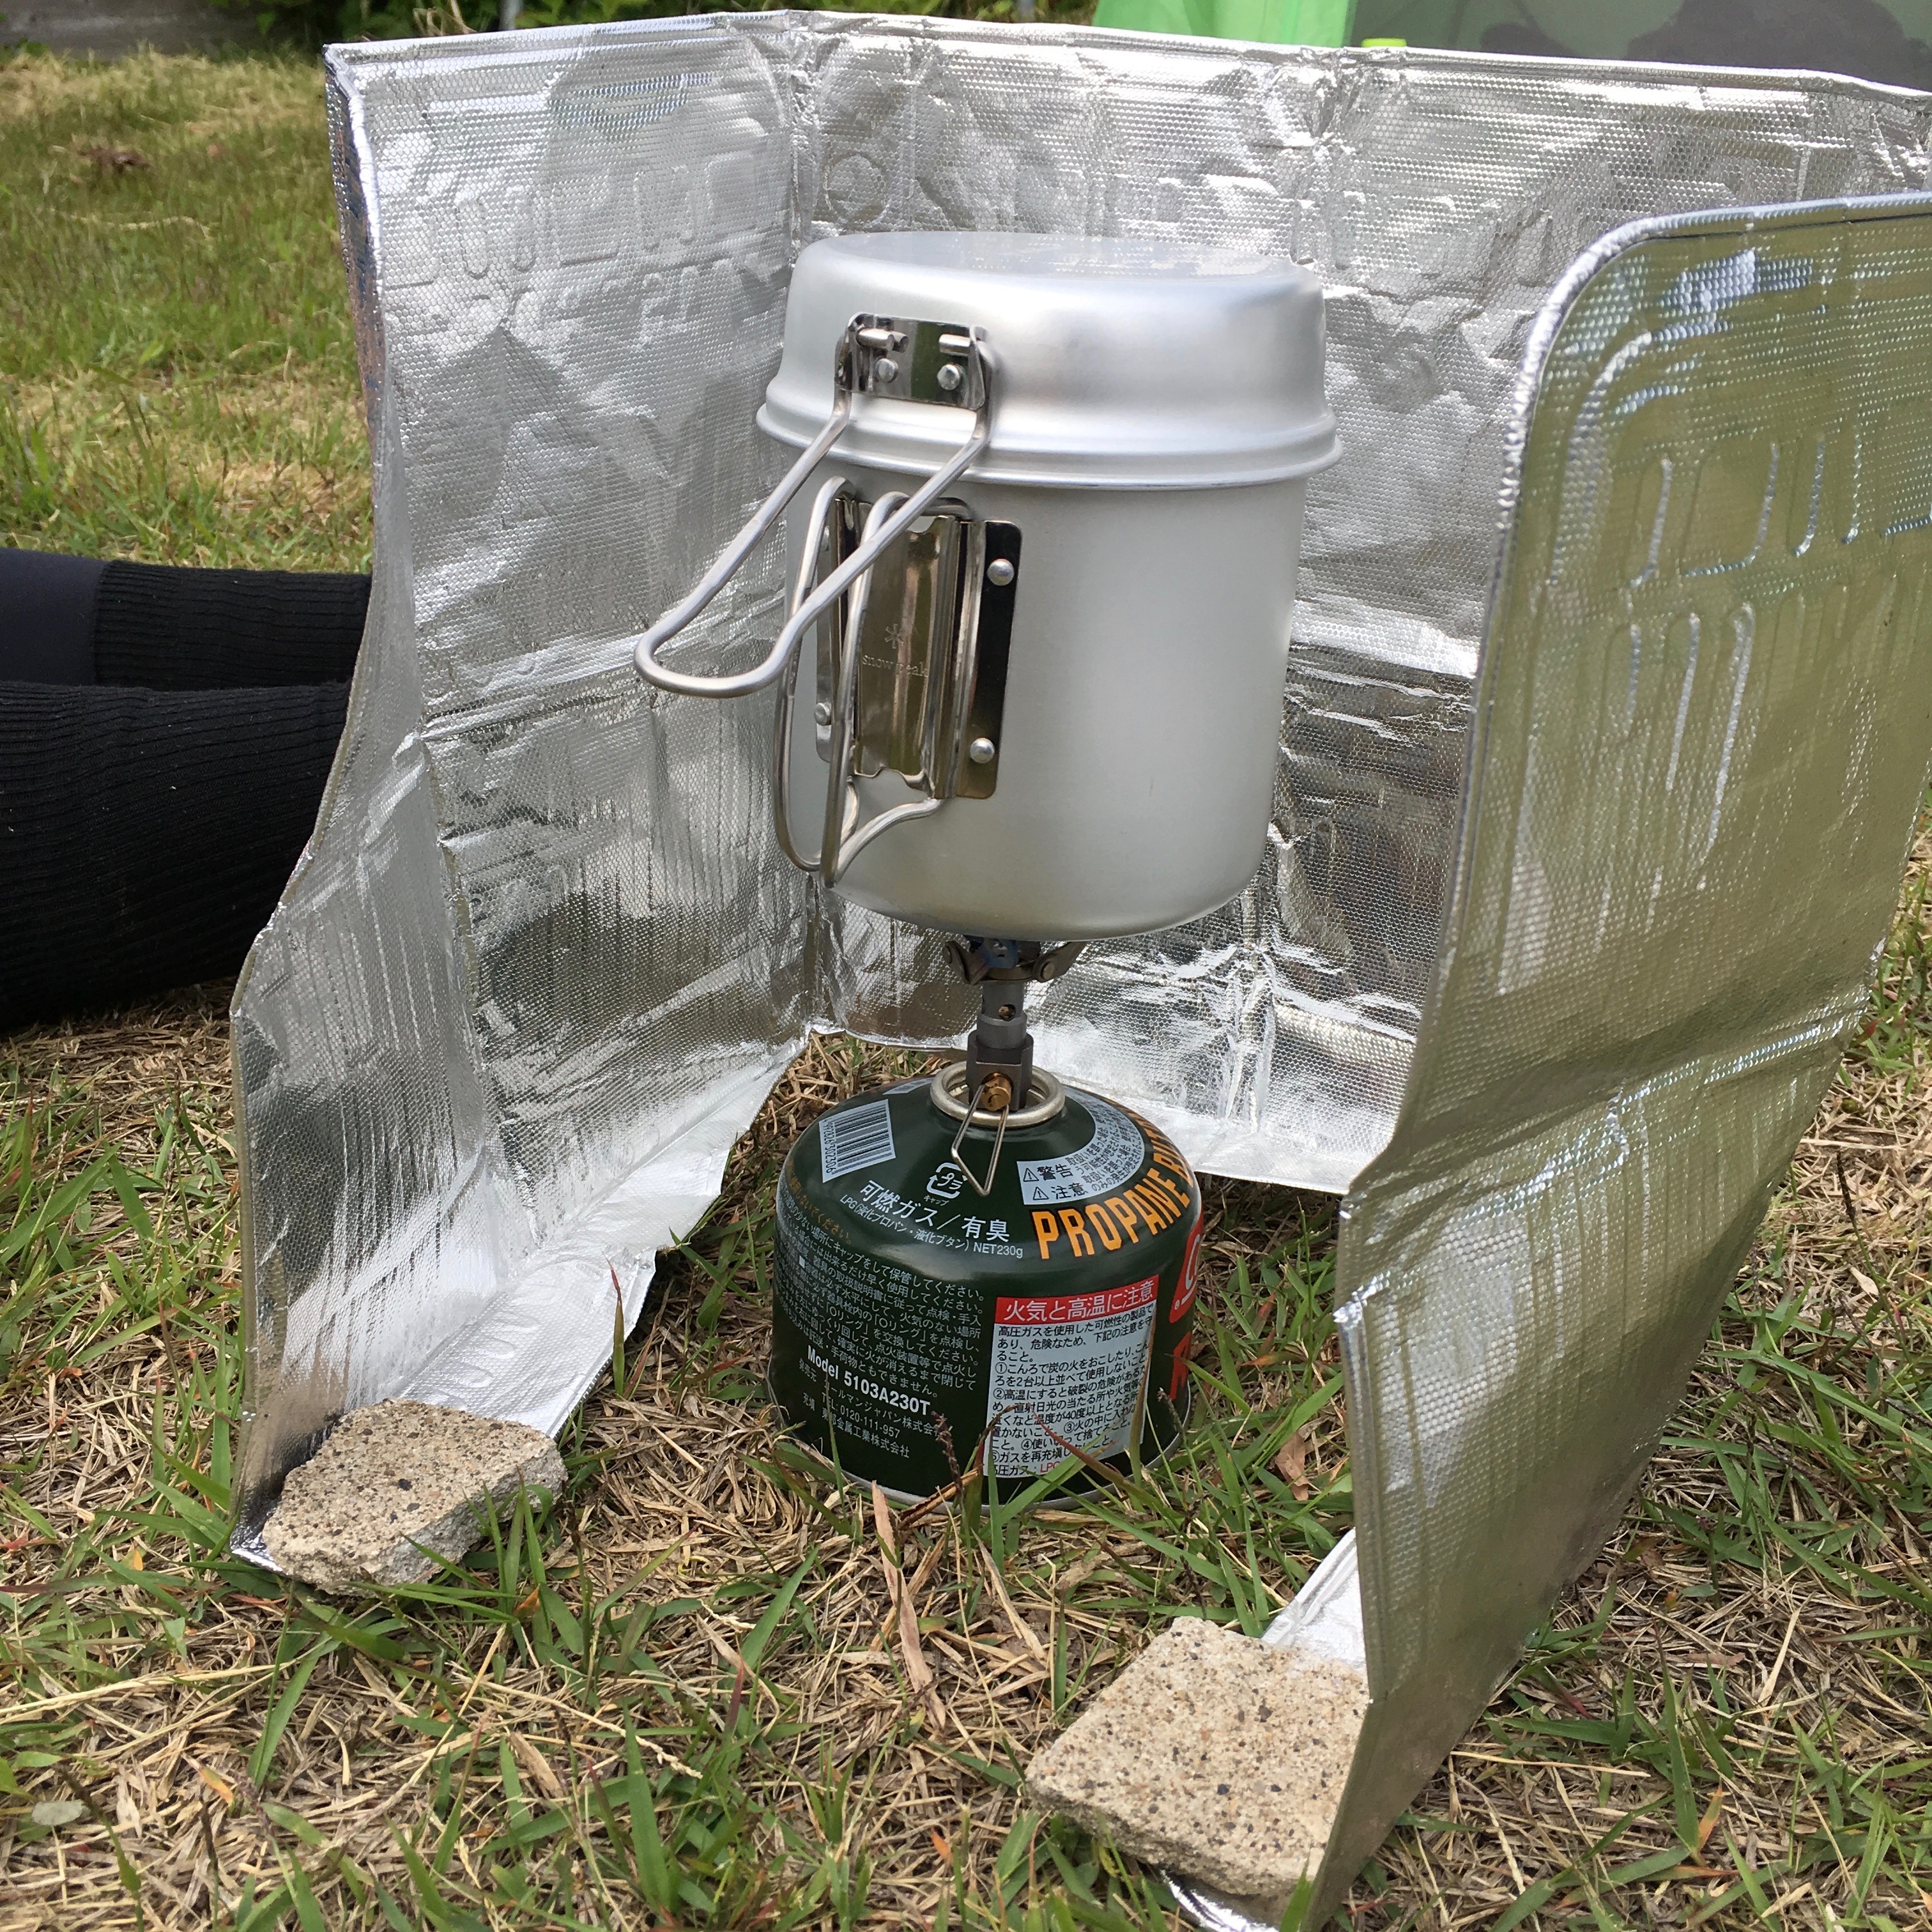
There is free water at Tengu Hut, Hakubadake Chojo Shukusha and Hakuba Oike Hut, but not at Happo Ike Hut or Karamatsudake Hut.

Hiking in Taiwan: Dabajianshan (大霸尖山) 4-Day Solo Hike

On clear days, you can see Dabajianshan (大霸尖山) from my parents’ apartment perched on the hills southeast of downtown Hsinchu. The distinctive square shape of the peak makes it super easy to recognize. It’s on the 500NT note. Dabajianshan is the holy mountain of the Atayal people and where they believe their ancestors came from. The “ba” in Daba means “dominate”; it’s the same character used in「霸王」or warlord. All reasons I decided to climb it.

Most people climb Dabajianshan in a 3-day hike, staying two nights at Jiujiu (or 99) Hut, which is manned. However, a Chinese language hiking guide I read strongly suggested breaking up the hike into 4 days and tent camping at 3050 High Ground or staying at Zhongba Hut which appealed to me because I like to avoid crowds and had a romantic idea of seeing sunrise from Dabajianshan.

Trail journal below.

Day 1 – Monday, July 17

Dalu Forest Road (大鹿林道) to Madara Creek Trailhead (馬達拉溪登山口) (19.5km)

Dalu Forest Road is an easy walk. It’s a mostly gravel road crossed by many small waterfalls. I actually get to see most of the endemic and endangered birds and butterflies described on the interpretive signs along the trail. Good job with signage and conservation efforts, national park and forest service! The road winds up the side of the mountain and the view on the other side of the valley is not bad. But it does get tedious after about 10km. (And there is no where secluded to pee.)

IMG_2840

Beginning of Dalu Forest Road

IMG_2842

Gwanwu Waterfall – a popular day hike in Guanwu Forest Recreation Area but you can’t tell it’s this high from the bottom of the waterfall.

Dabajianshan used to be a popular two-day climb, but typhoons repeatedly washed out Dalu Forest Road so its been closed to private motor vehicles since 2008 adding an additional 20km each way to the hike. You can see how the road was damaged and how streams/waterfalls just run across the trail in the video below.

I drove up in the morning from my parents house in Hsinchu past Judong (竹東) and Chingchuan (sp? 清泉) (a beautiful hot spring village high in the valley where Zhang Xueliang, the once rival warlord to Chiang Kai-shek who was blamed for losing China to the Communist Party, was once held in house arrest), so by the time I arrive at the trailhead to turn in my permit it’s a few minutes past 11AM, and the ranger lets me though without watching the safety video, because he wants to get off his shift. You’re not suppose to enter the trailhead after 11AM because of the long walk up to 99 Hut (4 hour, 4km hike up from Madara Creek Trailhead), but I’m only camping at Madara Creek.  Since I get a late start, I meet only one other hiker going up that day when I’m hiding from the rain in a worker shack at the 15km mark. He has a thick accent and I imagine what exotic location he is from in China. (Later I find out it’s Macau.)

When I finally get up to the campground in front of the abandoned visitors’ center at Madara Creek around 5:45PM, the water is not running at the toilets which is troublesome because there aren’t any good places to do you business around there. (It is apparent people have been using the toilets anyway and they are really gross.) I’m staking in my last couple of tent pegs when two vans pull up filled with workers who will be staying the night. They take over the visitors’ center building, despite a sign posted saying that the foundations of the building are not stable so do not enter.

I was looking forward to relaxing and enjoying my solitude since I have the sole permit reservation for the campground, but now my peace is disturbed by a chainsaw and leaf blower as the workmen build a f-ing bonfire.

IMG_2877.jpg

They were there to cut the grass along the forest road the next day.

I retreat to the nearby forestry service workers’ hut and manage to have a quiet dinner overlooking the creek. After dark, there are too many bugs in the hut (elevation ~1800 meters), so I have to hastily pitch my tent inside the hut. This was not as relaxing as I hoped!

IMG_2879.jpg

Forestry Service Hut

Day 2 – Tuesday, July 18

Madara River Trailhead to Zhongba Hut (中霸山屋) via Jiujiu Hut (九九山莊) (9.5km), and evening visit to Dabajianshan (4km round trip)

I sleep in longer than I intended because it is so dark inside the workers’ hut and only finish packing when I hear a leaf blower go on. I finally cross the red Madara Creek Bridge and start hiking just before 8AM. This results in me getting hailed on in the afternoon thunderstorm on the way to Zhongba Hut. It’s been classic Taiwan summer weather recently – 午後雷陣雨 – not-a-cloud-in-the-sky mornings followed by afternoon thunderstorms.

IMG_2882

Looking back across Madara Creek Bridge towards some hikers coming down from the mountains that morning

Not very far up the trail, I dig my first cathole the first place it looks viable to go off trail. It’s difficult, but I hit a rock and after wedging the rock out, the hole reaches regulation depth. (Review LNT principles here.) Achievement unlocked! I’m back on the trail clipping my potty trowel to my backpack when a hiker coming down passes me. Lucky!

The climb up to Jiujiu or 99 Hut is a slog, except for around the 2.4KM mark where there is old grown cypress forest. I love the smell of hinoki! Apparently there are two kinds: Taiwan Cypress /扁柏/ヒノキ, and Formosan Cypress/ 紅檜/ベニヒ. I thought they were all the same. FYI a lot of the large cypress tori (e.g. at Meiji Jingu) and large hinoki baths in Japan are constructed out of Taiwan hinoki.

IMG_2884.jpg

Cypress forest

I wander into 99 Hut to checkout the facilities even though I don’t plan on staying there and get ambushed by the caretaker and the cook who make me sit and drink ginger tea and then oolong tea with them. The cook feeds me sausage and eggs left over from breakfast and gives me two tomatoes for the road. The caretaker names all the flowers in the photos I took on Xueshan and shows me photos of Dabajianshan that he’s taken in all conditions. “This year, it snowed April 1 at 99 Hut!” he says as he proudly shows me the photo. He’s incredulous I have only brought my phone for photo taking purposes. I finally extract myself by promising to stop by again on the way down.

20170718_114930_001.jpg

Mr. Chang, the caretaker of 99 Hut, and I

On Daba Trail there are four baiyue: Dabajianshan (3492m), Xiaobajianshan (小霸尖山 3360m), Yizeshan (伊澤山3297m), and Jialishan (加利山3112m). It is hailing pea-sized pellets at the time I reach the junction for Jiali Shan. I see two people turn off the main trail to climb Jiali despite the crappy weather, but I skip Jiali and Yize and head straight along the increasingly muddy trail to Zhongba Hut for shelter. I’m not that crazy about peak-bagging baiyue; I’d rather get dry. It’s a good thing that after the junction for Jialishan at 3050 meters, the trail is never very steep.

At 3:20 in the afternoon, I’m resting on the deck of the very cozy Zhongba Hut. Arrived, swept out the hut, and had a pee before it started raining again. Great facilities here! Cathole digging equipment and rainwater collection tank with water coming out of a tap just out back. I lost my trash bag out of the side pocket of my backpack, probably when I set my pack down to dig out my rain jacket. I hope I find it on the way back down or I’ll feel really bad.

IMG_2917

Zhongba Hut

The clouds part above Zhongba Hut around 5:50PM, so I decide to go to Dabajianshan and see what I can see.

Dabajianshan is hiding mysteriously in the mist when I approach. I bow and say a little prayer of thankfulness and hope for good weather and safety and then cross to the metal rails toward the traverse under the Daba peak to Xiaoba. There’s a sign attached by a chain to the metal railing, and I’m taking a selfie with the sign and white where Daba is supposed to be behind me, when suddenly the clouds part and I see Daba clearly on my phone screen. Of course, I immediately turn around and shout “Wow! Wow! Wow!” out loud to nobody.

If ever you arrived at the top of a mountain and were sure it was a god, it would be Dabajianshan. You can’t step on the top and conquer him (no longer permitted by law because it’s dangerous, and really you shouldn’t out of deference to aboriginal beliefs), but you can sit at his feet and look out onto the wondrous view he has. I don’t stay long, because I want to be back at the hut to cook dinner before dark, and I want to get an early night so I can be back up at Daba for sunrise.

IMG_2983.jpg

No, this is not a stock photo. I took it with my very own wee little iPhone.

Day 3 – Wednesday, July 19

Zhongba Hut to Dabajianshan and Xiaobajianshan and back (5km?), then down to 99 Hut (9.5km)

Zhongba Hut is snug and quiet, no bugs, no scurrying or other animal sounds. The only sound is the occasional commercial jet flying overhead. When I wake up at 4:20, I go outside and can still see many starts though the horizon is getting reddish. I make a coffee, bottle it up and go to have breakfast with Dabajianshan. On the way, I can see the twinking of a city’s lights in smog far down below.

I wondered if anyone would make a night climb from 99 Hut to see the sunrise, but turns out it’s just me. It’s an amazing experience to share the sunrise with Daba; one tiny human and a great mountain god.

IMG_3013.jpg

Sunrise at Dabajianshan

Indeed, as the 99 Hut caretaker had told me, at sunrise, Daba is first red (5:09AM) and then turns golden yellow (5:13AM). After sunrise, I cross under the square Daba peak formation and head for Xiaoba. The ridge between Daba and Xiaoba offers great views of Xueshan and the Holy Ridge, but I can’t take any good pictures because they are eastward in the direction of the rising sun.

I get lost at the bottom of Xiaoba. On the way up yesterday, 3 separate hikers had warned me that the ropes on Xiaoba were damaged, not reliable and that they had forgone getting to the top. Unable to find the ropes, I end up behind the formation on the east side, then come back around and make an attempt at climbing up the north face, but then decide I don’t really want to get dead. I’m about to give up when I find a marker and finally locate the ropes. There are plenty of good footholds and handholds along that route that the tiny, tiny bit of indoor bouldering experience I have is enough to make me feel comfortable enough to climb up and down without relying on ropes.

IMG_3037.jpg

Panorama from top of Xiaobajianshan (Xueshan Main Peak in the middle of the photo in the mountain range in the distance)

IMG_3073

I climbed this rockpile by myself and didn’t die.

IMG_3116

Ridge between Dabajianshan and Xiaobajianshan

When I get back to the bottom of Daba, I meet four recent college grads, two girls and two guys. I take a few photos from them and they take a couple for me. One of the guys points out Turtle Island, the distinct island off the coast of Yilan, in the distance, indicating that the lights I saw below before sunrise were probably Taipei. It’s about 8 AM, which means I got to spend 3 hours hanging out with Daba and Xiaoba all by myself.

img_3128.jpg

When I get back to Zhongba Hut, there is a guy inside passed out in his sleeping bag. I try to gather up my things quietly and prepare to pack-up and cook my breakfast on the deck outside the hut. After a bit, he gets up and comes outside for a smoke. “Where did you come from?” I ask, since no one was there when I left at almost 5AM. Turns out he’s a porter carrying gear and lunch (!) for the group of hikers I ran into on top of Zhongba lookout (中霸坪) on the way back here. He lives in Chingchuan. The group he’s with got up in the wee hours to see sunrise at 3050 High Ground near the junction for Jialishan and they will be having lunch at Zhongba Hut. I offer him a sachima (a type of Chinese pastry I packed as breakfast food). He wanders off the pee and then goes back to bed. [Aside: Not to judge… Okay totally judging… but if you can’t carry your own lunch on a day hike (since they stay two nights in a row at 99 Hut)… Catheter and bedpan, much?]

I climb Yizeshan and Jialishan and take the obigatory peak photos on the way back down to 99 Hut. By the time I get to the top of Jialishan the cumulonimbus have piled up threateningly.

IMG_3142

Yizeshan – laminated sheet someone left up there

IMG_3157

Jialishan – Notice cloud difference from previous photo

I manage to make it to 99 Hut at 2PM just before it really starts pouring and take up the caretaker’s offer to stay there (instead of back down at Madara Creek Trailhead — being a government facility, he does charge me the requisite 200NT) and the cook’s offer of hot dinner (complimentary). When the rain lets up I go take a nap until dinnertime.

IMG_3179.jpg

After dinner, I joined other hut stayers to watch the sunset, but the clouds didn’t quite clear in time, so we were treated to a cloud light show instead.

Day 4: Thursday, July 20

99 Hut to the beginning of Dalu Forest Road (23km)

IMG_3181.jpg

Sunrise at 99 Hut

I tried to decline hot breakfast the night before but am woken up at 4:30AM by the cook anyway. No matter, I wanted to get moving early anyway in attempt to finally beat the afternoon thunderstorms one of these days. I’m back through the old growth forest at 7AM and back across the red bridge at Madara Creek Trailhead at 8:40AM. Not much to say about the day except I leap-frog with the porter I met at Zhongba Hut all day, chatting occasionally, and cross paths with a group of 7-8 other young porters from the same company bringing 200kg of fresh food up to 99 Hut in anticipation of the weekend. The forest road is monotonous since I’ve seen it before and I end up listening to Mindy Kaling’s Why Not Me? on Audible. (She had something really insightful to say about confidence and entitlement at the end of the book. Really!) Cumulonimbus are looming again by 1:30PM but I manage to finish the trail just before 2PM and before any rain!

IMG_3193.jpg

Finish!

IMG_3194.jpg

Convenience store dog at the Hi-Life I stopped at in Judong to get coffee on the way home. It was, of course, super hot back at lower elevation and this dog was enjoying a nap in the AC. Must be tough being a Husky in Taiwan. #itsadogslife

Hiking in Taiwan: Know Before You Go

I grew up in Taiwan, but just completed my first two high mountain hikes (and bagged my first six Baiyue!) over the month of July. I am fluent in Chinese and have family here so it was probably easier for me to figure out how to do it than for most people. Really, it was my brother that figured out all the permit stuff. Anyway, it was amazing so I wanted to share the information I gathered that might be useful to any English-speaking folk that want to hike in Taiwan.

Hiking culture in Taiwan is heavily influenced by Japanese hiking culture, as it was the Japanese that first developed modern, western-style hiking culture in Taiwan during the colonial period. Of course the mountains were sacred places and important hunting grounds for certain aboriginal tribes in Taiwan before the Japanese arrived and many of the current trails used to be hunting trails or trading routes used by the native peoples. My impression is that hiking infrastructure is very similar to the Japan, but the mountains are wilder.

Like Japan’s Hyakumeizan (日本百名山), Taiwan has its 100 famous peaks, known as Baiyue (台灣百岳) (see list here). But Japan only has 21 peaks above 3000 meters, while all of Taiwan’s Baiyue are above 3000 meters. The eastern two-thirds of the island is basically a series of mountain ranges running parallel to each other. The mountains are extremely rugged and remote for such a small island. The Central Mountain Range is the length of the JMT, but there is no practical way to resupply by hiking out to a town so you cannot do an American-style long distance hike of it. People have hiked the full length of the Central Mountain Range, but more in the manner of a full-fledged hardcore mountaineering expedition.

Speaking of hard-core mountaineering expeditions, see documentary of hard-core Taiwan canyoning expedition led by Mike Harris from Canyons in Gunma here.

Permits

Permits are required to hike the major trails in Yushan National Park, Shei-pa National Park and Taroko National Park. There is a lottery to climb Yushan Main Peak, so you must apply for a permit at least a month in advance. For the majority of other trails, you must apply for a Park Entry Permit at least 7 days in advance. This can be done at the National Park Permit Application website: https://npm.cpami.gov.tw/. (The website also comes in English and Japanese.) Everything is automated. You select the trail you want to hike and the online application form will automatically populate your options for itinerary and lodging. Check availability of beds/tentsites on your desired route before choosing dates. Generally, all Saturdays will be booked out for popular trails as soon as registration becomes available (usually a month ahead). You will need an emergency contact with a Taiwan ID number and phone number.

After completing the National Park Permit Application, you should be directed to a link to apply online for a corresponding Mountain Entry Permit from the police bureau. You can apply online up to 5 days in advance of your hike, or you can actually do it last-minute in person at the police station closest to your trailhead. (Taiwan police are notoriously friendly and nice.) The permits are free, as are most mountain huts and campgrounds.

Park Entry Permit approval depends mostly on availability of space in the huts/campsites for your dates and the difficulty of the trail. You’ll see a difficulty rating on the permit application for your course. For anything more than an A rank trail, you will be required to provide evidence of adequate previous hiking experience (e.g. photo with summit marker). Solo hikers are required to sign a waiver co-signed by a family member, so your family can’t sue the park service if anything happens to you. Mountain Entry Permit is apparently just some anachronistic formality and is automatically granted if you have a Park Entry Permit.

You’ll need to print 2 copies of each permit after they are approved. You will deposit one copy of each with the ranger at the trailhead when you enter the trail and hold on to the second copy, which you may be required to show on the trail and will have to deposit back at the trailhead when you finish so that the park service knows you’ve come back down to civilization and are not lost somewhere.

Permits may be annoying but I think they are understandable for safety and environmental reasons. When you deposit your permit at the trailhead, depending on the mood of the ranger, you might be required to watch a mountain safety / leave-no-trace video. I jokingly call this “the defensive hiking video.” They have an English version for foreigners.

If you need help with permits, contact me.

Mountain Huts, Porters and Food

When you apply for a Park Entry Permit you also designate your planned lodging / campsites. The mountain huts and campsites in the national parks are free unless otherwise specified. For example, Jiujiu Hut (or 99 Hut) on Daba Trail charges 200NT per person per night. It’s run by the forestry bureau and has a live-in caretaker and hot showers. Management of the hut most people stay at for a Yushan / Jade Mountain climb is outsourced to a private company and supposed to be really nice, so you probably have to pay for that one too.

Mountain huts called XX山莊 (shan-zhuang) have facilities like designated bunks covered with a thin rubber mat (think cheapest yoga mat), a cooking area, toilets, running water, solar-powered lighting. This is where most people stay and will probably be lively and noisy with big groups and aboriginal porters and cooks. I saw these guys servicing hikers at both 369 Hut and 99 Hut: http://www.bununclimbers.com/. They were friendly and professional. At 369 Hut, the rate was 200 NT per kilo to carry your stuff to and from 369 Hut and 800 NT for a sleeping bag and hot dinner and hot breakfast, which was 100% real food, mainly consisting of local fresh veg, and didn’t look too shabby. So, even though the national park website will say there is no food service or bedding at the mountain huts, you can get it from a private provider if you contact one in advance. When I was coming down from Dabajianshan on a Thursday, there were 7-8 young porters carrying 200kg of fresh food in styrofoam coolers strapped to external frame packs up to 99 Hut in anticipation of the weekend. (On a side note, fascinating history of external frame packs here.)

Huts called XX山屋 (shan-wu) are intended to be used as emergency huts and don’t have any facilities. (Park service considerately provided a shovel and hoe for digging catholes at Zhongba Hut.) It appears the emergency huts in Shei-pa National Park have all pretty recently been rebuilt or refurbished and had rainwater collection tanks added and are quite nice.

Don’t expect the designated campsites to have any facilities; they are just places which are relatively flat and have water sources nearby.

Maps

Sun River publishes hiking maps for climbing Taiwan’s Baiyue very similar to Yama to Kogen hiking maps in Japan. They cost 200NT apiece and are should be available at any serious outdoor gear shop. I got the one for the Holy Ridge which covers most of Shei-Pa National Park. The map provided information about the huts, campsites, water sources, model itineraries, course times and elevation profiles for popular routes. If you can’t read Chinese, the map is still useful for matching Chinese characters to signs, water sources, hut locations, course times etc. Beware that trail conditions are constantly changing due to typhoons, earthquakes etc. and maps may not be fully up to date. Check the appropriate national park website for latest conditions before you go.

975645F6-47B9-4699-AC8D-B4C45D63EBA3

Water

According to a Chinese language Taiwan mountaineering book my mom has, there is no water in the mountains of Taiwan that will make you seriously ill, there is only water that may not be very tasty to drink. The mountains are mostly sandstone, shale and half-metamorphosed shale-slate and when the water from the porous sandstone hits impermeable shale, it flows out in delicious mountain springs. Up on a ridge though, the water sources may be brown snow/rainwater ponds, so you’ll probably want a filter for that.

In Taiwan, it’s still not recommended to drink the tap water in the cities; so most people habitually filter or boil their water even if it looks fine. Use your own judgment or ask an aboriginal porter rather than some flatland Taiwanese person.

IMG_2760

Water seeping through cracks in the shale in the Black Forest under Xueshan Main Peak

Weather

As with any high alpine environment, the weather changes really quickly in the mountains. I hiked in July in the typical summer weather pattern of not-a-cloud-in the-sky mornings and short afternoon thunderstorms. Best time to hike, according to the caretaker at 99 Hut, is from September through December when the weather is most stable (after typhoon season and before cold fronts). You can hike most trails year round but snow gear (crampons, ice axe) may be necessary January-March and the difficulty rating on the trail is increased for permitting purposes.

In mid-July, at 3000 meters it got down to 8 degrees Celsius at night. Daytime temps above 2000 meters were so comfortable for hiking. It was a great escape from the sweltering sauna of Taiwan summer down below.

Dangerous Animals and Plants

If you see a Formosan Black Bear, you should go buy a lottery ticket because that means you’re really lucky. Their remaining habitat is the three national parks you will probably be hiking in but they are extremely endangered and sightings are extremely rare, so few that no meaningful estimate of the population can be done. Taiwan’s poisonous snakes are nicely distinct looking if you have the misfortune to have to tell a doctor which one bit you for anti-venom, but they don’t live at high elevation. Formosan macaques look small and cute but have been known to be aggressive, so don’t look them in the eye and don’t leave your pack unattended if they are around because they will go for your food.

There is a really scary plant to be aware of that is common in mountain forests called yaorenmao (literally “biting cat”). It’s a variety of stinging nettle. It’s covered with really fine little hairs that will prick and burn you with an acid venom if you accidentally touch it. It was all along segments of Dalu Forest Road on the Daba Trail when I hiked in, and the Forest Service had sent a private contractor to cut it down by the time I hiked out, so it’s good to know they are trying to keep it under control.

IMG_2859

Once bitten, you won’t forget what it looks like.

Elevation

Diamox / Acetazolamide is available over the counter at most any pharmacy in Taiwan for prevention of elevation sickness.

Cultural Quirks

For some reason, a lot of people hike in rubber boots, or wellies. I think that would be so hot and uncomfortable and ill-fitting. No one hikes in shorts; I got so many shocked comments. I guess you would think it’s cold in the mountains if you can wear jeans in the 39 degree sauna down at sea level.

IMG_3308

Take me back to the mountains!

Shinetsu Trail: What was in my pack?

I already wrote about my gear following my Yakushima Trek (read here), but Kiwi Sig Other thinks it’d be interesting for y’all to see what it looks like and how I pack. I’m just a beginner backpacker (lifetime 3 overnight backpacking trips) and made my gear choices based on other peoples’ great blogs and Youtube videos. On the Internets, newbies often post about all their gear and ask a more experienced community for a shakedown, but I haven’t ever weighed my stuff since I don’t have a scale and I think the key is probably to get out there with all your gear and figure out what works and what you can live without.

Overview

Here’s pretty much all the stuff I brought on the Shinetsu Trail, minus food and clothing worn.

IMG_2262.jpg

All the things in my pack for the Shinetsu Trail. How did I fit it all in there? With food, too!

From left to right, top to down- ish:

  • ULA Circuit pack, Sea to Summit Ultrasil Packliner (used this to protect sleeping bag and clothing from rain and also put food in here because of paranoia about bears and ants), some extra grocery bags to use as trash bags, a pair of disposable chopsticks as emergency eating utensil (I also carried a titanium spork thrown in my food bag), Montbell potty trowel attached to bag by cheap 100 yen store carabiner (also emergency eating utensil?).
  • Hiking poles with small draw string sack to cover tips (polite when using public transit in Japan).
  • Stuff generally stuffed in mesh pocket or otherwise attached on the outside of my pack: hat, sunglasses, potty kit (hand sanitizer and pocket tissues), tenugui (Japanese version of a bandana), small bottles of sunscreen and bug repellant (need better bug repellant, the stuff in the blue bottle was useless).
  • Stuff for camp: camp cookset, windscreen, swiss army knife, small ~300ml Thermos (this is my luxury item and I love it), Montbell Versalite Pack 15.
  • Water system: 1L PET bottle, 2L Sawyer Squeeze bag, Sawyer Squeeze filter, coupler for backwashing the filter.
  • Stuff in ziplock bags: First aid kit, electronics, toiletries, glasses. Not pictured: baggie for paper stuff. Details below.
  • Packed clothing: rain jacket, microfiber towel (I got this awesome sweat towel from volunteering at the Tell charity run. It is more absorbent and dries faster than a tenugui. Hit up Ben to see if he has any left…), merino wool Buff, glove liners, spare undies, spare socks, Uniqlo 100 weight fleece, Uniqlo Ultralight Down vest, Uniqlo Heattech Extra Warm top and bottom for PJs, tyvek drawstring bag used as clothing bag.
  • Big stuff: sleeping pad (cheap foam pad from the Amazon trimmed down with kitchen shears with four folds on the bottom separated so that the smaller section can be used as a sitting pad – Thanks for the advice, Ken!), sleeping bag, tent, tyvek groundsheet, tent pegs and cord for guylines in small ziplock. (Read more about my “Big Three” in my previous gear post.)
  • Not pictured: phone and minimalist wallet were carried in one of the side hip belt pockets.

Further Breakdown

First Aid Kit

I took Wilderness Advanced First Aid  with WMA Japan in May (hope to finally write up a post about that experience soon), which led to beefing up my first aid kit. This is what I threw together for now.

IMG_2213

What’s in my kit (roughly top to bottom, left to right):

  • WMA Field Guide and SOAP notes
  • a few packs of sterile gauze, blister patch and a few bandaids
  • tampon, ankle brace, stretchy bandage, surgical tape, vet wrap, duct tape, syringe for irrigating wounds (repurposed Sawyer filter backwashing syringe)
  • gloves, Advil, antihistamine, small tube of topical steroid for itchiness, small tube antibiotic ointment (I also intend to carry a small dropper bottle of iodine), a few safety pins (also good for hanging laundry on backpack).

This is a work in progress. I’ve got a swiss army knife and some other things in my pack that double as first aid tools. As with anything else in the outdoors, it all comes down to experience and your kit is only as good as your knowledge, so I highly recommend getting trained in Wilderness First Aid if you want to spend any extended period in the outdoors.

Here are some links I found useful about building your own first aid kit for hiking:

Electronics

img_2212.jpg

Self-explanatory: iPhone charger, earphones, earplugs, spare batteries for headlamp, headlamp, external battery that charges my iPhone 5 SE 3-4 times.

Toiletries

IMG_2224

Self-explanatory: Hotel disposable toothbrush, toothpaste, moisturizer, contact solutions, contact case, glasses (getting Lasik soon to so I won’t have to bring all the eye stuff).

Honestly, I didn’t use that face cream until after I finished the trip and I forgot to bring lipbalm. It’s probably generally humid enough in Japan in the summer that you don’t need to bring any moisturizer, sunblock will be enough. Here’s something I read recently that provides good perspective for women on how to let go of the need to groom and look good all the time: http://www.foxintheforest.net/be-wild-love-yourself/.

Paper things

IMG_2216
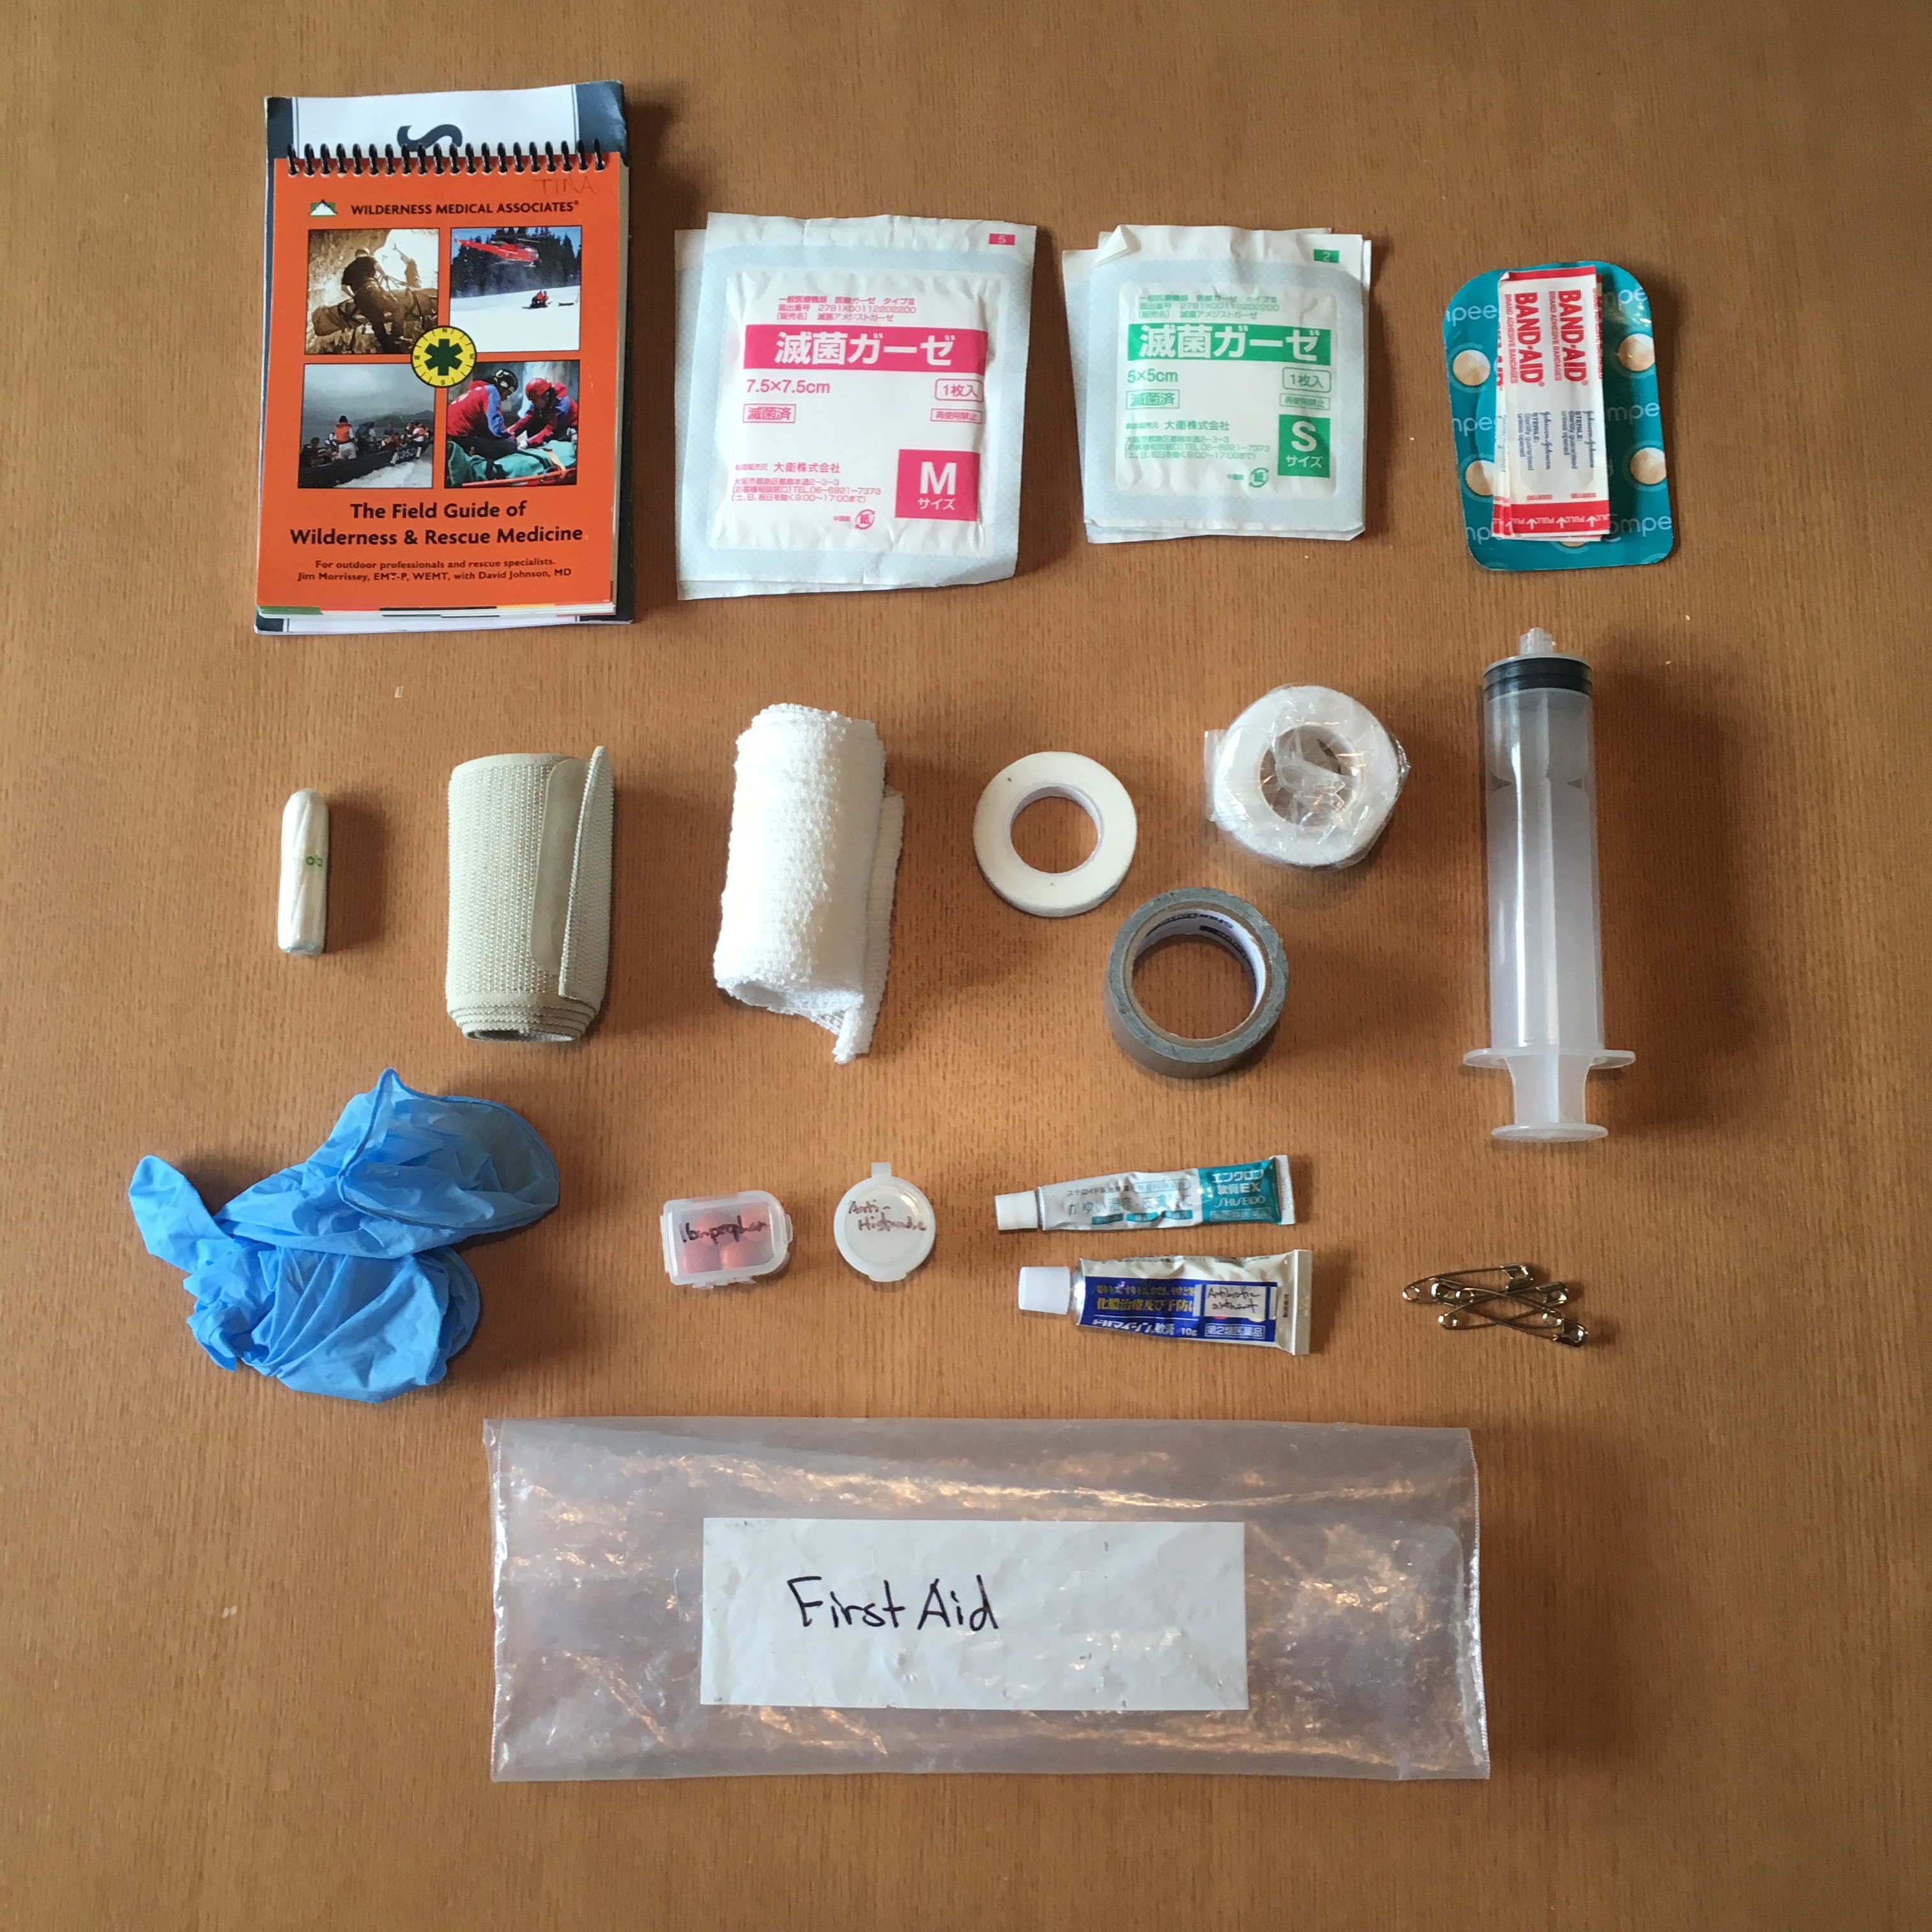
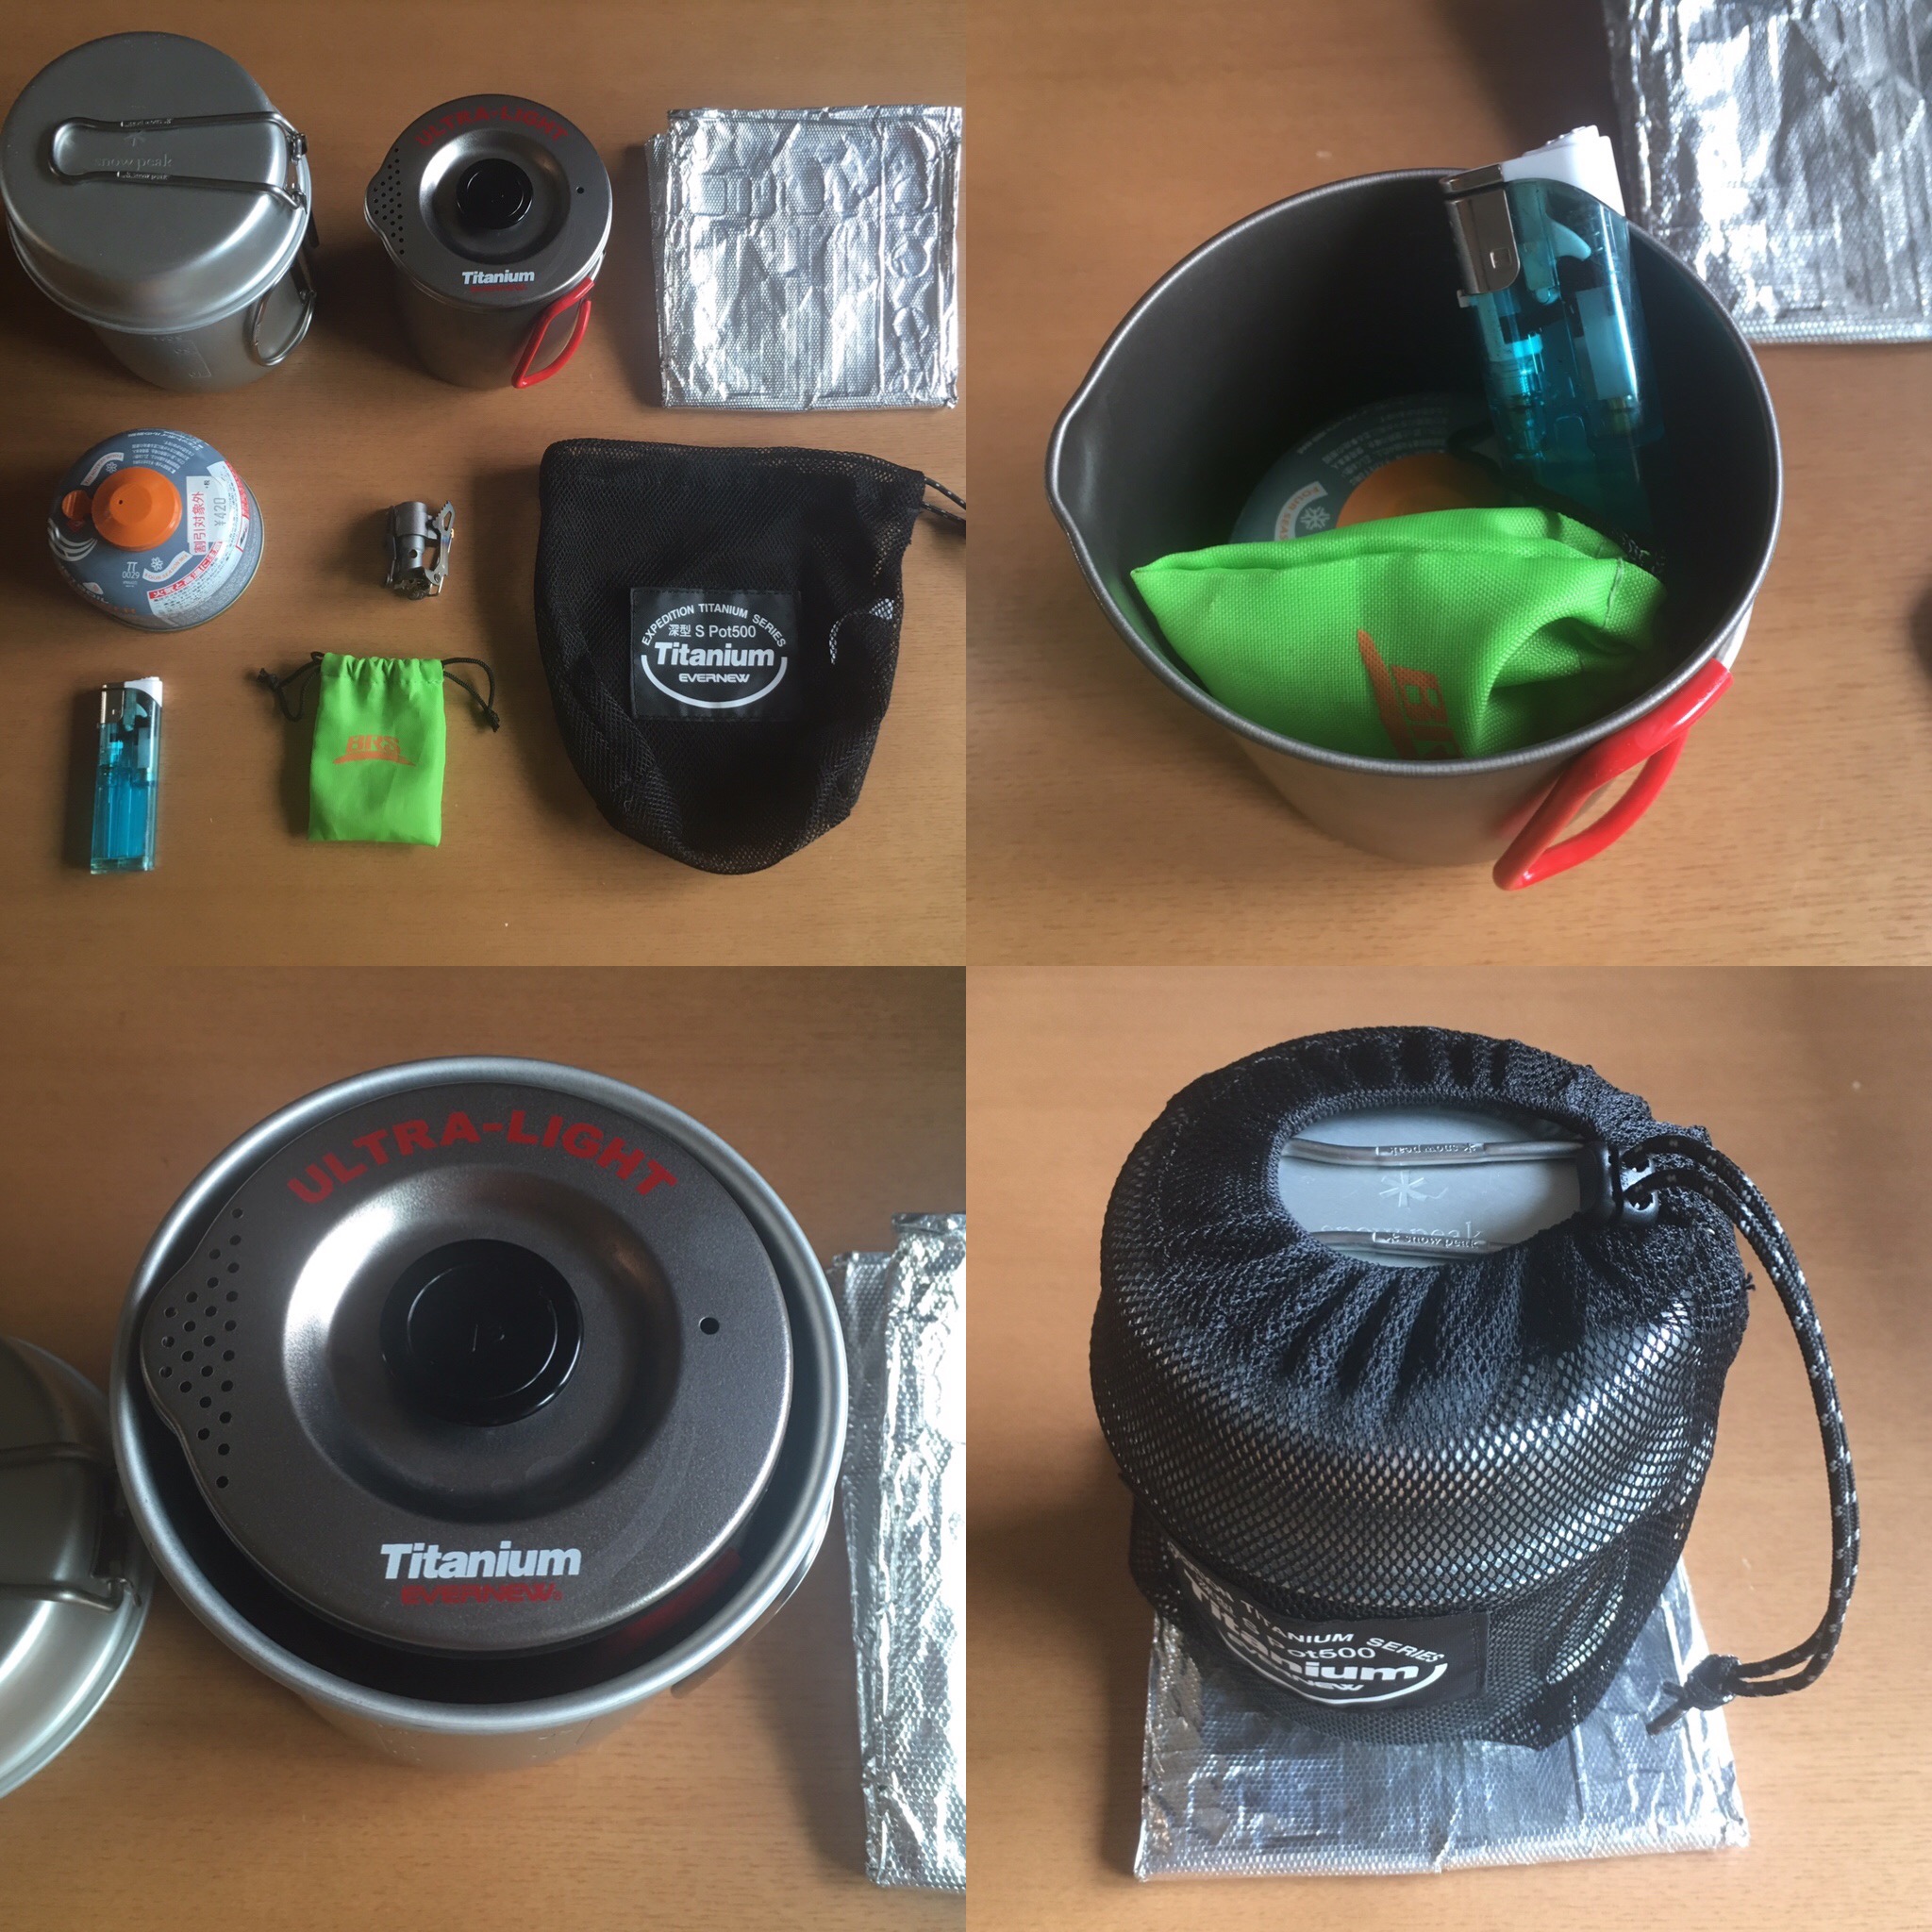
Forgot to include this in my overview photo above, because I was using the contents to write my Shinetsu Trail blogpost. I carried a book, maps, a small journal and a pen in another ziplock.

Cook-set

PBBN7100

Playing matryoshka with my camp cooking gear

I bought a new 750ml titanium cookpot for solo-hiking, but when Genna decided to come along, I realized that now I have the perfect two person cook-set, because the smaller pot weights next to nothing and packs neatly in my old 900ml cookpot. My two-person cook-set consists of:

  • Snowpeak 900ml Aluminum Cook Set
  • Evernew 750ml Titanium Pasta Cooker
  • Windscreen – Aluminum tempura splatter guard (didn’t even have to cut it down, just folded it up!)
  • Fuel canister
  • Lighter (back-up matches in first aid kit)
  • Tiny titanium stove and stuff sack
  • Mesh sack that came with smaller cookpot (the smaller drawstring sack holds everything tightly together so the lid of the larger cookpot doesn’t bang around)

Here’s what cooking dinner looks like:

IMG_2024.jpg

All Packed Up!

IMG_1998.jpg

Ready to go in the morning!

Oh yeah, I actually made the last minute decision to clip some 100 yen shop flipflops to the outside of my pack. It was definitely nice to have camp shoes (especially after a swim), but they are not essential. Up in the air on whether I would bring them again.