What hiking blog would be complete without a post about gear? On my Yakushima trip, I finally got to test out my “big three” pieces of gear that I collected in anticipation of my JMT hike.
(Disclaimer: I’m testing out some Amazon affiliate links in this post. So, yeah, I’m really cool and you want to be just like me. So buy all the same things I have so I can make money and never have to go back to a desk job.)
Big Three
- Pack – ULA Circuit (US$235; 1163g; 68L)
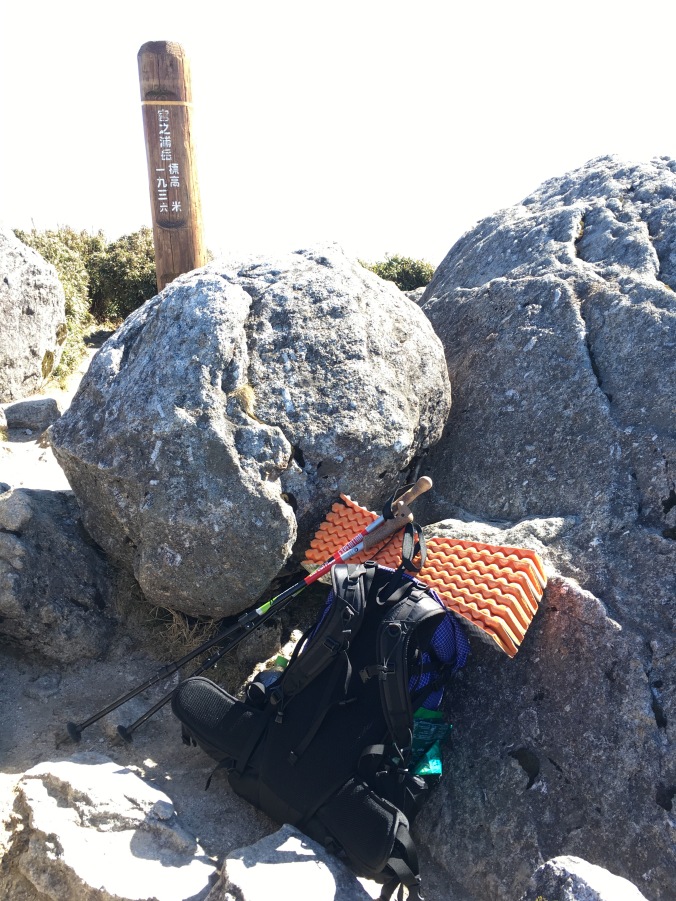
I believe this is the most popular pack for PCT and AT thru-hikers. I met a guy at the hostel in Kagoshima who had hiked the AT and who was carrying the same pack. It comes in purple, so I was sold. I have long torso, so I ordered regular length with a small waistbelt. When I carried it back from the US it hurt my back weird and I was worried I got the wrong size. However, I moved the waist belt up as high as it will go and now it fits fine. When I put everything in the pack, it was heavy to lift, but once on my back it didn’t feel heavy. I guess that’s what you want in a pack right?
I did lose my 1L Nalgene bottle from one of the side pockets in northern Kyushu (probably from putting it on a luggage rack on the train), but aside from that functionality seems good.
- Tent – Six Moons Designs Lunar Solo SE (US$210; 850 g; 2.4 sq m)
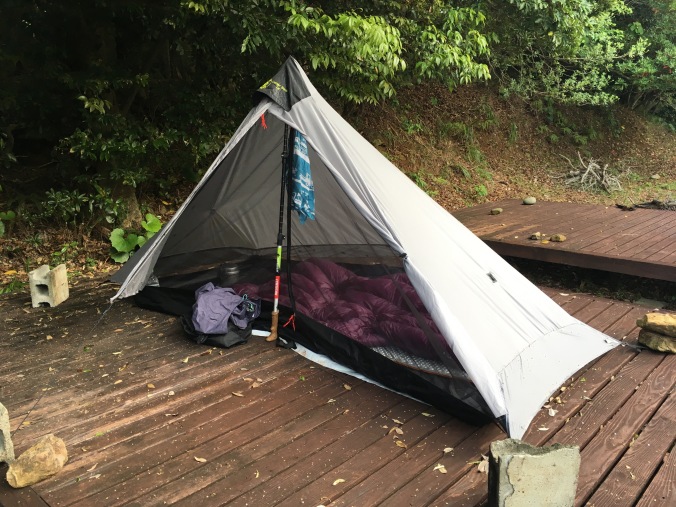
This tent appealed to me because it has no tent poles and can just be squished into its stuff sack, or anywhere. Also it is very roomy for a one-person ultra-light tent (no leaving pack outside under vestibule) and at $180 + $30 for seam sealing, it was cheap compared to other tents I was considering.
Some online reviews mention condensation issues, but I did not experience any, despite the rainy and humid conditions on Yakushima (but it wasn’t cold anywhere I used it). Other reviews mention a learning curve for pitching the tent right. The tent sets up with a trekking pole and minimum of 6 stakes. I got an extra stake and guyline to create more headroom and stability in the wind. I practiced setting the tent up once in Yoyogi Park before I left for my trip. Then I had a crash course in setting it up in a thunderstorm when I got to Yakushima and then a crash course setting it up in the rain with no stakes using rocks and concrete blocks when I arrived at South Village. At South Village, the next morning I did some adjustments to pitch the tent a bit higher to make the floor float properly and get more air flow, but I never got wet and the tent didn’t collapse overnight when I just hastily pitched it in the rain. The silnylon is a bit stretchy and billows in the wind but it’s quiet (doesn’t make any slappy noises), and since I put in an extra stake for headroom, the billowing didn’t bother me at all and I slept great. I was a bit worried about it not being freestanding, but now I’m not. This is a very comfy tent for people like me who like having good ventilation. May not be as good for people seeking warmth from their shelter (but not sure any tent provides that). Due to the shape, even though this tent has almost as much floor space as many 2-person ultralight tents, most of that floor space does not have headroom, so it really is only a 1-person tent, just with tons of room to spread out your gear.
If I buy a two-person tent in the near future (so Kiwi sig other can join me on some adventures), I’m considering the Tarptent Double Rainbow just because I like the name. I aspire to reach this level of stoke in the outdoors!
- Sleeping Bag – Enlightened Equipment Revelation 850DT 20 degree quilt (20F is about -7C) (US$270; 607g)
Perhaps my greatest enjoyment in life is sleeping, and this quilt is so light and warms up so fast it’s like sleeping in a cloud. I used this as my primary comforter all winter in Nozawa, when I figured I’d practice living without heat. After the first night in Shintakazuka Hut, I woke up and put on my still damp hiking clothes from the day before. I didn’t feel particularly cold even though I could see my breath in the darkness of the hut. Later in the day chatting with other hikers who had stayed at Shintakazuka, they complained it had been cold at night and that they had to get up and put on more layers. I wore a normal cotton T-shirt and some Uniqlo Heattech Extra Warm tights as PJs. I was never cold, so I guess my quilt worked great! I’m going to get a thermometer so that in the future I actually know how cold it was to gauge whether this sleeping bag is sufficient for the Sierras in early October.
The quilt was great for a place with climate as varied as Yakushima. Camping at subtropical sea level, I could unzip it flat and just put a corner over my belly. Here’s a great video about why quilts are better than sleeping bags:
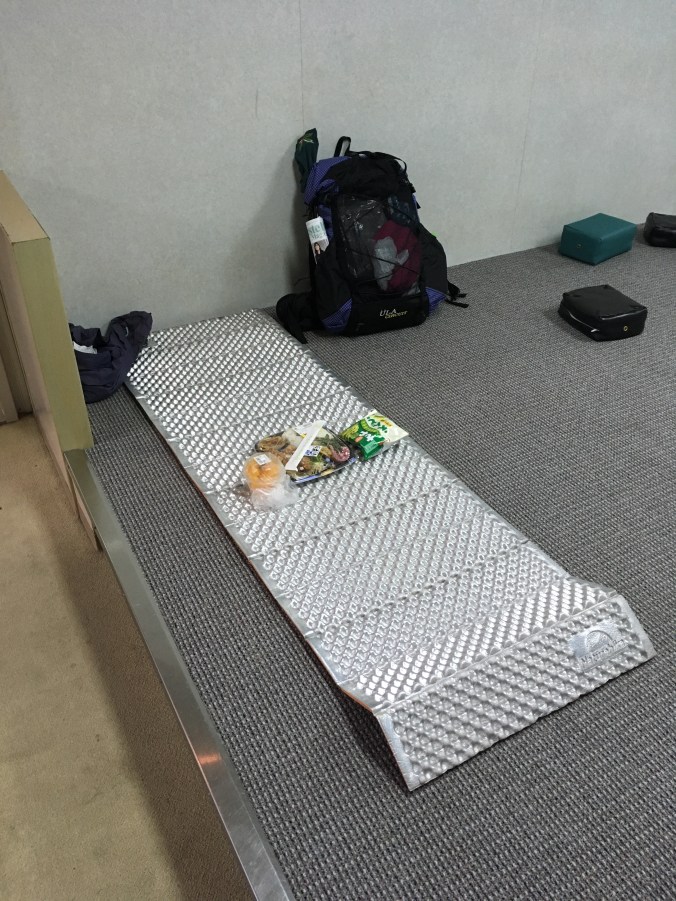
For this trip I used the quilt with a cheap imitation Thermarest Z lite foam sleeping pad I got off Amazon.
All my campsites were flat with no pokey things, and I was pretty comfy. With my superpowers of being able to sleep anywhere, I can even side sleep on a cheap foam pad. Listening to people blow up air pads and have to faff with deflating them in the morning at the huts makes me think I will just stick with a foam pad. It was also super convenient to just throw down and mark my spot on the ferry.
The only annoying thing is having a bulky thing strapped to the outside of your pack when the trail is super narrow and overgrown and you have to climb under trees or out of holes like on the Onoaida Trail, and I’m thinking of chopping it down a little so it packs better.
Footwear
I hiked in my Brooks Cascadia trail runners, partly as an experiment and partly because I was travelling to Yakushima following a yakimono tour in northern Kyushu and clomping around in hiking boots would’ve been annoying for the other part of my trip. The good thing about hiking in trail runners was that Yakushima is really wet. Because most of the island is a giant piece of granite with a thin covering of soil, wherever there is trail, there is likely water running down it. The hiking your shoes dry thing advocated by Andrew Skurka really works. When I pulled into camp early the second day, I put my shoes in a patch of afternoon sun and they were completely dry in less than an hour. On the other hand, on the third day, going down the treacherous Onoaida Trail, my ankles really suffered from lack of support.
Kitchen
I bought a super cheap tiny canister stoveand aluminum cook set
from Amazon to try out.
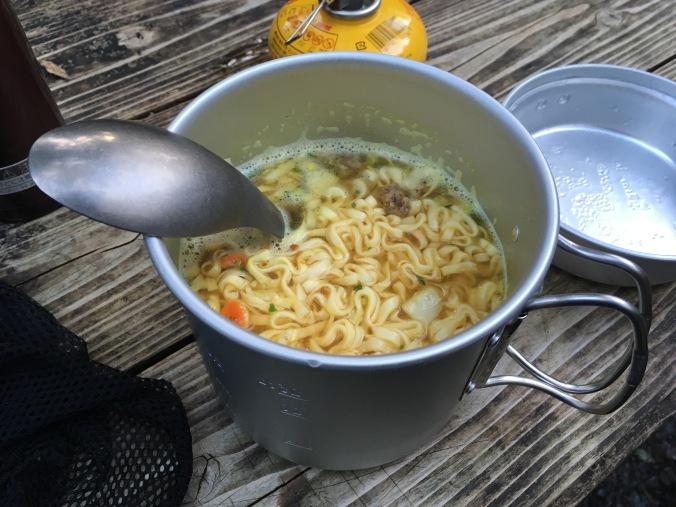
The tiny no brand Made in China stove worked great. I came up with a routine to boil 600ml of water at dinner and breakfast. I would pour 300ml into my little Thermos for a hot drink (coffee in the morning, herbal tea at night – actually one night I made umeshu oyuwari from some homemade umeshu generously offered to me by another hiker) and then use the remaining 300 ml for the hot part of my meal (instant ramen at dinner, two packs of instant miso soup for breakfast). So I’m now considering upgrading to this 700ml titanium cook pot.
Clothing
I brought way more clothing than necessary, but I used everything.
My basic hiking outfit was:
- Long-sleeve Kathmandu merino wool hiking shirt (purchased in NZ)
- Uniqlo Heattech leggings
- Synthetic capri sweatpants I bought for bouldering
- Darn Tough hiking socks (I wore through my two beloved pairs of Smartwool hiking socks over the winter so I replaced them with two pairs of Darn Tough socks to see which brand is more durable.)
- A Gap sports bra and some synthetic sport underwear from Target
For outer layers I had:
- Mountain Hardware fleece – This thing is pretty heavy, but very warm. Kiwi sig other purchased it for me secondhand from a gear exchange shop in Colorado Springs. I could’ve brought my Uniqlo ultralight down parka instead, which would have been lighter and less bulky for similar warmth, but I considered that Yakushima is really wet. I rolled this up at night and used it as a pillow, and for that use I was grateful for its bulk.
- North Face lightweight rain jacket – Debated bringing this or a real Goretex hardshell. But lightness and packability won out. I was blessed with amazing weather so didn’t end up regretting my decision.
- Uniqlo ultralight down vest – Extra puffy layer just for camp.
PJs/camp clothes:
- Extra pair Darn Tough socks
- Uniqlo Heattech Extra Warm leggings
- Tokyo Snow Club T-shirt – represent!
On the first day of hiking, going upward in elevation, I was really sweaty when I showed up at camp and couldn’t wait to get into dry camp clothes. (In the morning, putting on cold, damp hiking clothes was fine; they warmed up and dried right away when I started hiking.) The second day, hiking at high elevation, I didn’t get sweaty and probably would’ve been fine sleeping in my hiking clothes. But all in all, I think I’m going to be a hiker that carries PJs. The sleep comfort is worth it!
Other weather protection:
- Baseball cap – frontwards for sun, backwards when no sun (totally hit my head on a tree branch that was obstructed from my view by the brim)
- Merino wool Buff – I like to wear this as a light beanie; it was needed for covering ears when hiking above tree line where it was really windy
- Snowboarding glove liners – Gloves were needed above tree line. These cheap Mizuno “breath thermo” ones
really do stay warm when wet. However, they totally get destroyed by velcro on my snowboard jacket, snowboard boots, etc. Not a problem for hiking, fortunately. (I also have a breath thermo balaclava
which I really like because it is really thin and doesn’t get too wet and gross when you breath through it.)
- Sunglasses
- Tenugui – bandanna/sweat towel
Onsen kit: (That’s right! A third set of clothes! Totally not ultralight hiking! Brought this stuff in anticipation of having two chill days at the hostel.)
- Extra underwear and sports bra
- Extra short sleeve synthetic t-shirt (I actually had two extra t-shirts so that in case I ended up hiking in a short sleeve shirt I’d still have a clean shirt at the end.)
- Extra tenugui to use as towel
- 2 sets single use packets of shampoo and conditioner
- Shea body butter
Other
Water system – Sawyer Squeeze Water Filter and one of the 32oz bags that came with it. I used a 1L PET bottle as “clean” drinking water bottle but cooked with unfiltered water out of the Sawyer Squeeze bag. With this set up, I could carry 2L of water, which I never did except at camp. I carried about 500ml when I was hiking, but frankly, you don’t have to carry ANY water on Yakushima. It’s flowing out of everywhere. And no one was filtering the water either. I just filtered to practice using my filter. (Monkeys and yakushika were hanging around near the huts and I’m sure pee and poo in the water sources so…)
Trekking poles – I would have died on Onoaida Trail without trekking poles. I have PaceMaker Stix Expedition Trekking Poles. Not the lightest or most compact, but they have flip locks and cork grips and cost less than 50 bucks.
Toiletries:
- Tsubaki (camellia) oil doubles as face oil and hair product – Luxury item! (I use this face oil
made by the agriculture union on Toshima, one of the Izu islands that looks like a little cupcake floating in the sea. Why pay LVMH for a brand name when you can get it straight from the producer way cheaper. It also makes cool Tokyo omiyage since it’s technically a product of Tokyo.)
- Toothbrush and toothpaste
- chapstick, sunblock
- Potty kit – Hand sanitizer and 2 packets of pocket tissue (also had to use pocket tissue to wipe down cook pot, as you’re not allowed to wash your dishes on the trail)
- Glasses, contact case, contact solution – I want to get Lasik.
Other camp goods:
- headlamp
- eye mask and ear plugs – Used ear plugs to block out thunderstorm the first night, probably don’t need eye mask on the trail since everyone sleeps when it gets dark and wakes up before light but may need it for travelling (hostel/ferry) so will probably still carry it.
- first aid kit (advil and antihistamine, electrolyte tab, bandaids, blister patch, ankle brace)
- Swiss army knife – not used, but good idea to have right?
- journal, map and pen
- nylon eco-bag – I used this to carry stuff around camp. I want to replace it with a tiny, ultralight backpack like this one
so that I can use it to carry water and some essentials when I drop my heavy pack to go off on a side trail.
- Some extra ziplock bags and trashbags to keep things dry in case it rained
I feel like gear wise I was very prepared. The first night I pulled out my headlamp and it wouldn’t turn on, but I was prepared with spare batteries. After this hike, the only things I would add to my kit are a thermometer, a proper orienteering compass (I have a crappy one stuck on my key chain), and a small packable backpack. As a final note, on the way back to Tokyo, Jetstar let me check my pack in (on a domestic Japanese flight) with my sleeping pad and trekking poles just strapped to the outside. (I left my fuel can and lighter at the hostel along with my unused wag bags for the next hiker.)

I cut off the last 2 segments of the foam pad and use it as a butt pad for sitting on the ground. Then you can put it back under your feet when you go to sleep.
LikeLike
This suggestion has been implemented! Thanks, Ken!
LikeLike